
Ever wonder how to make cold foam for coffee that rivals your favorite coffee shop? That creamy, dreamy topping isn’t just for fancy cafes anymore. You can whip up luscious cold foam right in your kitchen, and it’s easier than you think. Ready to elevate your home coffee game?
This guide will walk you through everything you need to know about how to make cold foam for coffee, from the basic ingredients to pro tips for the perfect texture.
What Exactly Is Cold Foam?
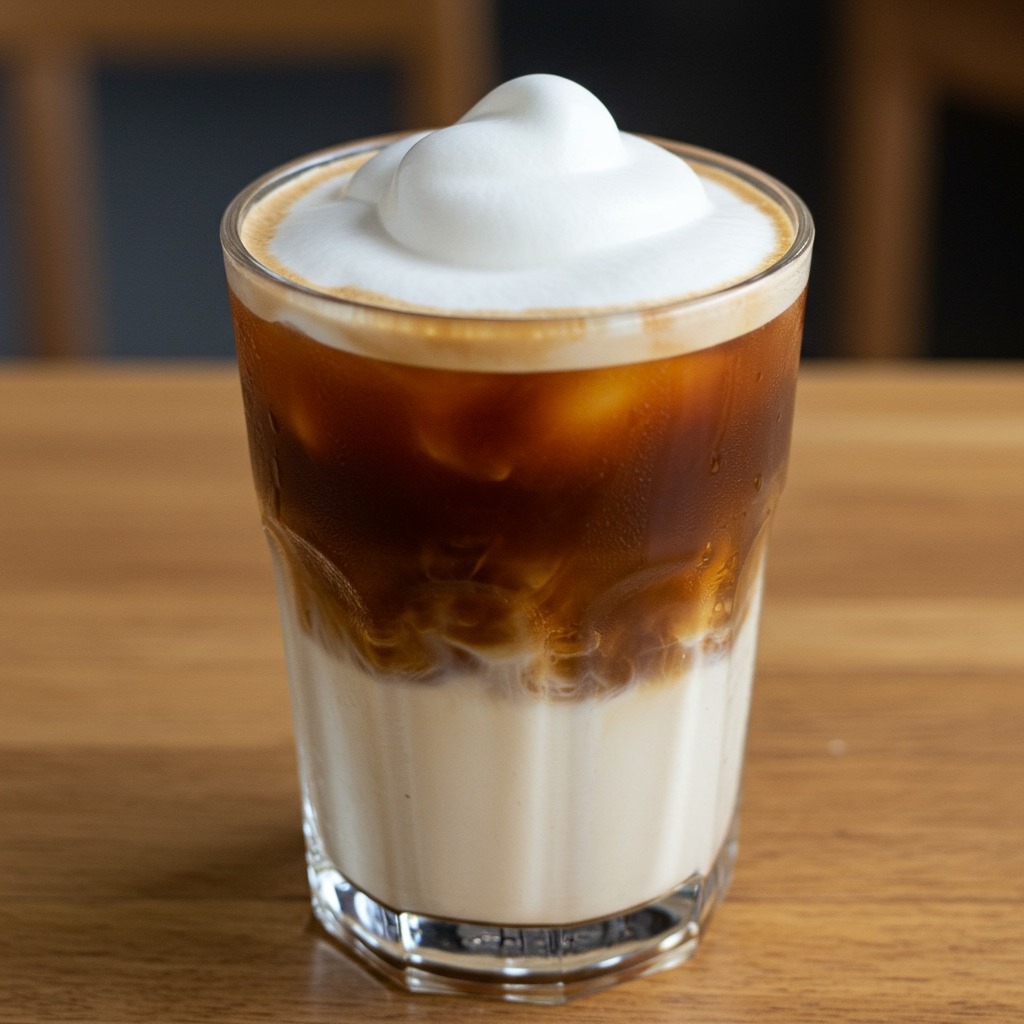
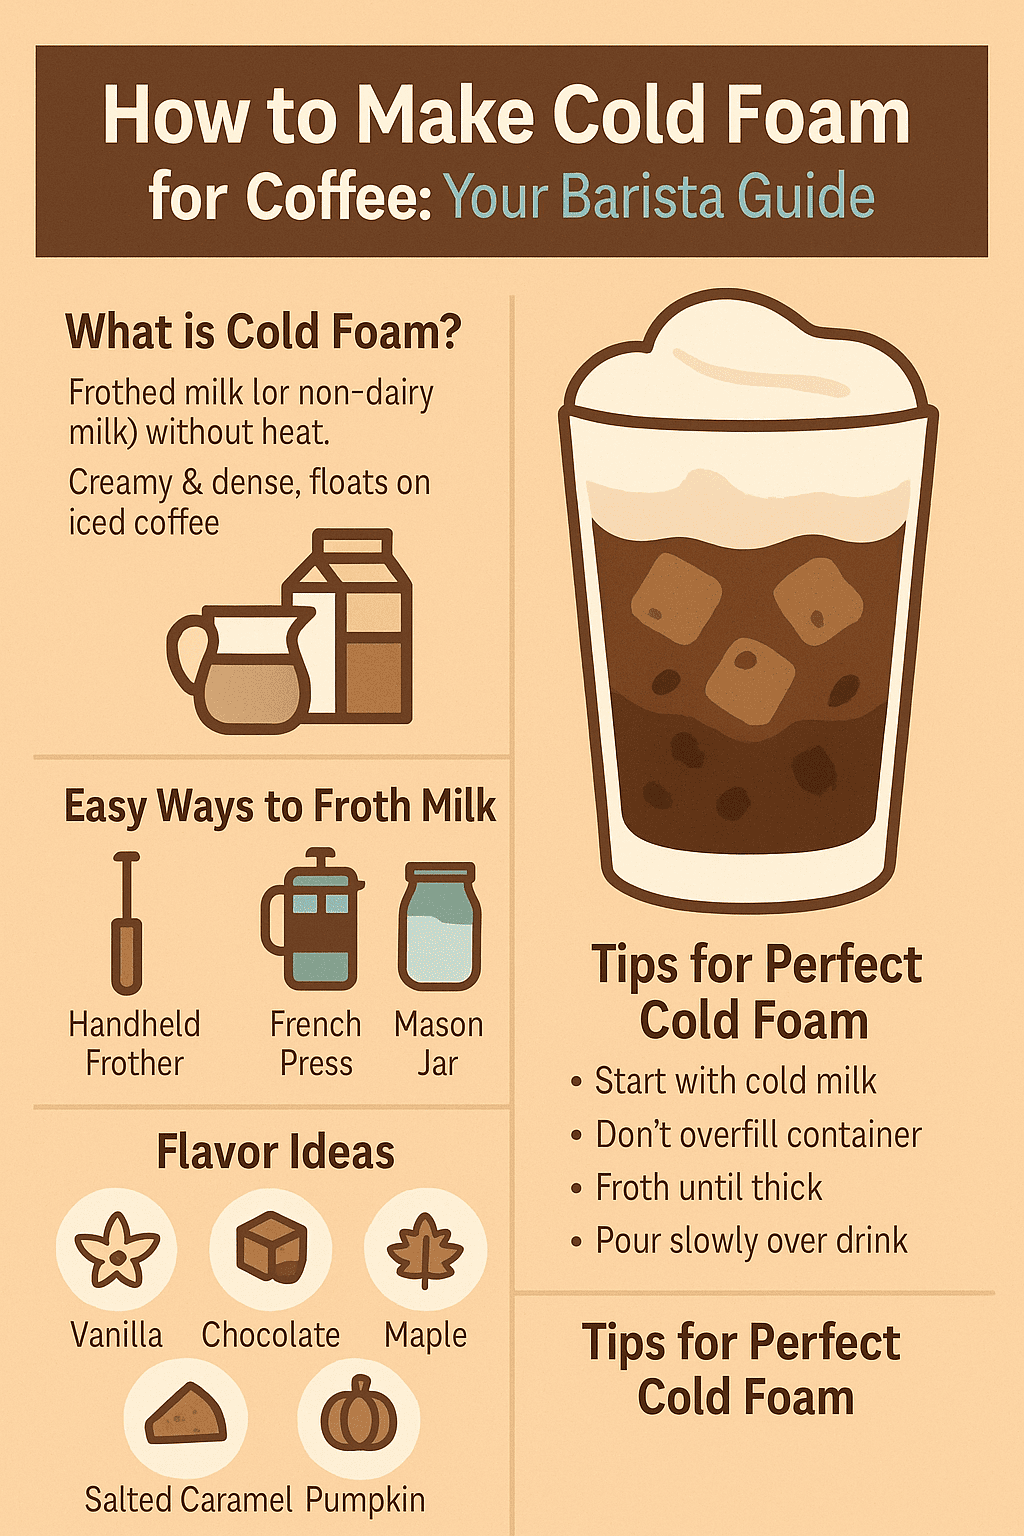
Before we dive into how to make cold foam for coffee, let’s clarify what it is. Cold foam is essentially frothed milk (or a non-dairy alternative) that’s made without heat. Unlike traditional steamed milk foam which is hot and airy, cold foam is denser, creamier, and, as the name suggests, cold. It floats beautifully on top of iced coffees, cold brews, and even lattes, slowly cascading into the drink.
It’s the secret to those picture-perfect layered coffee creations you see all over social media. And guess what? You’re about to master it.
Why You’ll Love Making Your Own Cold Foam
Learning how to make cold foam for coffee at home is a game-changer. Here’s why:
- Save Money: Your daily coffee run can add up. Making cold foam at home significantly cuts down on that expense.
- Customize It: You control the ingredients. Want it sweeter? Less sweet? Flavored? Dairy-free? You decide!
- Impress Your Friends (and Yourself!): There’s a certain satisfaction in creating a coffee-shop quality drink at home.
- It’s Quick & Easy: Seriously, you can have delicious cold foam in minutes.
Getting Started: What You’ll Need
The beauty of learning how to make cold foam for coffee is its simplicity. You probably already have most of what you need.
Key Ingredients:
- Milk: This is the star. We’ll talk about the best types of milk (dairy and non-dairy) in a moment.
- Sweetener (Optional): Simple syrup, maple syrup, honey, or even powdered sugar work well.
- Flavoring (Optional): Vanilla extract is a classic, but feel free to get creative with other extracts, syrups, or even cocoa powder.
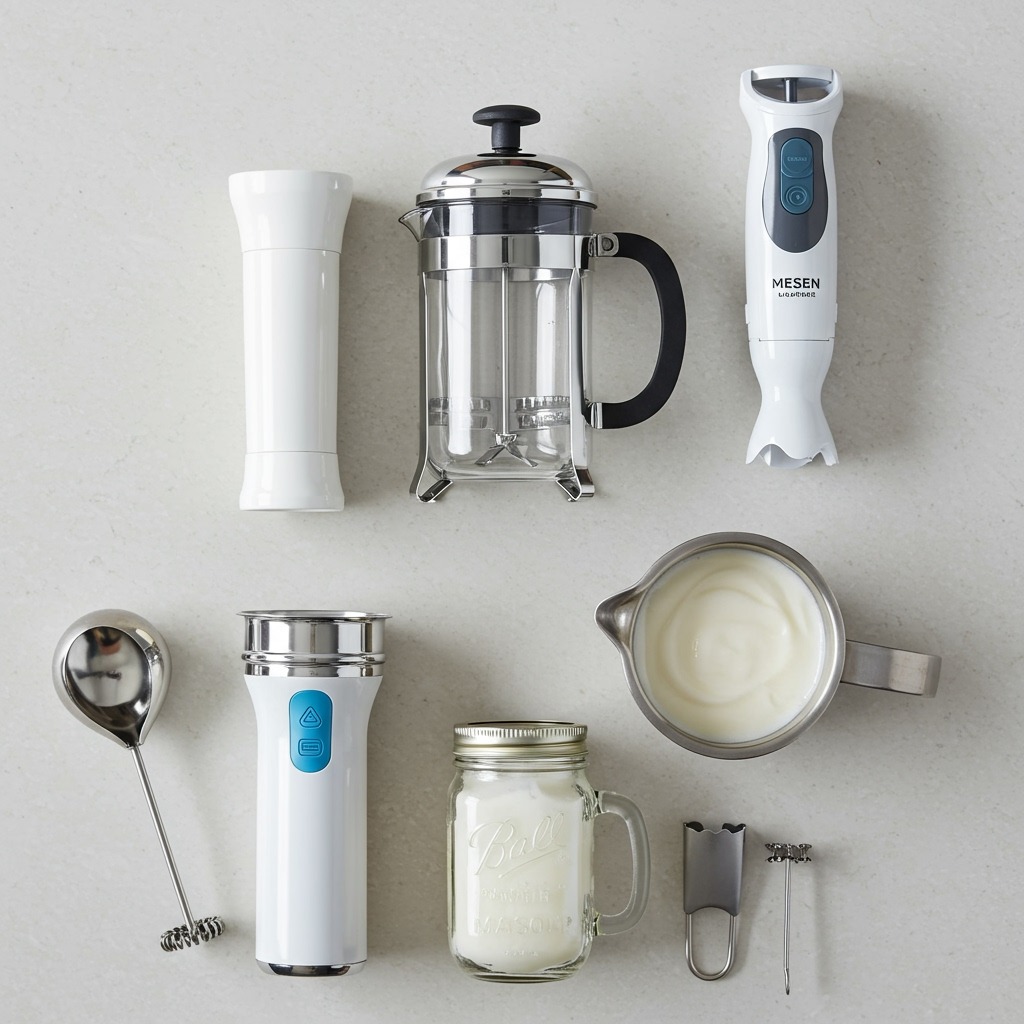
Essential Equipment (Choose One):
- Handheld Milk Frother: This is often the easiest and most affordable option.
- French Press: Yes, your coffee maker doubles as a frother!
- Immersion Blender: If you have one, it can work in a pinch.
- Blender (Regular or Personal-Sized): A powerful blender can also create great foam.
- Mason Jar with a Lid: The good old-fashioned shaking method!
Choosing Your Milk: The Foundation of Great Cold Foam
The type of milk you use will significantly impact the texture and stability of your cold foam. Here’s a breakdown:
- Dairy Milk:
- Skim Milk (Nonfat Milk): Surprisingly, this is often the best choice for the stiffest, most voluminous foam due to its higher protein-to-fat ratio. It’s the go-to for many baristas when learning how to make cold foam for coffee for a classic, light texture.
- 2% Milk (Reduced-Fat Milk): A good middle ground, offering decent foam volume and a creamier taste than skim milk.
- Whole Milk: Produces a richer, creamier foam, but it might not be as stable or voluminous as foam made with lower-fat milks. The fat content can sometimes weigh the bubbles down.
- Heavy Cream or Half-and-Half: While you can froth these, they tend to become more like whipped cream. For a true cold foam, it’s best to mix heavy cream with a lower-fat milk or use it sparingly for a super decadent treat.
- Non-Dairy Milk: Learning how to make cold foam for coffee with non-dairy options is totally doable!
- Oat Milk: Barista blends of oat milk are fantastic for frothing, creating a creamy and stable foam. Regular oat milk can also work, but the results may vary.
- Soy Milk: Another good contender, soy milk generally froths well, producing a decent foam.
- Almond Milk: Can be a bit trickier. Look for barista series almond milk, as regular versions often produce a thinner, less stable foam.
- Coconut Milk (from a carton): Similar to almond milk, it can be inconsistent. Full-fat canned coconut milk (the thick cream part) can be used for a very rich, whipped-cream-like foam, but isn’t typical for classic cold foam.
Pro Tip: Always use cold milk. The colder the milk, the better it will froth and hold its shape.
How to Make Cold Foam for Coffee: Step-by-Step Methods
Ready to get frothing? Here are several ways how to make cold foam for coffee:
Method 1: Handheld Milk Frother
This is arguably the most popular and straightforward method.
- Chill Your Milk: Pour about 1/4 to 1/3 cup of cold milk into a glass or small pitcher. If using sweetener or flavoring, add it now.
- Immerse the Frother: Submerge the whisk head of the frother just below the surface of the milk.
- Froth Away: Turn on the frother. Move it up and down gently to incorporate air. You’re looking for the milk to double or even triple in volume and create a thick, pourable foam. This usually takes about 30-60 seconds.
- Tap and Swirl (Optional): Gently tap the glass on the counter a couple of times to release any large air bubbles. Swirl the glass to create a smoother, more velvety texture.
- Pour: Spoon or gently pour your homemade cold foam over your iced coffee.

Method 2: French Press
Your French press isn’t just for brewing!
- Add Milk: Pour about 1/2 cup of cold milk (and any sweeteners/flavors) into your French press. Don’t fill it more than one-third full, as the volume will increase significantly.
- Plunge Rapidly: Secure the lid and rapidly pump the plunger up and down for about 30-60 seconds. You’ll feel resistance as the foam builds.
- Check Consistency: Lift the lid. You should have a thick, creamy foam.
- Pour: Gently pour or spoon over your drink.
Read more: How to Make French Press Coffee: The Complete Guide
Method 3: Mason Jar
No fancy gadgets? No problem!
- Combine Ingredients: Pour about 1/4 to 1/2 cup of cold milk (plus sweeteners/flavors) into a clean mason jar. Ensure the jar is no more than half full.
- Seal Tightly: Screw the lid on securely.
- Shake Vigorously: Shake the jar as hard as you can for about 45-60 seconds.
- Rest and Thicken: Let the jar sit for about 30 seconds. The foam will thicken further.
- Pour: Carefully pour or spoon the foam onto your coffee.
Method 4: Blender (Regular or Immersion)
- Regular Blender: Add your cold milk (and additions) to the blender. Start on a low speed, then increase to medium. Blend for about 30-45 seconds, or until frothy and thick.
- Immersion Blender: Place your cold milk in a tall glass or pitcher (deep enough to prevent splattering). Submerge the immersion blender just below the surface and blend, moving it up and down, for about 30-60 seconds until foamy.
Flavor Variations: Take Your Cold Foam to the Next Level
Now that you know the basics of how to make cold foam for coffee, it’s time to get creative!
- Vanilla Sweet Cream Cold Foam (Starbucks-Inspired):
- 1/4 cup heavy cream
- 2 tablespoons 2% milk (or skim)
- 1 tablespoon vanilla syrup (or 1/2 teaspoon vanilla extract + 1 teaspoon sweetener)
- Froth until thick and creamy. This is a richer, more decadent foam.
- Chocolate Cold Foam:
- 1/4 cup milk of choice
- 1-2 teaspoons cocoa powder
- 1 teaspoon sweetener (or to taste)
- Sift cocoa powder into the milk before frothing to prevent clumps.
- Salted Caramel Cold Foam:
- 1/4 cup milk of choice
- 1 tablespoon caramel sauce or syrup
- A tiny pinch of sea salt
- Froth all ingredients together.
- Maple Pecan Cold Foam:
- 1/4 cup milk of choice
- 1-2 teaspoons maple syrup
- A drop of pecan extract (optional)
- Pumpkin Spice Cold Foam (Seasonal Favorite):
- 1/4 cup milk of choice
- 1 tablespoon pumpkin puree
- 1/2 teaspoon pumpkin pie spice
- 1-2 teaspoons maple syrup or sweetener of choice
- Ensure pumpkin puree is smooth before frothing.
Tip for Flavoring: Add liquid sweeteners and extracts directly to the milk before frothing. For powders like cocoa or spices, consider making a small slurry with a tiny bit of milk first to prevent clumping, then add it to the rest of the milk.

Troubleshooting Common Cold Foam Issues
Learning how to make cold foam for coffee sometimes involves a little trial and error. Here are some common problems and how to fix them:
- Foam is Too Bubbly/Not Creamy:
- Cause: You might have incorporated too much air too quickly, or your frothing technique needs adjustment. Over-frothing can also lead to this.
- Fix: Try frothing for a shorter period or with less vigorous movement. After frothing, gently tap the container on the counter and swirl it to help smooth out the bubbles and create a more velvety microfoam.
- Foam is Too Thin/Watery:
- Cause: The milk wasn’t cold enough, you didn’t froth long enough, or the type of milk isn’t ideal for frothing (e.g., some regular almond milks).
- Fix: Ensure your milk is very cold. Try frothing for a longer duration. Consider switching to a milk known for better frothing capabilities, like skim milk or a barista-blend non-dairy milk. For a richer foam, you could try adding a tiny splash of heavy cream (though this makes it more like sweet cream).
- Foam Deflates Quickly:
- Cause: This is common with lower-protein milks or if the foam wasn’t frothed to the right consistency. Using warm milk will also cause this.
- Fix: Again, cold milk is key. Ensure you’re frothing until it’s quite thick and stable. Skim milk or barista-style non-dairy milks tend to hold their foam longer.
- My Non-Dairy Milk Isn’t Frothing:
- Cause: Not all non-dairy milks are created equal when it comes to frothing. Some lack the necessary protein or fat structure.
- Fix: Opt for “barista series” or “barista blend” non-dairy milks. These are specifically formulated for frothing. Oat milk and soy milk generally perform better than almond or rice milk for frothing. You might also want to check out specialized guides on frothing specific types of non-dairy milk, like this helpful resource on how to froth almond milk.
Pro Tips for Perfect Cold Foam Every Time
- Start with COLD Milk: We can’t stress this enough. The colder the milk, the better the foam structure.
- Don’t Overfill: Milk will expand significantly when frothed. Only fill your frothing container about one-third full.
- Sweeten to Taste: Adjust the amount of sweetener based on your preference and the sweetness of your coffee. Simple syrup (equal parts sugar and water, heated until dissolved, then cooled) dissolves best in cold liquids.
- Clean Your Frother Immediately: Milk residue can be tricky to clean once it dries. Rinse your frother or French press parts right after use.
- Experiment: The best way how to make cold foam for coffee that you love is to experiment with different milks, sweeteners, flavors, and frothing times.
- Layer Like a Pro: To get that beautiful layered look, pour your cold foam slowly over the back of a spoon onto your iced coffee.
How to Use Your Delicious Cold Foam
Now that you’re an expert on how to make cold foam for coffee, where should you put it?
- Iced Coffee: The classic pairing.
- Cold Brew Coffee: The smoothness of cold brew with creamy cold foam is a match made in heaven.
- Iced Lattes & Mochas: Add a luxurious topping.
- Iced Teas: Try vanilla cold foam on an iced chai or black tea.
- Italian Sodas: For a creamy, fizzy treat.
- Even Hot Chocolate (for a contrast!): A dollop of cold foam on warm hot chocolate is surprisingly delightful.
Learning how to make cold foam for coffee opens up a world of delicious possibilities. It’s a simple skill that can transform your everyday coffee into a special treat. So grab your milk, pick your frothing method, and get ready to enjoy cafe-quality drinks without leaving your home.
Frequently Asked Questions (FAQ) – How to Make Cold Foam for Coffee
Q1: What is the best milk for making cold foam?
A: Skim milk (nonfat milk) often produces the most voluminous and stable foam due to its high protein content. For non-dairy options, barista-blend oat milk is a popular choice for its creaminess and ability to froth well.
Q2: Can I make cold foam without a frother?
A: Yes! You can make cold foam using a French press by pumping the plunger, or by vigorously shaking cold milk in a sealed mason jar. A blender can also work.
Q3: How do I make my cold foam thicker?
A: Ensure your milk is very cold. Froth for a longer duration. Using skim milk or adding a small amount of heavy cream (for a sweet cream style) can also result in thicker foam.
Q4: Why is my cold foam disappearing quickly?
A: Your milk might not have been cold enough, you may not have frothed it sufficiently, or the type of milk used doesn’t hold foam well. Try colder milk, longer frothing, or a different type of milk like skim or a barista non-dairy version.
Q5: Can I flavor my cold foam?
A: Absolutely! Add vanilla extract, simple syrup, maple syrup, cocoa powder, or fruit purees to your milk before frothing. For powdered ingredients, mix them with a little milk first to avoid clumps.
Q6: How is cold foam different from whipped cream?
A: Cold foam is made primarily from milk (often lower fat) and is lighter and more pourable than whipped cream. Whipped cream is made from heavy cream and has a much higher fat content, resulting in a very thick, spoonable texture. While you can learn how to make cold foam for coffee to be rich, its primary base is still usually milk.
Q7: How much milk should I use to make cold foam?
A: Generally, start with about 1/4 to 1/2 cup of milk. It will double or even triple in volume when frothed, so don’t overfill your frothing container (no more than one-third full).