
Standing at the base of Angels Landing in Zion National Park, staring up at what seemed like an endless series of zigzagging trails carved into the canyon wall, I felt a mix of excitement and intimidation. My hiking partner groaned, “Why can’t they just build a straight trail up?” Little did he know that those intimidating switchbacks were actually our best friends—designed to make what would otherwise be an impossible vertical climb into a manageable (though still challenging) adventure. That day taught me to embrace switchbacks rather than curse them, understanding that these ingenious trail features represent centuries of human ingenuity in making steep terrain accessible to adventurous souls.
Whether you’re a beginner hiker encountering your first switchback trail or an experienced adventurer looking to refine your technique, understanding how to properly navigate these zigzagging paths can transform your hiking experience from a grueling ordeal into an enjoyable journey.
What Exactly Are Switchbacks?
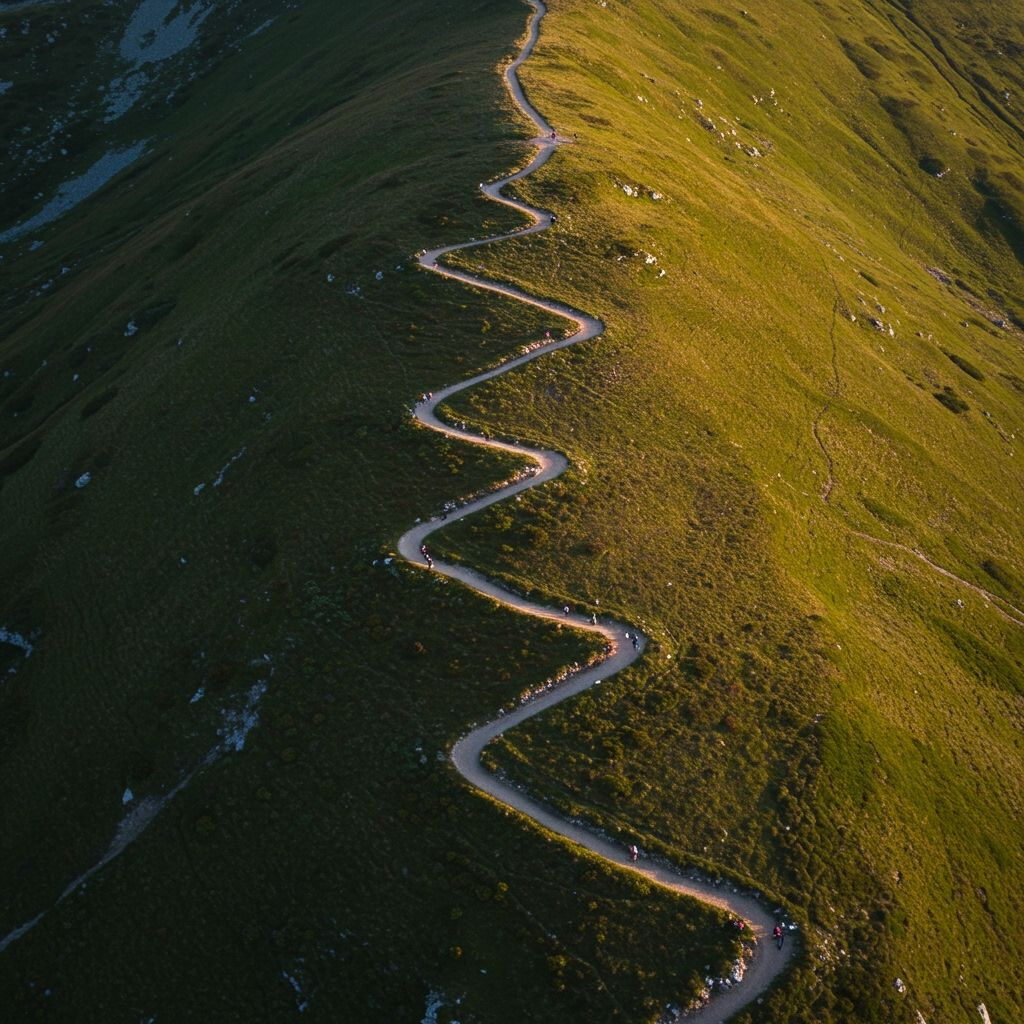
A switchback is a trail design feature that creates a zigzag pattern up steep terrain, allowing hikers to gain elevation gradually rather than attempting a direct vertical assault on a hillside or mountain face. Instead of climbing straight up a slope, switchback trails wind back and forth across the face of the incline, creating a series of hairpin turns that reduce the overall grade of the ascent.
Think of switchbacks as nature’s escalator—they get you to the same destination but break the journey into manageable segments. While you’ll cover significantly more distance on a switchback trail compared to a hypothetical straight-line route, the gentler grade makes the climb physically possible for most hikers and dramatically reduces the risk of injury.
The term “switchback” comes from the sharp reversals in direction that characterize these trails. At each turn, the trail literally switches back on itself, heading in the opposite direction while continuing to gain elevation. This zigzag pattern is immediately recognizable on topographic maps and from viewpoints that allow you to see the trail’s path up a mountainside.
The Science Behind Switchback Design
Trail designers don’t create switchbacks randomly—these features follow specific engineering principles that balance accessibility with environmental protection. Most switchback trails maintain grades between 8-15%, compared to natural slopes that might exceed 30-50% in mountainous terrain.
The optimal switchback design considers multiple factors, including soil composition, drainage patterns, expected foot traffic, and seasonal weather conditions. Engineers calculate turn radius, segment length, and grade percentages to create trails that remain stable and navigable under various conditions.
Proper switchback spacing prevents erosion by controlling water flow along the trail. Each turn includes slightly graded surfaces that direct runoff away from the trail bed rather than allowing water to channel straight down the slope. This drainage control protects both the trail infrastructure and the surrounding vegetation from damage.
The historical development of switchback techniques dates back thousands of years. Ancient civilizations, including the Incas, Romans, and various Asian cultures, developed sophisticated switchback systems for moving people and goods through mountainous terrain. Modern trail building incorporates these time-tested principles with contemporary understanding of soil mechanics and environmental protection.
Why Switchbacks Matter for Hikers and the Environment
From a hiker’s perspective, switchbacks transform potentially dangerous or impossible climbs into achievable adventures. The reduced grade means your leg muscles don’t have to work as hard against gravity, allowing you to maintain a sustainable pace over longer distances. Your cardiovascular system also benefits from the more moderate exertion level.
Joint protection represents another crucial benefit. Steep, direct routes place enormous stress on knees, ankles, and hips, particularly during descent when gravity amplifies impact forces. Switchbacks reduce these stresses significantly, making hiking accessible to people with joint issues or age-related mobility concerns.
Environmental protection drives many switchback design decisions. These trails minimize habitat disruption by following natural contours and avoiding sensitive areas like water sources or wildlife corridors. The controlled grade prevents excessive erosion that can damage entire watersheds downstream.
Switchbacks also concentrate foot traffic along designated routes rather than allowing hikers to create multiple informal paths. This concentration protects vegetation and prevents the trail from widening, which occurs when people walk around obstacles or muddy sections.
The detailed guide from Great Minds Think Hike explains how switchbacks contribute to ecosystem conservation while making outdoor recreation more sustainable.
Mastering Switchback Technique
Successfully navigating switchbacks requires different techniques than hiking on gentler terrain. The repetitive nature of switchback climbing demands efficient movement patterns that conserve energy while maintaining safety.
Pacing Strategies
The key to switchback success lies in finding your sustainable pace early and maintaining it consistently. Many hikers make the mistake of attacking the first few switchbacks aggressively, then burning out before reaching their destination. Instead, adopt a pace you can maintain for the entire climb.
The “conversation pace” test works well for switchback hiking—you should be able to carry on a conversation while climbing. If you’re too breathless to speak, slow down. This pace ensures you’re working aerobically rather than anaerobically, allowing for sustained effort over long distances.
The rest step technique becomes valuable on longer switchback climbs. This involves pausing briefly with each step, allowing your weight-bearing leg to rest for a moment before taking the next step. While it looks slow, this technique actually allows faster overall progress by preventing the fatigue that forces longer rest stops.
Efficient Movement Patterns
Maintain consistent stride length throughout switchback climbs rather than varying your steps based on terrain changes. Shorter, consistent steps require less energy than irregular, long strides that strain your muscles differently with each movement.
Use your arms for balance and momentum, but avoid over-swinging, which wastes energy. A natural arm swing helps maintain rhythm while providing balance on uneven surfaces.
Plant your feet deliberately on each step, ensuring good contact with the ground before transferring your full weight. This prevents slips that can cause injury and waste energy through recovery movements.
Turn Navigation
The hairpin turns characteristic of switchbacks require specific techniques for safe navigation. Approach turns slightly from the outside, giving yourself maximum turning radius and the best view of the trail ahead.
Slow down before entering turns rather than trying to maintain speed through them. Sharp switchback turns often feature loose rocks, roots, or other hazards that are easier to navigate at controlled speeds.
Use trekking poles effectively through turns by planting them wide for stability. Many hikers make the mistake of keeping poles too close to their bodies during turns, reducing their stabilizing effect.
Understanding proper hiking techniques enhances your overall trail performance, including switchback navigation skills.
Essential Gear for Switchback Success
While switchbacks don’t require specialized equipment, certain gear choices can dramatically improve your experience and safety on these challenging trails.
Footwear Considerations
Proper hiking boots or shoes become even more critical on switchback trails where ankle stability and traction are paramount. Look for footwear with aggressive tread patterns that provide grip on various surfaces, including loose rocks, dirt, and roots.
Ankle support becomes important on trails with numerous direction changes and uneven surfaces. High-top boots provide more support than low-cut shoes, though they may feel restrictive to some hikers. Choose based on your ankle stability needs and personal preference.
Break in new footwear thoroughly before attempting challenging switchback hikes. The repetitive stress of prolonged climbing and descending can cause hot spots and blisters with poorly fitted or new shoes.
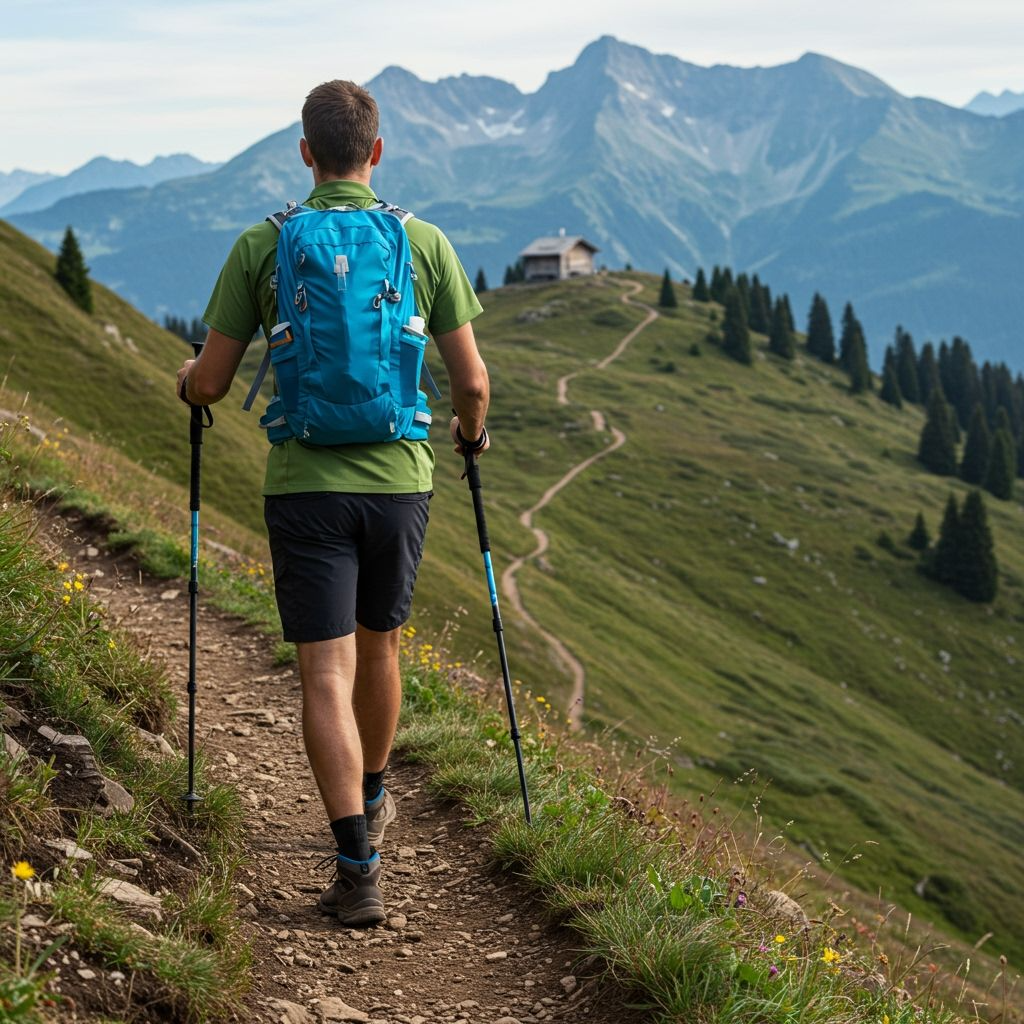
Trekking Pole Benefits
Trekking poles provide multiple benefits on switchback trails that make them worth carrying despite their weight. They reduce stress on leg muscles during ascent by allowing you to use your arms for propulsion, and they provide crucial stability during descent when gravity threatens to overwhelm your control.
Pole length adjustment becomes important on switchback trails where you’re constantly changing direction. Some hikers prefer to shorten poles slightly for steep ascents and lengthen them for descents, while others find a compromise length that works for both.
Proper pole technique involves planting poles ahead of your feet during ascent to help pull yourself up, and behind your feet during descent to provide braking force and prevent falls.
Hydration and Nutrition Strategy
Switchback climbs typically take longer than equivalent distances on gentler terrain, requiring careful attention to hydration and energy replacement. Plan to drink more water than usual, especially in hot weather when extended exertion increases fluid needs.
Electrolyte replacement becomes important on longer switchback climbs where extended sweating depletes sodium and other minerals. Sports drinks or electrolyte supplements help maintain proper muscle function and prevent cramping.
Energy-dense snacks work better than large meals during switchback climbs. Foods like nuts, dried fruit, energy bars, and trail mix provide sustained energy without causing digestive issues during physical exertion.
Switchback Etiquette and Environmental Responsibility
Proper behavior on switchback trails protects both the environment and the experience of other hikers. Understanding and following established etiquette prevents conflicts and helps preserve these valuable trail resources.
The Cardinal Rule: Never Cut Switchbacks
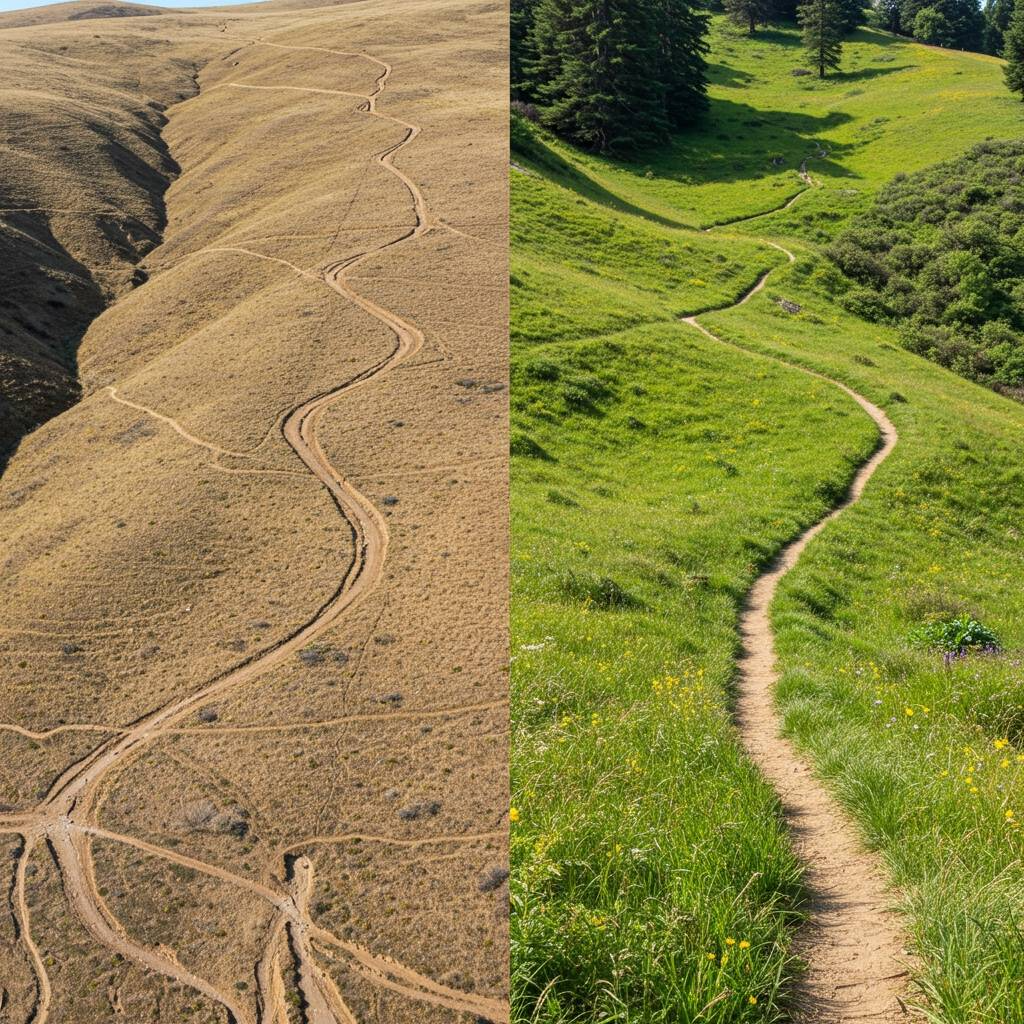
The most important rule of switchback hiking is never to cut corners by taking shortcuts between trail segments. These shortcuts, even when they seem minor, cause significant environmental damage through soil erosion and vegetation destruction.
Cutting switchbacks creates informal trails that other hikers may follow, leading to braided trail systems that multiply environmental damage. Even single instances of shortcutting can initiate erosion processes that eventually require expensive trail repair or closure.
The shortcuts aren’t actually faster in most cases. The steep grade of direct routes between switchback segments quickly exhausts most hikers, requiring longer recovery periods that offset any time savings from reduced distance.
Trail maintenance crews work hard to repair damage caused by switchback cutting, using resources that could otherwise improve trail systems. Respecting their efforts by staying on designated trails supports sustainable trail management.
Right-of-Way Protocols
Uphill hikers generally have right-of-way on switchback trails because stopping and starting again requires more energy when climbing than when descending. However, this rule should be applied with common sense and courtesy.
If you’re descending and encounter uphill hikers, step aside to let them pass unless doing so would be dangerous due to trail conditions. Most uphill hikers appreciate the courtesy and will acknowledge your consideration.
Large groups should be particularly courteous about allowing individual hikers or small groups to pass. Breaking large groups into smaller segments makes passing easier and reduces trail impact.
Trail runners and mountain bikers should announce their presence well in advance and pass only when safe for all trail users. The speed differential on switchback trails can create dangerous situations if faster users surprise slower ones.
The comprehensive Marathon Handbook guide to switchback hiking provides detailed etiquette guidelines that help maintain positive trail experiences for everyone.
Leave No Trace Principles
Follow established Leave No Trace principles with particular attention to staying on designated trails and packing out all waste. Switchback environments are often more fragile than other trail systems due to steep grades and erosion susceptibility.
Avoid creating rock cairns or other trail markers unless you’re qualified trail maintenance personnel. Well-meaning hikers sometimes create misleading markers that can lead others off the designated route.
Be especially careful with food waste and personal hygiene items. Steep switchback terrain makes it tempting to toss organic waste over the edge, but this practice attracts wildlife and creates unsanitary conditions for other hikers.
Famous Switchback Destinations
Some of the world’s most spectacular hiking destinations feature iconic switchback trails that attract adventurers from around the globe. These trails showcase the variety and beauty possible with well-designed switchback systems.
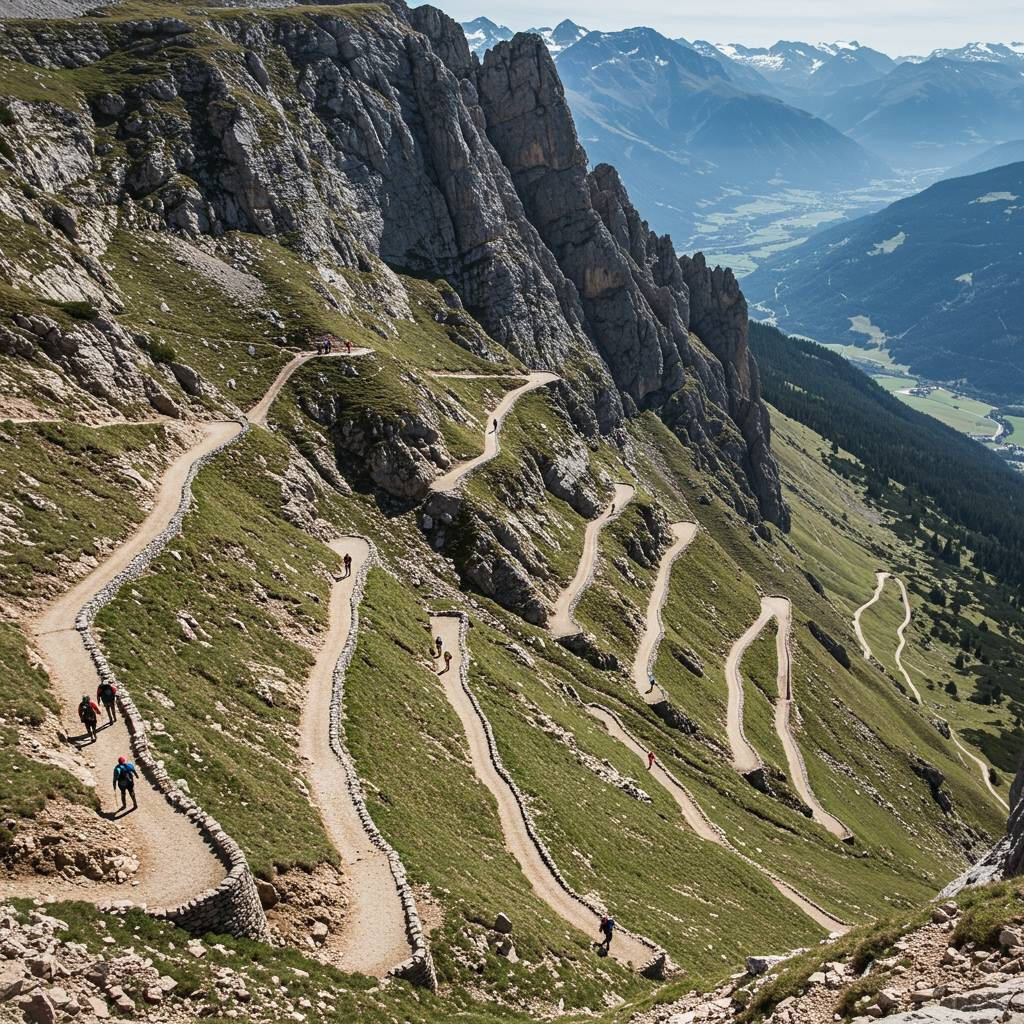
Angels Landing, Zion National Park
Angels Landing’s switchback section, known as Walter’s Wiggles, features 21 steep switchbacks that gain significant elevation in a short distance. This trail demonstrates how switchbacks can make seemingly impossible terrain accessible while providing spectacular views at each turn.
The trail’s popularity means heavy traffic that requires extra courtesy and patience from hikers. Early morning starts help avoid crowds while providing better lighting conditions for photography.
The switchback section represents only part of the Angels Landing experience, but it’s often the most physically demanding portion that tests hikers’ endurance and technique before the final scramble to the summit.
Bright Angel Trail, Grand Canyon
The Bright Angel Trail’s switchbacks descend nearly 5,000 feet into the Grand Canyon, showcasing how these trail features work for downhill hiking as well as climbing. The trail’s historic significance dates back to Native American use and early tourist development.
Mule trains share this trail with hikers, requiring additional awareness and courtesy. The stock animals have right-of-way and need extra space for safe passage, particularly on switchback turns.
Water and shade stations along the route provide rest opportunities that break the long switchback descent into manageable segments, demonstrating good trail design principles.
International Switchback Classics
The Inca Trail to Machu Picchu features ancient switchbacks that have carried travelers for centuries. These historic trails demonstrate the timeless effectiveness of switchback design for mountain travel.
European alpine regions offer numerous switchback trails that access high-altitude destinations while providing safe passage through challenging terrain. These trails often feature different construction techniques adapted to specific geological conditions.
Asian mountain trails, particularly in the Himalayas, showcase switchback construction in extreme environments where altitude and weather create additional challenges for both trail builders and users.
Training for Switchback Success
Preparing your body for switchback hiking requires specific conditioning that addresses the unique demands of prolonged climbing and the repetitive stress of directional changes.
Cardiovascular Preparation
Stair climbing provides the most specific training for switchback hiking because it mimics both the cardiovascular demands and the repetitive leg muscle contractions required for sustained climbing. Stadium stairs, building stairwells, or gym stair climbers all provide effective training opportunities.
Hill running or power hiking builds the sustained cardiovascular capacity needed for long switchback climbs. Focus on maintaining steady effort rather than speed, developing the aerobic base that supports extended climbing sessions.
Interval training can help build the anaerobic capacity needed for steep sections or high-altitude switchbacks where oxygen availability becomes limiting. Alternate high-intensity efforts with recovery periods to build both systems.
Strength and Stability Training
Leg strength becomes crucial for switchback success, particularly in the quadriceps, glutes, and calves that bear the brunt of uphill hiking loads. Squats, lunges, step-ups, and calf raises all provide valuable strength development.
Core stability training helps maintain proper posture and balance during long climbs and on uneven switchback terrain. Planks, side planks, and other core exercises build the stability needed for efficient movement.
Ankle stability exercises become important for preventing injuries on uneven switchback terrain, where rolled ankles represent a common hazard. Balance board training and single-leg exercises build ankle strength and proprioception.
Mental Preparation Strategies
Switchback hiking often becomes as much a mental challenge as a physical one, particularly on trails with numerous turns that can feel monotonous or discouraging. Developing mental strategies for maintaining motivation becomes crucial for success.
Break large climbs into smaller, manageable segments rather than focusing on the distant summit. Celebrate reaching each major switchback or rest point as a milestone achievement.
Practice mindfulness techniques that keep you present in the hiking experience rather than fixating on remaining distance or difficulty. Focus on your breathing, the rhythm of your steps, or the natural beauty surrounding the trail.
FAQ: Switchback Hiking Essentials
Why don’t trail builders just make straight trails up mountains?
Straight trails up steep terrain would be extremely dangerous, cause severe erosion, and be impossible for most hikers to navigate safely. Switchbacks make steep terrain accessible while protecting the environment.
Are switchbacks harder than regular hiking trails?
Switchbacks are typically more challenging than flat trails due to continuous elevation gain, but they’re much easier than attempting to climb steep terrain directly. The controlled grade makes difficult terrain manageable.
How should I prepare for my first switchback hike?
Build cardiovascular fitness through stair climbing and hill walking, strengthen your leg muscles with squats and lunges, and practice with shorter switchback trails before attempting longer ones.
What’s the biggest mistake beginners make on switchback trails?
Starting too fast and burning out early is the most common mistake. Find a sustainable pace early and maintain it consistently rather than attacking the trail aggressively.
Why is cutting switchbacks such a big deal?
Cutting switchbacks causes serious erosion, destroys vegetation, creates dangerous informal trails, and can lead to trail closures. It’s both environmentally destructive and often counterproductive for hikers.