
Last spring, I stood in my driveway staring at a patch of concrete where I desperately wanted a vegetable garden. The soil around my property was packed clay—the kind that laughs at shovels and makes you question your life choices. I wasn’t about to haul in tons of topsoil or build expensive raised beds. That’s when a buddy at the campground told me about his straw bale garden. “Just plop down some bales and grow right on your driveway,” he said, grinning like he’d discovered fire.
I was skeptical. Growing tomatoes and peppers in straw? On concrete? It sounded too simple. But three months later, I was harvesting zucchini the size of baseball bats and cherry tomatoes by the handful—all from straw bales sitting on my driveway. No digging. No weeding. No fighting with terrible soil.
If you’re an outdoor enthusiast who values smart solutions over complicated setups, straw bale gardening is your ticket to fresh veggies anywhere. Whether you’re dealing with rocky ground at a seasonal campsite, limited space on an apartment balcony, or soil that refuses to cooperate, this method works. Let me walk you through exactly how to make it happen.
What Is Straw Bale Gardening?
Straw bale gardening turns ordinary straw bales into instant raised beds. The bale itself becomes both the container and the growing medium. As the straw decomposes over the growing season, it transforms into nutrient-rich compost that plants absolutely thrive in.
Here’s the genius part: you don’t need soil. The bale works like a massive, self-contained sponge that holds moisture perfectly while staying well-aerated. Think of it as composting and growing simultaneously. By the time fall arrives, your “used” bales become excellent mulch or compost for next year’s garden.
This technique works anywhere you can place a bale—driveways, patios, gravel lots, rocky ground, even rooftops. If you’ve got sun and can access water, you’ve got a garden site. The method was popularized by gardeners looking for accessible, no-till solutions, and it’s become a favorite among people with physical limitations, poor soil, or zero traditional garden space.

Why Straw Bale Gardening Works for Outdoor Enthusiasts
Outdoor folks appreciate gear and methods that just work without endless fuss. Straw bale gardening delivers on multiple fronts:
No soil preparation: Skip digging, tilling, and soil amendments entirely. Perfect for renters or anyone with temporary garden space.
Accessibility: Bales sit 18-24 inches high, reducing bending and kneeling. Great for anyone with back issues or mobility concerns. You work at a comfortable height without straining your body.
Instant setup: Position your bales, condition them for two weeks, and plant. No construction or heavy lifting required beyond moving the bales into position.
Portability: Need to relocate? Bales can move before conditioning starts. Once planted, they stay put for the season, but next year you can set up anywhere.
Zero weeds: Fresh straw contains virtually no weed seeds. You’ll spend your time harvesting, not weeding. This alone saves hours compared to traditional gardening.
Works anywhere: Concrete, gravel, sand, clay, rocky ground—surface doesn’t matter as long as water can drain away from the base of the bales.
Extended season: Decomposing straw generates heat, warming plant roots and allowing earlier spring planting in cool climates. The internal temperature can stay 10-15 degrees warmer than surrounding air.
Water efficiency: Once established, the decomposing straw holds moisture remarkably well. You’ll water frequently, but the bales retain more than traditional containers.
If you love the simplicity of cowboy coffee over complicated brewing setups, you’ll appreciate how straightforward straw bale gardening feels. It’s direct, practical, and gets results without overthinking the process.
Getting Started: What You’ll Need
Gather these supplies before you begin:
Straw bales (NOT hay): Each bale holds 2-4 plants depending on size. Look for clean, tightly bound bales from farm supply stores, garden centers, or directly from farms. Expect to pay $5-12 per bale depending on your region.
Nitrogen source: Blood meal, bone meal, or balanced organic fertilizer for conditioning. You’ll need about 3 cups per bale total over the conditioning period.
Garden hose or watering can: You’ll water daily during conditioning and throughout the growing season.
Potting soil: Small amount (2-3 inches) for seeding small crops like lettuce, carrots, and herbs.
Seeds or seedlings: Choose your favorite vegetables. Transplants give you a head start; seeds work great for beans, peas, and root crops.
Basic hand tools: Trowel from a garden tool set and pruners for maintenance and harvest.
Optional supports: Stakes, tomato cages, or cattle panels for vining crops like cucumbers, beans, and indeterminate tomatoes.
A soil pH/moisture meter helps monitor conditioning progress and watering needs throughout the season. It takes the guesswork out and tells you exactly when bales need water.
Important distinction: Use straw bales, not hay bales. Straw is the hollow stems left after grain harvest—it’s clean, seed-free, and decomposes perfectly. Hay contains seeds, leaves, and grasses that sprout everywhere and create a weedy mess. If your supplier doesn’t know the difference, find another source. This single mistake ruins countless first attempts at straw bale gardening.
Step-by-Step Straw Bale Garden Setup
Follow this proven process for success:
Choose Your Location
Pick a spot with 6-8 hours of direct sun daily. Most vegetables are sun-lovers and won’t produce well in shade. Lay bales with cut ends facing up—this is where you’ll plant. The strings should run horizontally around the bale. Leave them on; they hold everything together as the straw decomposes throughout the season.
Arrange bales in rows, clusters, or however suits your space. Create pathways between rows for easy access. Unlike traditional gardens, you can place them directly on driveways, patios, or gravel without any ground prep. Just make sure water can drain away from the area so bales don’t sit in puddles.
For a small setup, 3-6 bales provide plenty of growing space for a household. For ambitious gardeners, 10-20 bales create a serious production garden. Start small your first year to learn the method, then expand based on your experience.
Condition the Bales (Days 1-18)
This crucial step jump-starts decomposition and creates the environment plants need. The process takes 10-18 days, so start conditioning about three weeks before your area’s last frost date. Conditioning is non-negotiable—skip it and your plants will struggle.
Days 1-3: Soak bales thoroughly with water. Keep them damp—really soak them until water runs through the bottom. You’re initiating bacterial activity inside the bale. Water morning and evening if weather is hot and dry.
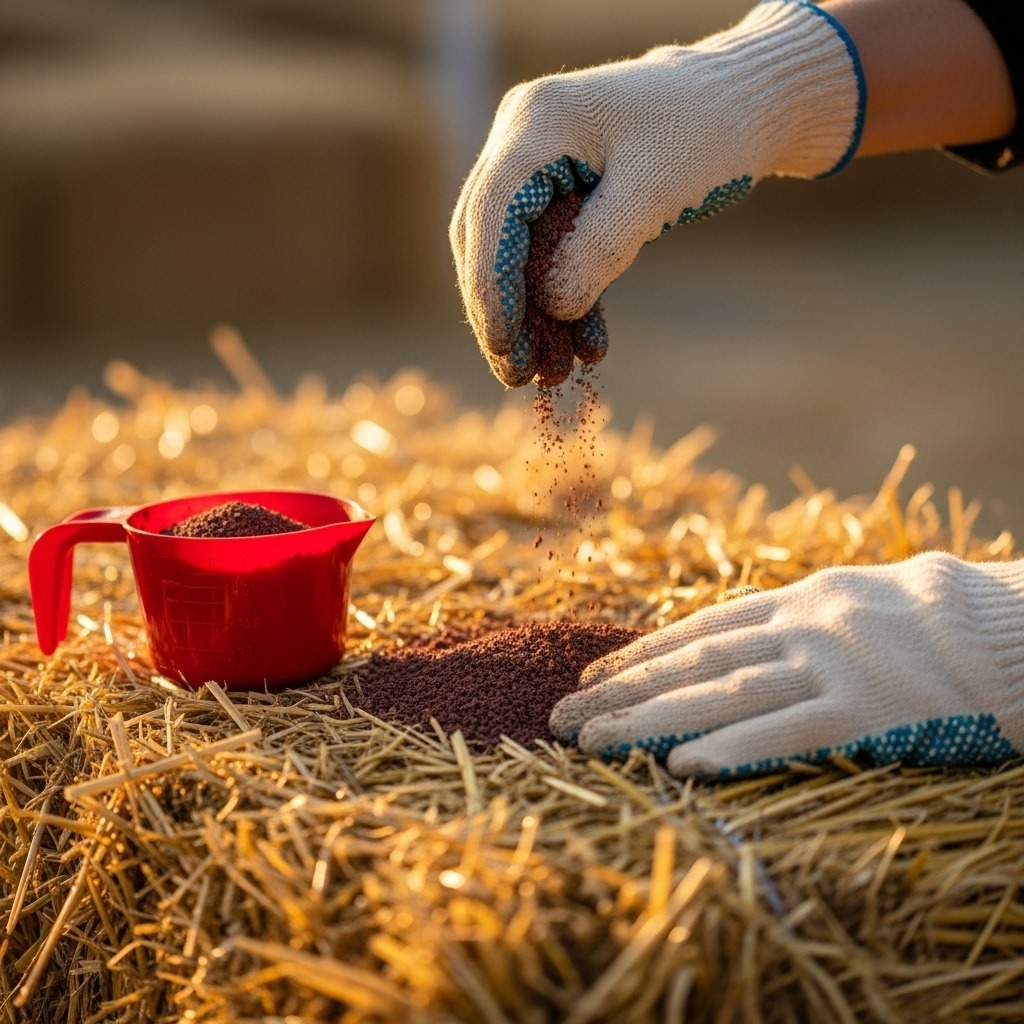
Days 4-6: Sprinkle ½ cup of blood meal (or high-nitrogen organic fertilizer) on top of each bale. Poke it into holes on the surface using a stick or your finger, working it 2-3 inches deep. Water it in completely until the fertilizer dissolves and moves into the bale. The bale should feel warm to the touch as bacteria begin working. Some bales reach 120-140°F internally during this phase.
Days 7-9: Reduce to ¼ cup of fertilizer per bale daily. Continue watering thoroughly each time you add fertilizer. The decomposition process accelerates. You might notice a mushroomy, earthy smell—this is normal and signals active composting.
Day 10: Stop adding fertilizer but continue watering daily. The bale temperature will drop over the next few days as the initial nitrogen surge is consumed.
Days 11-18: Monitor internal temperature by pushing your hand into the center of the bale. Once it drops below 80-85°F and feels warm but not hot, your bales are ready for planting. Add one final application of balanced fertilizer (like a 10-10-10 blend) or spread a thin layer of compost on top.
Conditioning requires patience, but it’s the foundation of your success. The decomposition process creates nitrogen-rich compost inside the bale while maintaining perfect moisture and aeration. Properly conditioned bales smell earthy and feel spongy when squeezed.
Planting Your Straw Bale Garden
Once conditioned, bales are ready for seeds or transplants. Here’s how to plant for maximum success:
Transplanting Seedlings
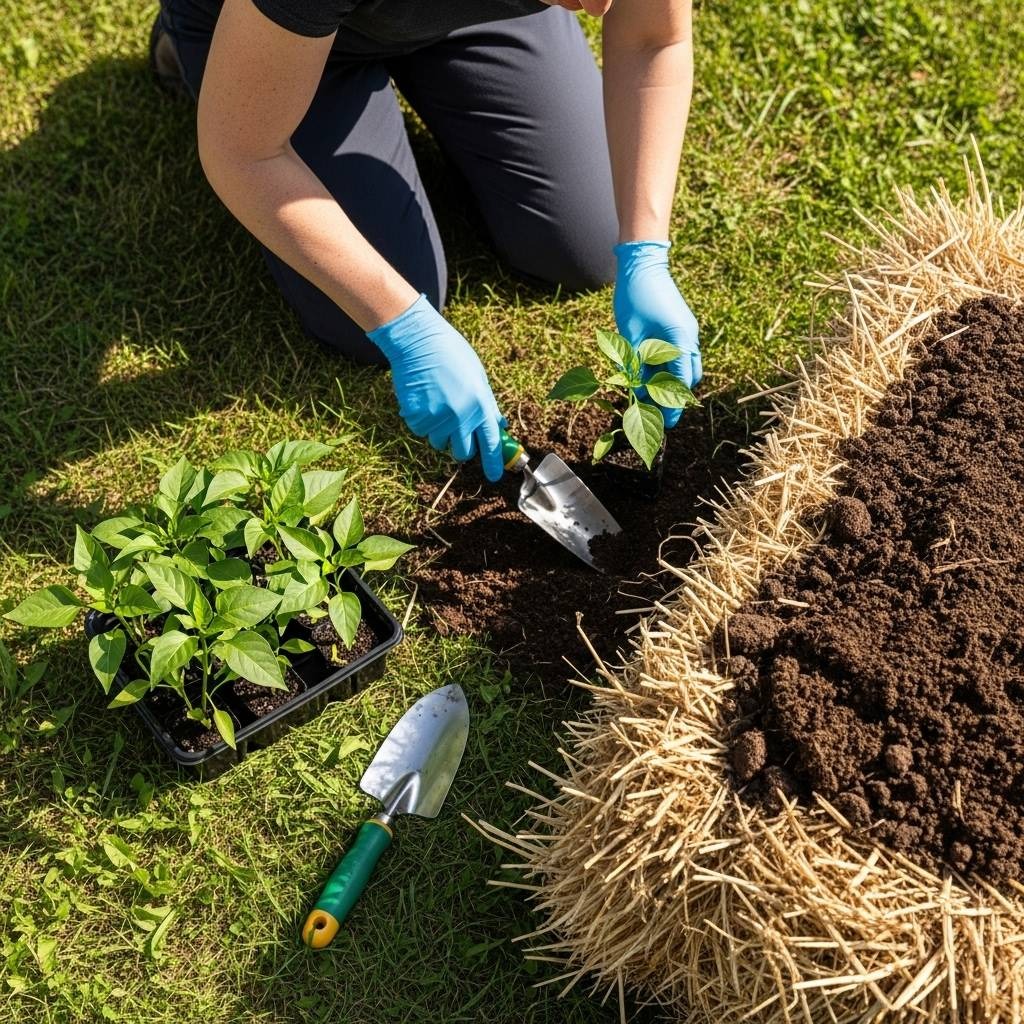
Use a trowel to create an opening in the bale about 6 inches deep and wide enough for the root ball. The straw will part easily in conditioned bales. Insert your seedling directly into the straw, then close the straw around it by pushing stems back together. Cover any exposed roots with a bit of potting soil to keep them moist while they establish.
Plant spacing based on mature size:
- Large plants (tomatoes, peppers, eggplant, cabbage): 2 per bale
- Medium plants (cucumbers, squash, broccoli, cauliflower): 3-4 per bale
- Small plants (lettuce, herbs, greens, radishes): 6-8 per bale
Avoid the temptation to overcrowd. Plants need space for air circulation and root development. Cramming too many into one bale reduces yields and increases disease pressure.
Direct Seeding
Large seeds (beans, peas, squash, pumpkins): Push seeds directly into the bale to your second knuckle depth. No soil needed. The decomposing straw provides everything they need.
Small seeds (carrots, radishes, lettuce, spinach, herbs): Spread 1-2 inches of potting soil across the bale’s top surface. Sow seeds into this layer and lightly cover with more soil. Water gently with a watering spray mister to avoid washing seeds away. The soil layer gives tiny seeds good contact and prevents them from drying out.
Use checkerboard planting patterns instead of rows to maximize your growing space on each bale. This also improves air circulation between plants.
Best Plants for Straw Bale Gardens
Most vegetables thrive in straw bales. These are top performers based on years of gardener experience:
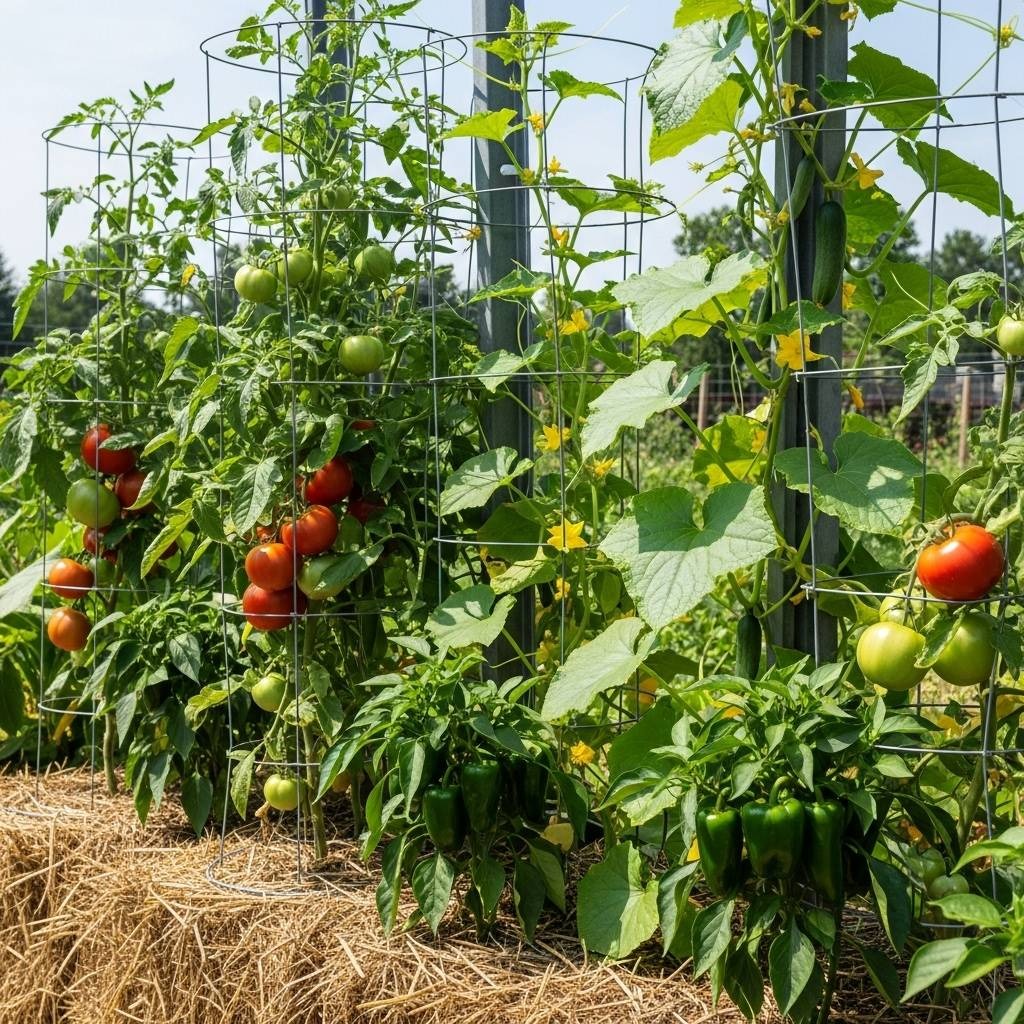
Tomatoes: The #1 straw bale crop. Use cages or stakes for support. Determinate varieties work great and stay manageable; indeterminate types produce heavily but need sturdy support. Cherry tomatoes are especially prolific.
Peppers: Sweet bells, jalapeños, and hot peppers love the warm root zone created by decomposing straw. They’re low-maintenance and produce abundantly with minimal care.
Cucumbers: Grow vertically on a trellis or cattle panel for huge yields. Bush varieties sprawl off the bale sides. One plant per bale produces dozens of cucumbers over the season.
Squash and Zucchini: Let them sprawl off the sides or train them upward on supports. These are heavy feeders that appreciate the nutrient-rich environment. One plant can supply a family all summer.
Beans and Peas: Bush varieties need no support and produce quickly; pole types climb beautifully and yield over a longer period. Both fix nitrogen in the bale, improving it for the next crop.
Lettuce and Greens: Perfect for interplanting under taller crops or on north-facing bale sides where they get partial shade. Succession plant every 2 weeks for continuous harvest.
Herbs: Basil, cilantro, parsley, oregano, and thyme flourish in bales. Plant multiple types in one bale for an instant herb garden. Fresh herbs transform camping breakfast ideas into gourmet meals.
Root Crops: Carrots, radishes, and beets develop perfectly in loose, aerated straw with a soil topping. They grow straighter than in heavy garden soil.
Potatoes: Plant seed potatoes in the bale and add more straw on top as plants grow—easy earthing up. At harvest, simply pull the bale apart and collect your potatoes. No digging required.
Avoid: Corn (too tall and heavy for bales to support), perennial crops (bales last only one season), and deep-rooted plants like asparagus.
For vertical gardening, drive T-posts or metal stakes behind bales and attach cattle panels or wire fencing. Train cucumbers, beans, peas, and small melons up the supports. This method transforms a few bales into a productive vertical garden that saves space and makes harvesting easier. You can pick cucumbers at eye level instead of crawling on the ground.
Watering and Feeding Your Bales
Straw bales drain quickly and need consistent moisture, especially once plants mature and develop extensive root systems:
Water daily (sometimes twice in hot weather): Check moisture by pushing your hand 2-3 inches into the bale. If it feels dry, soak thoroughly until water runs through the bottom. In peak summer with mature plants, you may need 1-2 gallons per bale daily.
Mulch the top: Add straw, leaves, or grass clippings to reduce evaporation and moderate temperature. A 2-inch layer cuts water needs significantly.
Fertilize every 2-3 weeks: Bales decompose quickly, consuming nutrients. Apply liquid fish emulsion, compost tea, or granular organic fertilizer to keep plants productive throughout the season. Heavy feeders like tomatoes benefit from weekly light feeding.
Morning watering: Water early in the day so foliage dries before evening. This reduces fungal disease pressure.
Consider drip irrigation or soaker hoses laid across the tops of bales if you’re managing multiple bales or traveling frequently. This keeps moisture consistent even when you’re away for camping trips or extended outdoor adventures. A simple timer automates the process completely.
Common Mistakes to Avoid
Watch for these pitfalls that trip up first-time straw bale gardeners:
Using hay instead of straw: Hay sprouts weeds endlessly and creates constant frustration. Always verify you’re buying straw, not hay. If the seller can’t confirm, walk away.
Skipping conditioning: Planting in unconditioned bales means plants sit in sterile, carbon-rich straw with no nutrients. They’ll starve and stunt. Never skip conditioning.
Insufficient watering: Bales dry out fast, especially in hot, windy conditions. Daily checks are essential. Wilted plants in bales often can’t recover as easily as in-ground plants.
Removing the strings: Those bindings hold decomposing bales together for the entire season. Cut them and your bale falls apart mid-season, stressing or killing plants.
Overcrowding plants: Give each plant adequate space. Cramming too many into one bale reduces yields, blocks airflow, and invites disease.
Ignoring support for tall plants: Tomatoes and cucumbers need staking or caging just like in traditional gardens. The loose straw doesn’t anchor plants against wind and heavy fruit.
Planting too early: Wait until bale temperatures drop below 85°F. Hot bales literally cook plant roots. Patience during conditioning prevents heartbreak at planting time.
Using herbicide-treated straw: Some straw comes from fields sprayed with persistent herbicides that remain active for months. These damage or kill vegetables. Source organic straw or ask farmers about their spray programs.
Learning from these mistakes saves you a season of disappointing results. Take conditioning seriously, water consistently, and you’ll harvest abundantly. Many gardeners become lifelong straw bale converts after one successful season.
Advanced Tips and Tricks
Once you’ve mastered the basics, try these techniques:
Wicking system: Place a perforated drainpipe through the center of bales before conditioning. Fill with gravel or sand. Water the pipe and moisture wicks outward, reducing watering frequency.
Stacking for space: In tight spaces, stack conditioned bales 2-3 high with offset joints like bricks. This creates a wall garden with massive vertical growing space.
Companion planting: Mix flowers like marigolds and nasturtiums into bales with vegetables. They attract pollinators and repel pests naturally.
Heat-loving crops: Use early-season heat from conditioning to start heat-lovers like melons, okra, and eggplant earlier than normal garden timing allows.
Fall extension: As bales cool and decompose in fall, they still support cool-season crops like lettuce, spinach, kale, and radishes. Get a second crop from the same bales.
Succession planting: Replace finished plants with new ones. Pull spent lettuce and immediately plant basil. Harvest early peas and plant late-season broccoli in the same spot.
End-of-Season: What Happens to Used Bales?
By late fall, your bales will be partially decomposed, loose, and rich with organic matter. The strings might be the only thing holding them together. Here’s how to use them:
Mulch: Spread decomposed straw around trees, shrubs, and perennial beds. It suppresses weeds and enriches soil as it continues breaking down.
Compost: Add to compost piles or bins for finished compost by spring. Mix with green materials for faster decomposition.
Soil amendment: Work directly into garden beds to improve structure, drainage, and fertility. It lightens heavy clay and adds organic matter to sandy soil.
Pathway material: Lay chunks between garden rows to suppress weeds and create clean walking surfaces.
Animal bedding: Chickens, rabbits, and goats appreciate used straw for bedding. It’s already partially composted.
Erosion control: Spread on bare slopes to prevent erosion while new plantings establish.
Nothing goes to waste. Your one-season bales continue feeding your soil and plants for years. This cycle mirrors outdoor ethics—leave no trace, use resources fully, respect the land. The sustainable loop appeals to environmentally conscious outdoor enthusiasts.
Cost Analysis: Is Straw Bale Gardening Worth It?
Let’s break down the numbers for a typical 6-bale setup:
Initial costs:
- 6 straw bales: $30-72
- Conditioning fertilizer: $15-25
- Seeds/seedlings: $20-40
- Potting soil (small amount): $10
- Total: $75-147
Harvest value (conservative estimate):
- 12 tomato plants: $120 worth of tomatoes
- 12 pepper plants: $80 worth of peppers
- Herbs, cucumbers, beans, lettuce: $60+
- Total value: $260+
The return on investment happens in a single season. Year two costs less since you only replace bales and seeds. Compare this to raised bed construction ($200-500) that requires maintenance and soil refreshment. Straw bales are genuinely economical for productive gardens.
Connecting Straw Bales to Your Outdoor Lifestyle
The beauty of straw bale gardening extends beyond growing food. It connects outdoor living with self-sufficiency:
- Pack fresh basil and tomatoes for camping meals
- Grow vegetables at seasonal campsites or cabins
- Create portable gardens for RV living
- Harvest fresh salad ingredients for hiking snacks
- Teach kids about growing food during camping activities
For outdoor enthusiasts, bale gardens bridge the gap between backyard and backcountry. You develop plant knowledge, patience, and problem-solving skills that apply broadly. Plus, food grown in your own straw bale just tastes better around a campfire.
Frequently Asked Questions About Straw Bale Gardening
What’s the difference between straw and hay?
Straw is hollow grain stalks left after harvest—clean, low in seeds, and perfect for gardening. It’s usually wheat, barley, or oat straw. Hay is dried grasses and legumes cut for animal feed—full of seeds that sprout everywhere. Hay is green and leafy; straw is golden and hollow. Always use straw bales, never hay.
How long do straw bales last?
Bales last one growing season. By fall, they’ve decomposed into loose compost. This is normal and expected—you’ll start fresh with new bales next spring. Some gardeners get 18 months in mild climates, but plan for annual replacement.
Can I grow organic vegetables in straw bales?
Yes! Use organic nitrogen sources like blood meal, bone meal, or fish meal during conditioning. Feed with certified organic fertilizers throughout the season. Ensure your straw bales haven’t been treated with herbicides—ask your supplier for organic straw or straw from farms with minimal chemical use.
How much do straw bales cost?
Prices vary by region and season, but expect $5-12 per bale from farm supply stores. Buy in late summer or fall when harvest is fresh for best selection and pricing. Spring prices often run higher due to demand.
Do I need to replace bales every year?
Yes. Straw bales decompose fully during the growing season, which is what makes them work so well. Budget for new bales each spring, then use spent bales as valuable mulch and compost. The decomposed material is gold for garden beds.
What if my bales don’t heat up during conditioning?
Add more nitrogen (blood meal or fertilizer) and water thoroughly. Cold weather slows bacterial activity—be patient. If outdoor temperatures stay below 50°F, conditioning takes longer but still works. Some gardeners start conditioning indoors or in a greenhouse to jump-start the process.
Can I use straw bales for multiple years?
Not for growing plants. After one season, bales are too decomposed to hold together or support plants. However, you can reuse partially composted bales as mulch, then use fully composted material as soil amendment the following year.
Do bales attract pests or rodents?
Fresh straw rarely attracts pests. As bales decompose and you add vegetables, standard garden pests may appear—aphids, caterpillars, etc. Treat them as you would in any garden. Rodents occasionally nest in unused bales during winter, but active growing bales with regular watering don’t appeal to them.