
Is your current fishing knot letting you down? Are you tired of losing that prize catch because your knot slipped, or worse, snapped under pressure? Every angler knows the frustration of a weak knot. It can turn a perfect cast into a missed opportunity. But what if there was a knot that combined remarkable strength with surprising simplicity? Enter the Orvis Knot.
This isn’t just another knot; it’s a game-changer. The Orvis Knot is celebrated by seasoned anglers, especially in the fly fishing community, for its reliability and clean profile. It’s a knot that, once learned, becomes a trusted ally on the water, ensuring your line holds strong when it matters most. It’s about confidence in every cast, knowing your connection is secure.
You’re about to discover why the Orvis Knot is a favorite among experienced anglers and how you can master it in just a few simple steps. I’ll walk you through tying it, explain why it’s so effective, and help you sidestep the common mistakes that can weaken any knot. Get ready to upgrade your knot-tying game and fish with unwavering confidence.
Why the Orvis Knot Stands Out
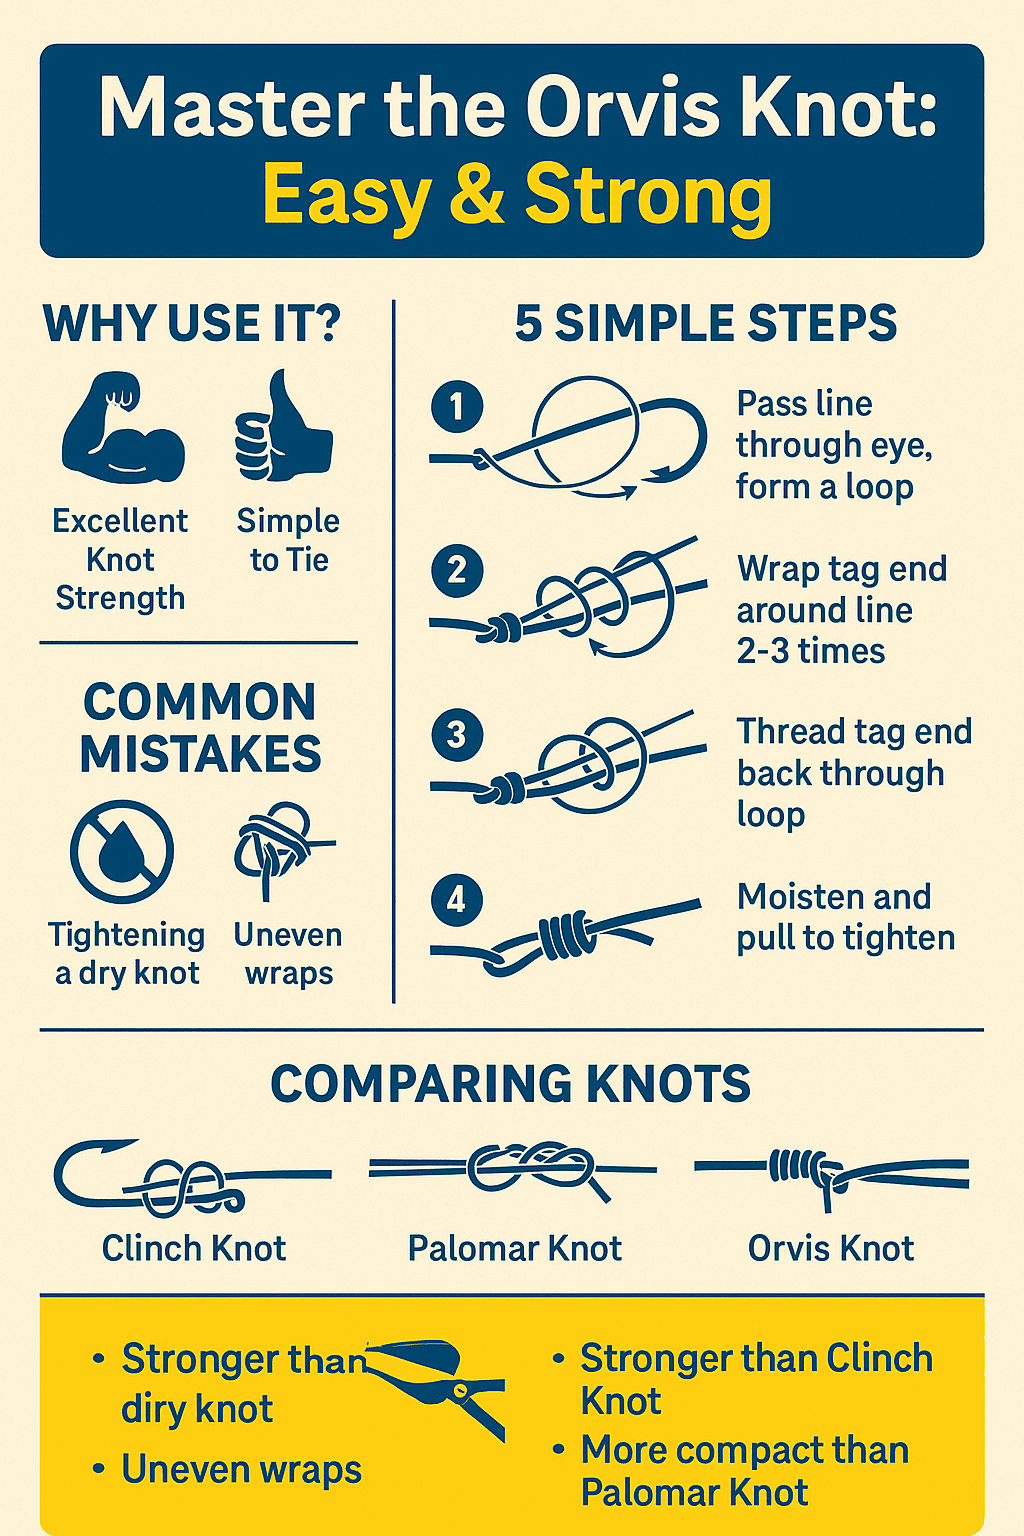
What makes the Orvis Knot special? It boils down to two key advantages: its impressive strength and its elegant simplicity. These aren’t just marketing claims; they’re backed by real-world performance.
Strength: Your Line’s Best Friend
The Orvis Knot is often hailed as one of the strongest knots you can use for attaching your line to a hook, swivel, or fly. Why is this so crucial? Because the knot is typically the weakest point in your entire fishing setup. A strong knot means less chance of break-offs, especially when you’re battling a powerful fish.
- High Breaking Strength in Tests: Independent tests frequently show the Orvis Knot retaining a significant percentage of the line’s original breaking strength. This means it minimizes the reduction in line integrity that often occurs when you tie a knot. It’s designed to grip the line securely without causing undue stress points. For anyone looking to understand overall strongest fishing knot options, the Orvis Knot consistently ranks high.
- Minimal Line Damage: Unlike some knots that can pinch or crimp the line, creating weak spots, the Orvis Knot creates a smooth, even tension. This gentle hold on the line helps preserve its full strength, making it more reliable under pressure. You don’t want a knot that weakens your line before you even start fishing.
Simplicity: Easy to Learn, Quick to Tie
Strength is important, but a knot that’s impossible to tie effectively isn’t practical on the water. This is where the Orvis Knot truly shines. It has fewer intricate steps than many other knots offering comparable strength.
- Easy to Learn and Remember: Once you tie it a few times, the process becomes intuitive. Its logical sequence of wraps and passes makes it less prone to errors than more complex knots. You won’t be fumbling with instructions when the fish are biting.
- Quick to Tie, Even with Cold Hands or in Low Light: Imagine trying to tie a complicated knot on a chilly morning, or as dusk sets in. The Orvis Knot’s straightforward design means you can tie it efficiently even when conditions aren’t ideal. This speed is invaluable when you need to re-tie quickly to get back to the action.
Versatility: Beyond Just Fly Fishing
While the Orvis Knot gained prominence in the fly fishing world, its benefits extend far beyond attaching delicate flies. It’s a highly versatile knot that can serve you well in various fishing scenarios.
- Attaching Flies, Lures, Hooks: Whether you’re connecting a tiny dry fly, a heavy jig, or a bait hook, the Orvis Knot provides a secure connection. Its streamlined profile also means it won’t impede the action of your lure as much as bulkier knots might.
- Works with Different Line Types: The Orvis Knot performs admirably with monofilament and fluorocarbon lines. While some knots are finicky with specific line materials, the Orvis Knot offers consistent performance across common fishing lines, making it a reliable choice for your tackle box.
Step-by-Step: Tying the Orvis Knot
Learning to tie the Orvis Knot is best done visually, but clear written instructions provide the foundation. Follow along, and you’ll be tying it confidently in no time.
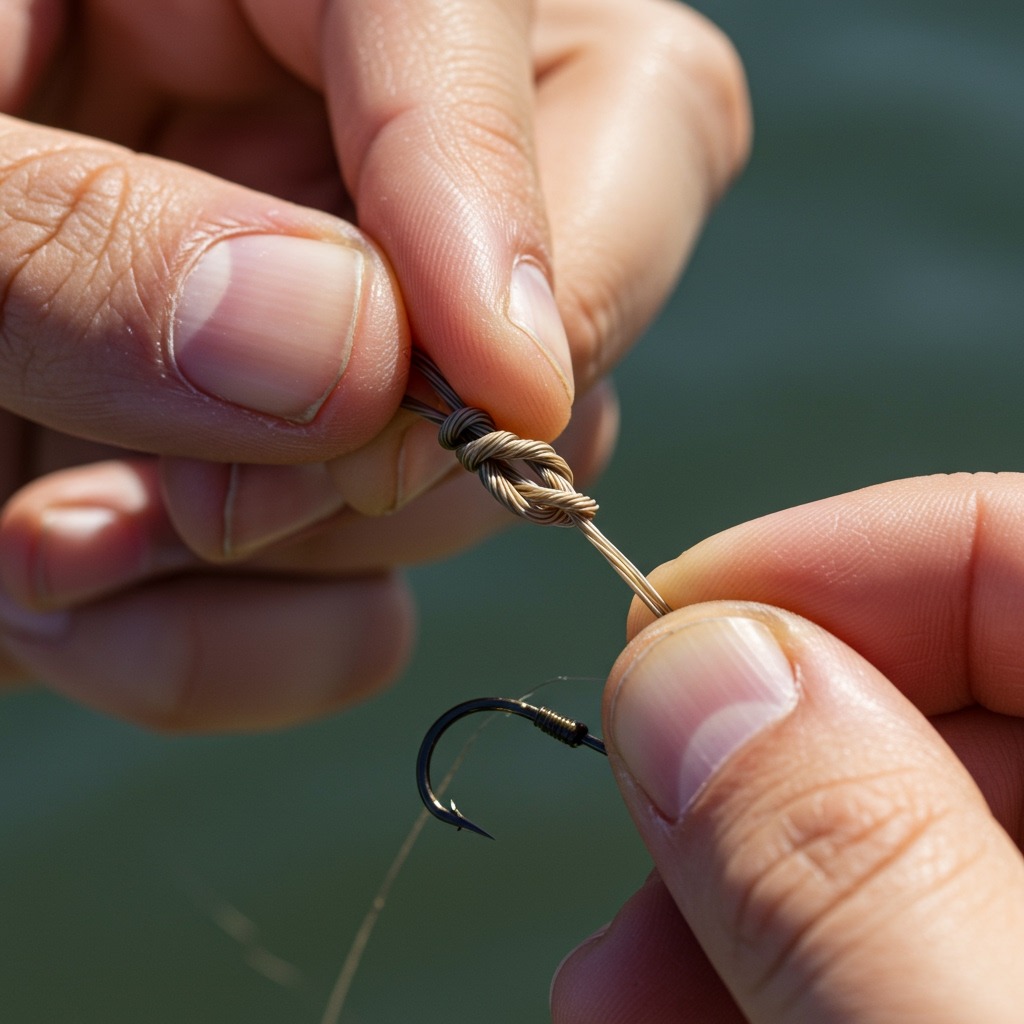
A. Visual Learning is Key
Many anglers find it easiest to learn new knots by watching someone tie them. I highly recommend watching a video tutorial alongside these instructions. The Orvis company itself offers excellent video demonstrations, as do many other reputable fishing resources like this one from NetKnots. A visual aid truly brings the steps to life.
B. The Setup: Getting Started
- Pass the Tag End Through the Eye: Start by passing the tag end (the free end of your fishing line) through the eye of your hook, swivel, or fly.
- Hold Parallel: Bring the tag end back towards the standing line (the main line coming from your reel) and hold it parallel to the standing line, forming a small loop just above the eye. You want about 4-6 inches of tag end to work with.
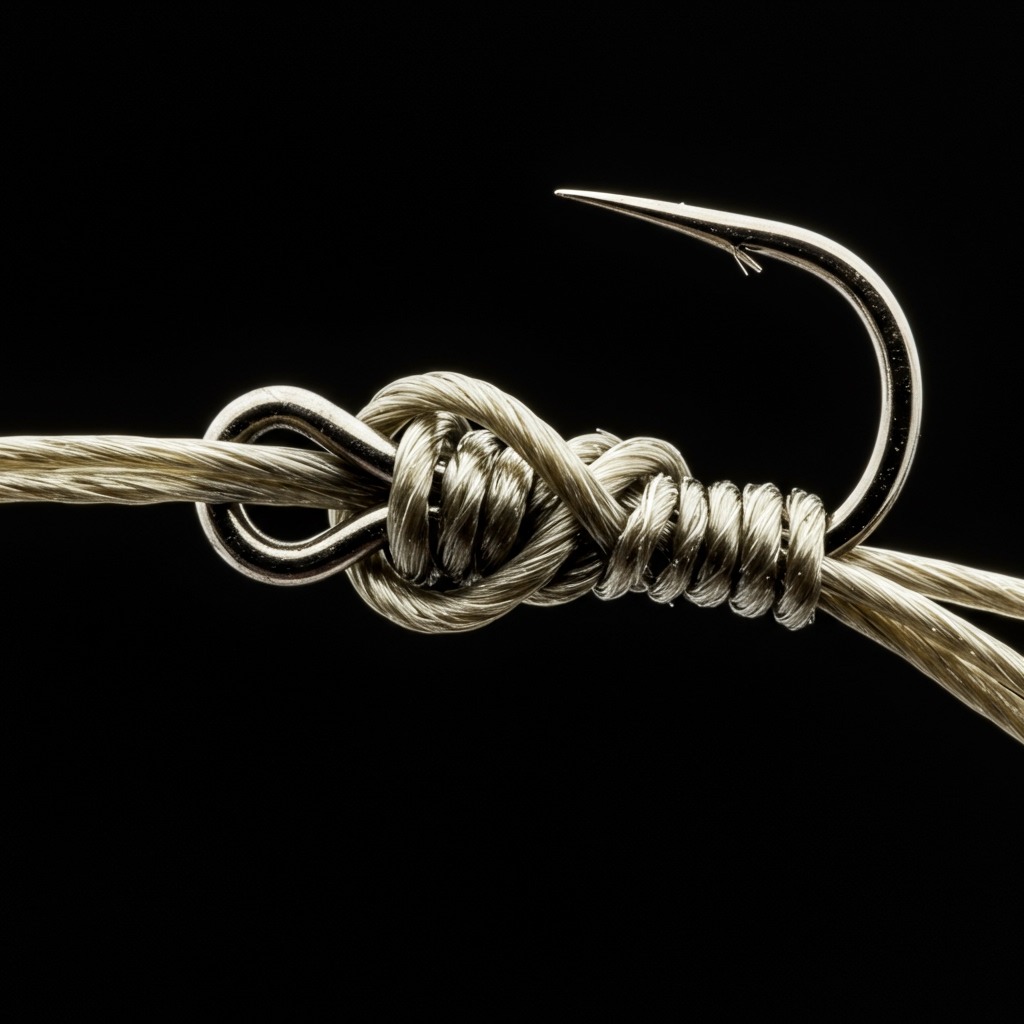
C. The Core Wraps: The “3” or “4” Wraps
This is the heart of the Orvis Knot, creating the friction and grip that make it so strong.
- Wrap the Tag End Around Both Lines: Take the tag end and wrap it around both the standing line and its own parallel portion. Wrap it from the side closest to the hook eye, moving upwards along the parallel lines.
- Number of Wraps: This is a crucial detail.
- For heavier lines (e.g., 12lb test and up), three wraps are typically sufficient and provide excellent strength.
- For lighter lines (e.g., 10lb test and below), use four wraps. The extra wrap adds more surface area for friction, increasing strength and reducing slippage on thinner, slicker lines. Many general guides suggest four wraps for most applications as a good standard.
D. The Return Pass: Locking It Down
- Feed the Tag End Back: Once you’ve completed your wraps, take the tag end and feed it back down through the two loops you just created. You’ll be inserting it through the opening where the wraps began, aiming towards the hook eye. This pass “locks” the wraps in place.
E. The Tighten: Seating Your Knot Securely
This step is vital for the knot’s integrity. Don’t rush it!
- Moisten the Knot: Before pulling, always, always moisten the knot with saliva or water. This lubrication reduces friction heat as the knot cinches down, preventing damage to the line. Dry knots can weaken your line significantly.
- Pull the Standing Line Slowly: Hold the hook securely and slowly pull the standing line. Watch the wraps begin to snug down neatly. You should see them stack uniformly.
- Pull the Tag End and Standing Line to Seat: Once the wraps are mostly seated, give a firm but steady pull on both the standing line and the tag end. This will fully cinch the knot against the eye of the hook. Don’t yank; a smooth, consistent pull is key.
- Trim Excess: Use sharp line clippers to trim the tag end very close to the knot, leaving about 1/8th of an inch. A neat trim prevents tangles and keeps your presentation clean.
When to Use the Orvis Knot
The Orvis Knot isn’t just a party trick; it’s a practical knot for many fishing situations.
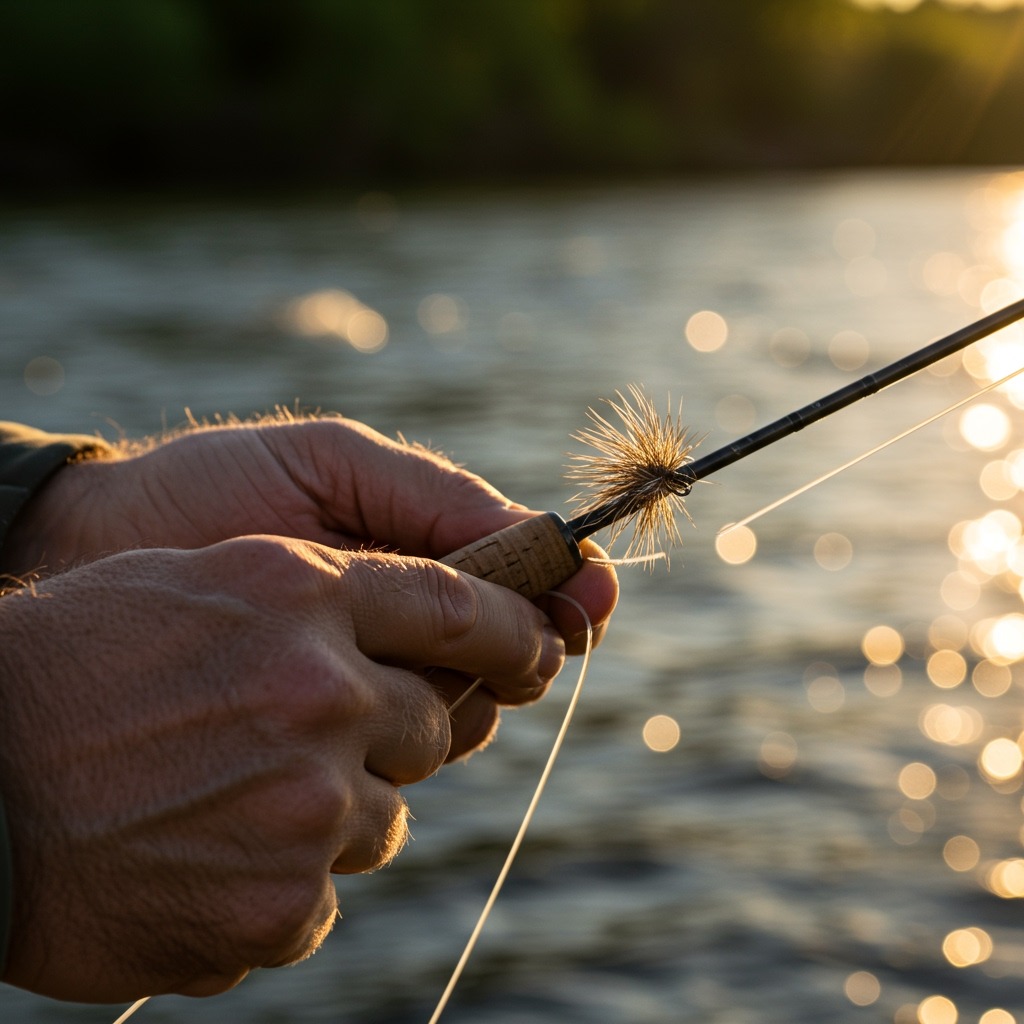
A. Fly Fishing: Attaching Flies to Tippet
This is arguably where the Orvis Knot gained its legendary status. Its neat, compact profile makes it ideal for securing delicate flies to your tippet. It casts cleanly and doesn’t interfere with the fly’s action. Whether you’re dry fly fishing, nymphing, or throwing streamers, this knot is a fantastic choice for a reliable connection to your fly.
B. Lure Fishing: Connecting Lures to Main Line/Leader
While primarily known for fly fishing, the Orvis Knot performs exceptionally well when tying small to medium-sized lures to your main line or leader. Its strength and low profile are beneficial when you want your lure to move naturally without a bulky knot.
C. General Hook Tying: A Reliable Choice
From bait fishing with a simple hook to securing swivels, the Orvis Knot offers a highly reliable connection. If you’re looking for one strong, versatile knot to learn for attaching terminal tackle, the Orvis Knot is a top contender. For general fly fishing basics or just connecting a hook to a line, it’s an excellent addition to your repertoire.
Common Mistakes to Avoid
Even a simple knot can fail if tied incorrectly. Steer clear of these common pitfalls to ensure your Orvis Knot holds true.
- Not Moistening the Knot: This is the most critical mistake. Dry line creates friction and heat when cinching, which weakens monofilament and fluorocarbon lines significantly. Always moisten your knot before tightening.
- Improper Wraps: Using too few wraps for lighter line can lead to slippage. Using too many wraps can make the knot bulky and difficult to cinch down properly. Ensure your wraps are neat, parallel, and the correct number for your line strength.
- Rushing the Cinch: A quick, hard yank can cause the knot to “burn” the line or seat improperly, creating a weak point. Always pull slowly and steadily to allow the wraps to align and tighten smoothly.
- Ignoring Line Type: While versatile, extremely thick lines might benefit from a different knot, and some super-slick braided lines might require more wraps or a specialized knot designed for them. However, for mono and fluorocarbon, the Orvis Knot is excellent.
- Not Trimming the Tag End Properly: Leaving too long a tag end can snag on weeds or debris, or even interfere with casting. Trimming it too short can cause the knot to unravel. Aim for about 1/8th of an inch.
Orvis Knot vs. Other Popular Knots
How does the Orvis Knot stack up against other common choices? While many knots are effective, the Orvis Knot holds its own, often surpassing others in specific attributes.
- Clinch Knot: The standard Clinch Knot is a classic, but the Orvis Knot is generally considered superior in terms of breaking strength and resistance to slipping, especially with slicker lines. The added security of the tag end passing back through the loops provides a stronger grip.
- Palomar Knot: The Palomar Knot is incredibly strong and popular, particularly for braided line, but it can be bulkier and sometimes requires passing the hook through a loop, which can be difficult with larger hooks or lures. The Orvis Knot is more streamlined and easier to tie with terminal tackle already attached.
- Improved Clinch Knot: The Improved Clinch Knot adds an extra step to the standard Clinch, boosting its strength. However, the Orvis Knot often tests stronger and is less prone to slipping over time. Its unique locking mechanism provides a very secure hold.
FAQ Section
Q: Is the Orvis Knot truly the strongest?
A: It is consistently ranked among the strongest knots for connecting monofilament and fluorocarbon lines to hooks, swivels, and lures. While “the strongest” can be debated among various knots and line types, it reliably retains a very high percentage of the line’s breaking strength.
Q: Can I tie the Orvis Knot with braided line?
A: The Orvis Knot is primarily designed for monofilament and fluorocarbon. While you can tie it with braided line, braided lines are typically slicker and can slip more easily with knots designed for mono. For braided lines, knots like the Palomar or Uni Knot are generally preferred for maximum security.
Q: What’s the difference between 3 and 4 wraps?
A: The number of wraps (3 or 4) depends on your line’s breaking strength. For heavier lines (e.g., 12lb test and above), 3 wraps are usually sufficient. For lighter lines (e.g., 10lb test and below), 4 wraps are recommended to provide more friction and prevent slippage due to the thinner diameter.
Q: Is it good for saltwater fishing?
A: Yes, the Orvis Knot is an excellent choice for saltwater fishing, particularly for attaching leaders to flies or lures where a strong, streamlined knot is beneficial. Its high strength retention makes it reliable against strong currents and powerful fish.
Q: What if my knot slips?
A: If your Orvis Knot slips, it’s usually due to one of a few common mistakes: not moistening the knot before tightening, not pulling it tight enough, or not using enough wraps for your line type. Double-check your technique, ensure it’s thoroughly moistened, and pull firmly but smoothly to seat it correctly. Practice makes perfect!
Mastering the Orvis Knot empowers you with a simple, yet incredibly strong connection, ensuring you’re ready for anything the water throws at you. Add it to your knot arsenal, and fish with newfound confidence.