
Last summer at Yellowstone, I watched a family try to wash their dinner dishes in the bathroom sink. The camp host had to politely explain why that wasn’t allowed, and the family looked completely lost about what to do next. It reminded me of my own early camping days when I had no clue about proper dishwashing—and the disasters that followed.
Nothing ruins a great camping meal faster than dreading the cleanup afterward. But here’s the truth: washing dishes while camping doesn’t have to be a nightmare. With the right system, proper equipment, and a few insider tricks, you can have those dishes clean and put away in under 15 minutes.
Whether you’re car camping at a state park, backcountry camping, or just getting started with outdoor adventures, this guide will teach you everything you need to know about washing dishes while camping—the right way, the safe way, and the efficient way.
Before we dive into dishwashing, make sure you’re prepared for all aspects of your camping adventure with our comprehensive camping for beginners guide. And if you’re planning meals that create fewer dishes to wash, check out our easy camping meals for families for inspiration.
Why Proper Dishwashing Matters While Camping
Washing dishes properly while camping isn’t just about cleanliness—it’s about safety, environmental responsibility, and wildlife protection. Improperly cleaned dishes and carelessly disposed of greywater can attract bears, contaminate water sources, and create health hazards.
Food residue left on dishes becomes a beacon for wildlife, especially in bear country. Even tiny scraps can draw curious animals to your campsite, creating dangerous situations. Additionally, soap and food particles in lakes, rivers, and streams harm aquatic ecosystems and contaminate drinking water for downstream users.
From a health perspective, bacteria from improperly cleaned dishes can cause serious foodborne illness, especially in hot weather. Without access to medical facilities, food poisoning can turn your outdoor adventure into a serious emergency.
The good news? Proper camp dishwashing is simple once you know the system. It just requires a different approach than your kitchen sink at home.
Essential Equipment for Camp Dishwashing
Success starts with having the right gear. You don’t need expensive equipment, but having proper tools makes the job infinitely easier and more effective.
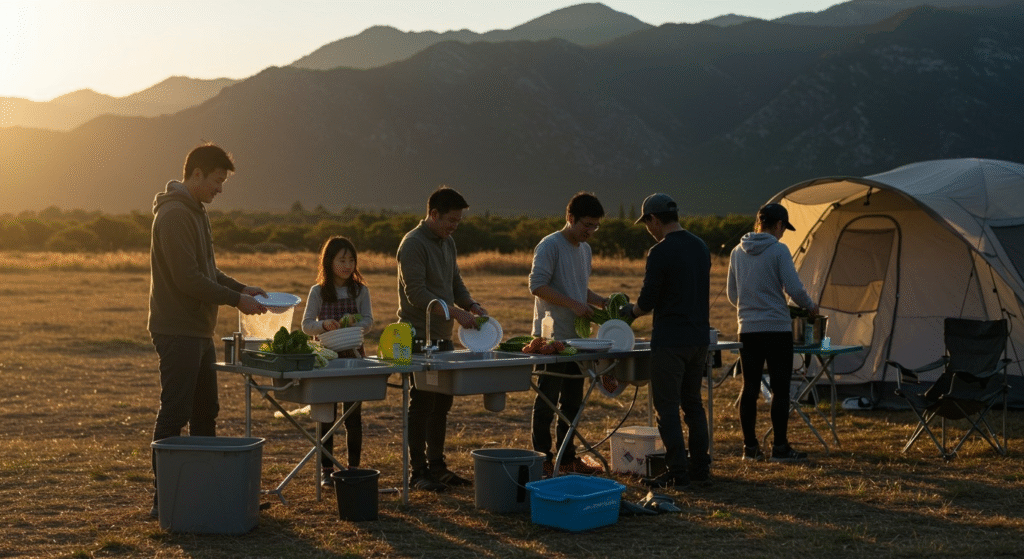
The Two-Basin System
The foundation of efficient camp dishwashing is a two-basin setup. You’ll need containers that can hold several inches of water and accommodate your largest dishes. Collapsible camping basins are ideal because they pack small and handle large loads, but plastic tubs or even large pots work in a pinch.
Your first basin becomes the wash station filled with warm, soapy water. The second serves as the rinse station with clean water. This system allows you to wash multiple items efficiently while keeping your rinse water clean throughout the process.
Biodegradable Soap Selection
Never use regular household dish detergent while camping. Standard detergents contain phosphates and chemicals that harm the environment, even when disposed of properly. Biodegradable camp soaps like Dr. Bronner’s, Campsuds, or Sea to Summit Wilderness Wash break down naturally in soil without damaging ecosystems.
Use soap sparingly—just a few drops in your wash basin create enough suds to clean a full meal’s worth of dishes. Too much soap creates excessive suds that are harder to rinse and more difficult to dispose of responsibly.
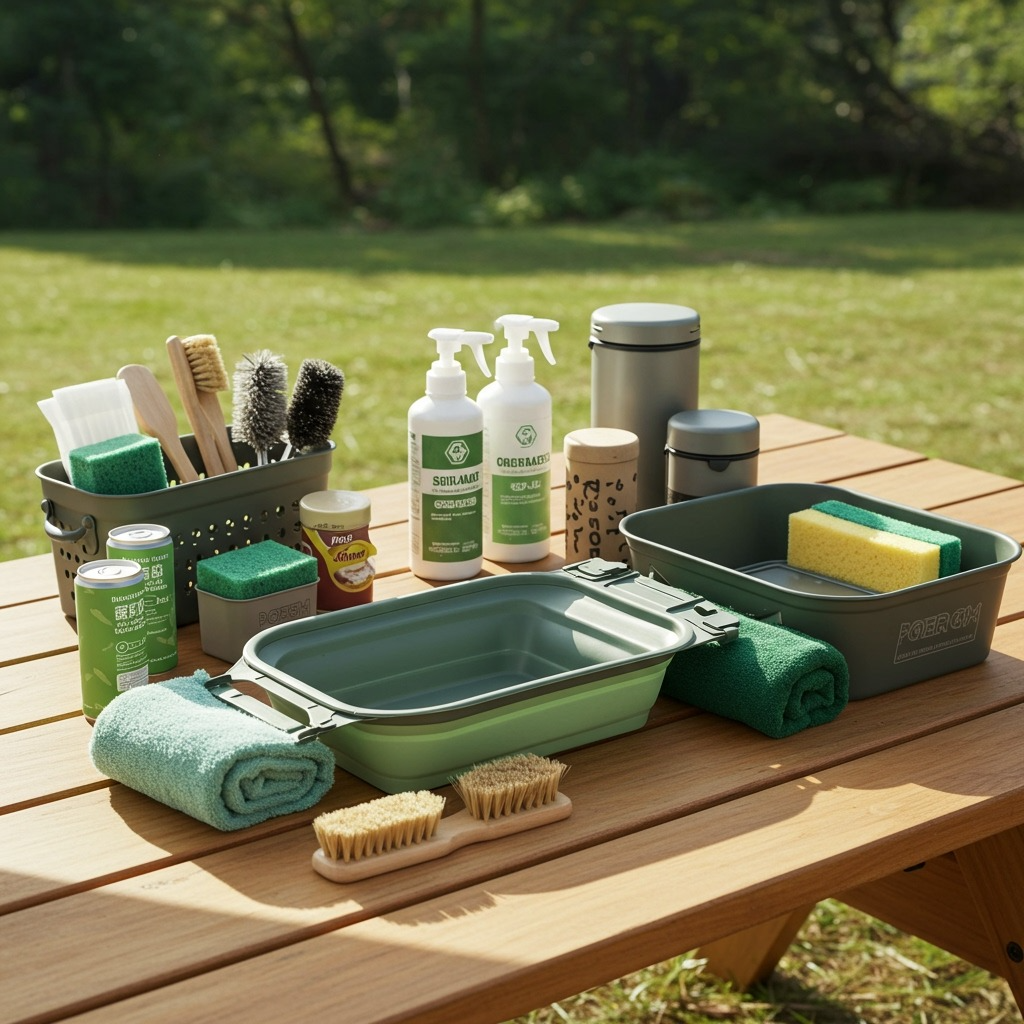
Essential Cleaning Tools
A good scrubbing sponge or brush makes quick work of stuck-on food. Look for antimicrobial sponges that resist bacterial buildup. A pot scraper—essentially a flexible plastic tool—helps remove food residue before washing, keeping your wash water cleaner longer.
Microfiber towels work better than regular dish towels for drying because they absorb more water and dry faster. Pack at least two clean towels: one for drying dishes and another for general cleanup.
Don’t forget a fine-mesh strainer for filtering food particles from your greywater before disposal. This simple step makes proper waste disposal much easier and more environmentally responsible.
For more camping organization tips and equipment recommendations, explore our guide to primitive camping to understand minimalist approaches to camp setup.
The Step-by-Step Camp Dishwashing Process
Step 1: Pre-Cleaning Preparation
Start the dishwashing process before you even begin washing. Encourage everyone to finish all their food—the “clean plate club” makes your job infinitely easier. Store any leftovers in sealed containers and scrape all remaining food scraps into your trash bag, not onto the ground.
Use a pot scraper or rubber spatula to remove as much residue as possible from pots, pans, and plates. For stubborn, stuck-on food, add a small amount of hot water to the dirty pan and let it soak while you eat. This simple step loosens debris and makes actual washing much faster.
Paper towels can help wipe away oils and sauces that would otherwise cloud your wash water. The goal is to start with dishes that are as clean as possible before they hit the soapy water.
Step 2: Setting Up Your Wash Station
Location matters when setting up your dishwashing station. Choose a level area at least 200 feet away from any water sources—lakes, rivers, streams, or wells. This distance ensures that your greywater doesn’t contaminate natural water sources or drinking supplies.
Heat water in a pot on your camp stove while you’re finishing dinner. You don’t need gallons—just enough to create warm wash water that makes cleaning more effective and comfortable. Cold water can clean dishes, but warm water cuts through grease better and makes the experience much more pleasant.
Fill your wash basin with warm water and add just a few drops of biodegradable soap. Mix gently to create suds without creating excessive foam. Fill your rinse basin with clean water at any temperature—warm is nice, but room temperature works fine for rinsing.
Step 3: The Washing Strategy
Wash dishes in order from cleanest to dirtiest. Start with glasses and cups, move on to plates and bowls, then tackle utensils, and finish with pots and pans. This strategy keeps your wash water effective longer and prevents cross-contamination.
Scrub each item thoroughly, paying attention to areas where food might hide—the undersides of plates, the insides of cups, the tines of forks. Take your time with this step; rushed washing often means re-washing later.
If your wash water becomes too dirty or cold during the process, don’t hesitate to refresh it. Pour the dirty water into your greywater collection container, refill with clean warm water, and add fresh soap. Clean dishes are worth the extra water.
Step 4: Rinsing and Drying
After washing each item, dip it in your rinse basin to remove soap residue. If dishes still feel slippery or show soap bubbles, they need more rinsing. Clean rinse water is crucial—replace it if it becomes too soapy or dirty.
Air drying is the most sanitary option when the weather permits. Spread clean dishes on a towel in a sunny spot, or use a collapsible drying rack if you have one. If you need to hand-dry dishes, use a completely clean towel and ensure dishes are thoroughly dry before storing to prevent bacterial growth.
In humid conditions or when time is short, hand drying with clean towels works well. Just make sure your drying towel hasn’t been used for other camp tasks—cross-contamination from a multi-purpose towel can reintroduce bacteria to clean dishes.
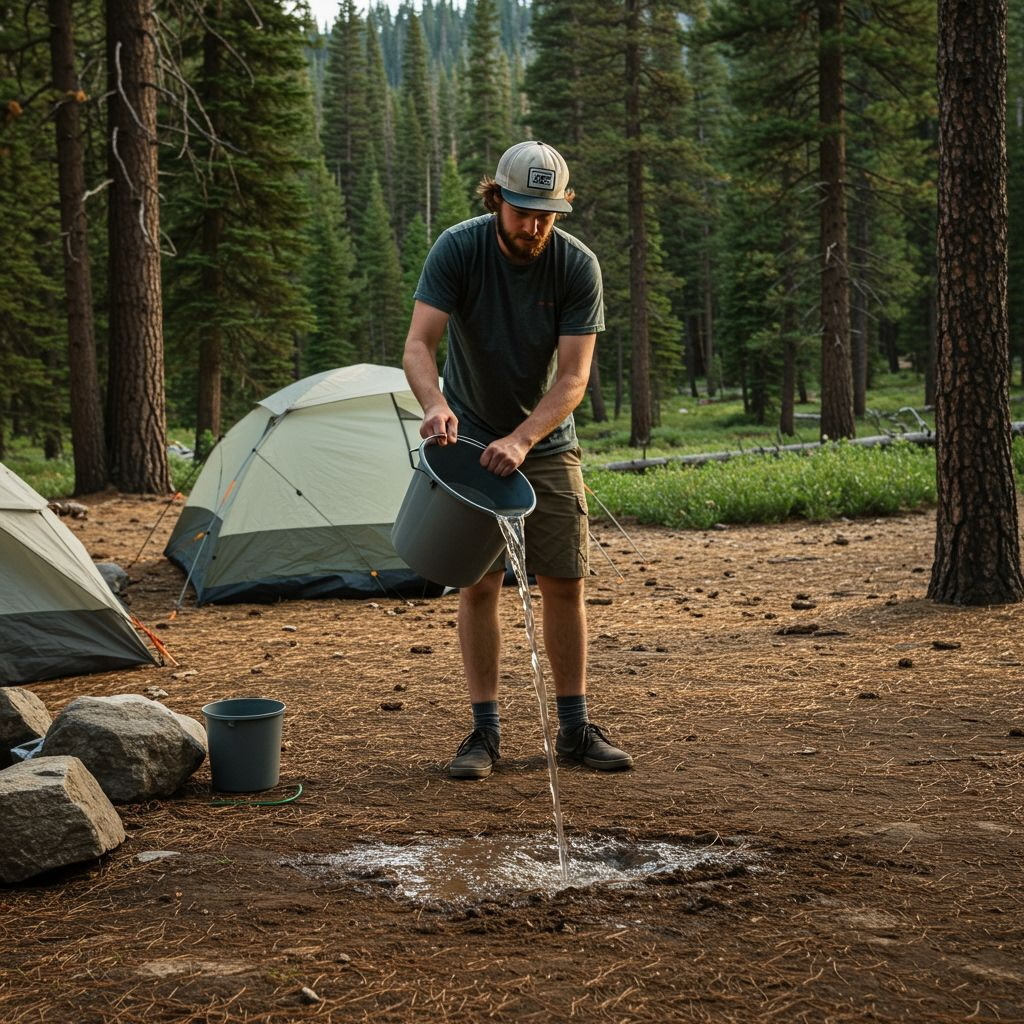
Step 5: Greywater Disposal
Proper greywater disposal is crucial for environmental protection and camp regulations. Combine all your dirty water—wash water, rinse water, and any other cleaning water—into one container.
Strain the water through a fine-mesh strainer to remove food particles, then dispose of these solids in your trash. Never bury food scraps or scatter them around camp, as this attracts wildlife.
Many developed campgrounds have designated greywater disposal areas—use them if available. If no facilities exist, check with camp hosts or rangers for local regulations. In most areas, you can “broadcast” greywater by spreading it over a large area at least 200 feet from water sources, trails, and campsites.
For those planning extended outdoor adventures, our camping in the rain guide includes additional tips for managing camp chores in challenging weather conditions.
Advanced Techniques and Pro Tips
The Three-Basin Sanitizing Method
For large groups, extended trips, or when preparing raw meat, consider adding a third basin for sanitizing. This method, borrowed from professional kitchens and Scout troops, ensures maximum cleanliness and safety.
Fill your third basin with hot water and a sanitizing agent. Quaternary sanitizing tablets work effectively in room-temperature water and kill a broad spectrum of bacteria and viruses. Alternatively, use a capful of unscented bleach in a gallon of water.
Dip clean, rinsed dishes in the sanitizing solution for at least one minute, then air dry. Don’t rinse after sanitizing—let the solution air dry on dishes for maximum effectiveness.
Water Conservation Strategies
When water is scarce, modify your technique to minimize usage. Use a spray bottle to rinse dishes instead of dunking them in a rinse basin. Pre-clean dishes more thoroughly with paper towels to reduce washing requirements.
Consider the “cup method” for small loads: put soapy water in a cup and use it to dip your sponge or brush instead of filling an entire basin. This technique works particularly well for quick cleanups or when washing just a few items.
Save pasta or rice cooking water for washing—the starch helps cut grease, and the hot temperature aids cleaning. Just make sure the cooking water doesn’t contain salt or other seasonings that could harm plants or soil.
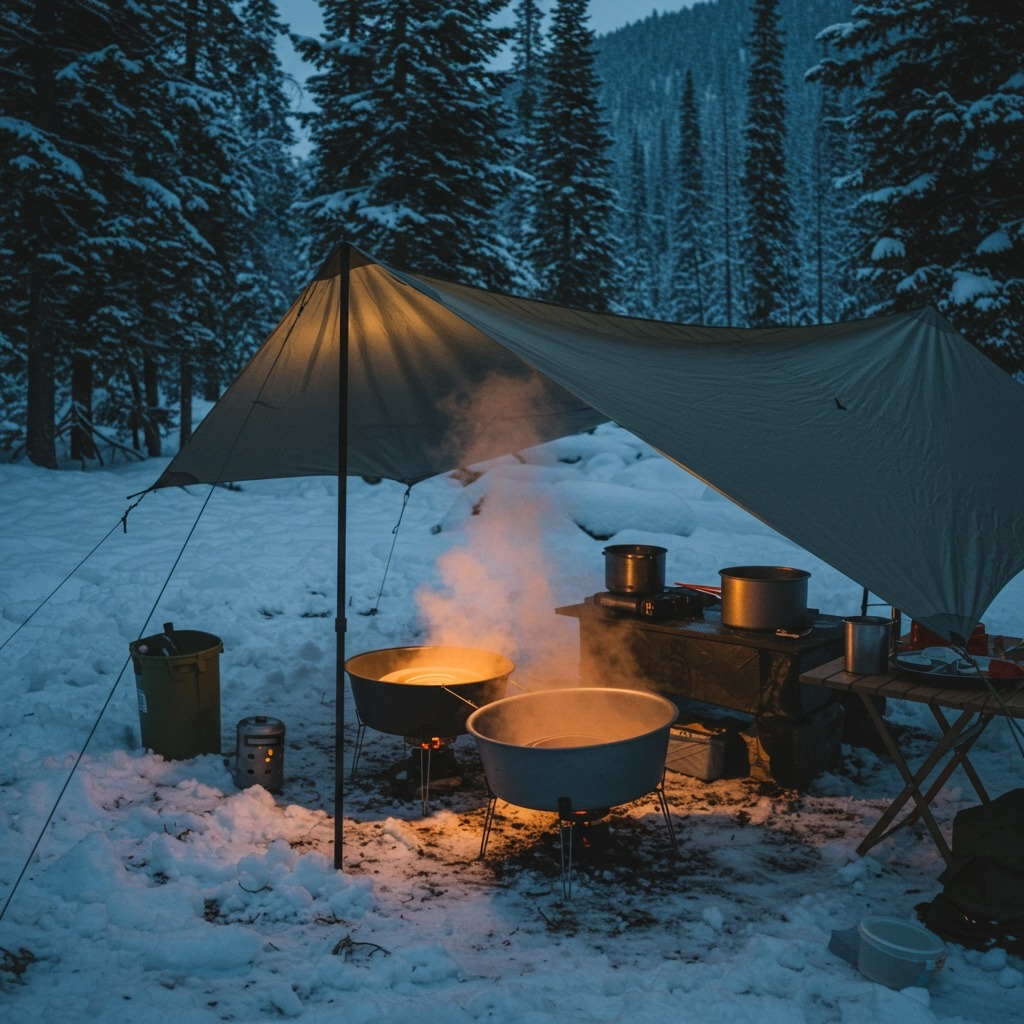
Cold Weather Considerations
Winter camping requires special dishwashing considerations. Water freezes quickly, making the process more challenging and potentially dangerous if spilled on skin or gear.
Work faster in cold conditions and keep extra hot water available to refresh your basins. Insulated containers help maintain water temperature longer. Dry dishes completely before storing to prevent freezing and potential damage.
Consider washing dishes inside a tent vestibule or under a tarp if the weather is severe. Just ensure adequate ventilation and protect your shelter floor from spills.
For comprehensive cold-weather camping guidance, check out our camping in the snow article for specialized techniques and safety considerations.
Troubleshooting Common Problems
When the Dishwasher Gets Cold Too Fast
Cold dish water makes cleaning much more difficult and unpleasant. Combat this by heating extra water while you wash and refreshing your basin as needed. Insulated containers or thermal carafes help maintain temperature longer.
Work systematically and efficiently to make the most of hot water. Wash items in batches rather than one at a time, and keep lids on containers when not actively washing.
Consider timing—washing dishes in direct sunlight helps maintain water temperature, while evening or early morning washing fights against ambient cooling.
Soap Won’t Rinse Clean
Excessive soap creates rinsing problems and environmental concerns. If dishes feel slippery or show persistent bubbles, you’re using too much soap, or your rinse water needs changing.
Start over with less soap if necessary. It’s better to wash twice with minimal soap than struggle with over-sudsy dishes that won’t rinse clean.
Hard water can make soap more difficult to rinse. If you suspect water hardness issues, use even less soap and consider adding a small amount of white vinegar to your rinse water to help neutralize soap residue.
Stubborn Food Won’t Come Off
Tough food requires patience and the right technique. Soak items while washing other dishes—time often accomplishes what scrubbing alone cannot.
Hot water is your best friend for most stuck-on foods. Don’t hesitate to pour boiling water directly over problem areas. For protein-based foods like eggs or cheese, start with cold water to prevent cooking the residue onto the surface.
Baking soda makes an excellent, gentle abrasive for stuck-on food. Make a paste with water and scrub gently—it’s effective but won’t scratch most surfaces.
Environmental Considerations and Leave No Trace
Wildlife Protection Through Proper Cleaning
Proper dishwashing protects both wildlife and campers. Food odors from improperly cleaned dishes or carelessly disposed greywater attract animals ranging from squirrels and raccoons to bears and mountain lions.
Even seemingly clean dishes can retain food odors detectable by wildlife. Store clean dishes in sealed containers or your vehicle overnight, especially in bear country. Never leave dishes out to air dry overnight.
Greywater disposal far from camp helps prevent conditioning wildlife to associate human campsites with food sources. This protection benefits both current and future campers while keeping wildlife wild and safe.
Long-term Campsite Health
Repeated improper greywater disposal can damage soil and vegetation around popular campsites. High soap concentrations and food particles can alter soil chemistry and harm native plants.
Rotate your greywater disposal locations if camping in the same area for multiple days. This practice spreads environmental impact over a larger area and allows soil biology to process waste more effectively.
For additional environmental camping practices, explore resources from the Leave No Trace organization to understand comprehensive low-impact outdoor ethics.
Alternatives for Water-Scarce Situations
Dry Cleaning Methods
When water is extremely limited, dry cleaning methods can help maintain basic sanitation. High-quality paper towels can remove most food residue from dishes, though they won’t provide the sanitation level of proper washing.
Baby wipes designed for sensitive skin can clean dishes reasonably well in emergencies. Choose unscented varieties without lotions or harsh chemicals. These aren’t ideal for regular use but work for short-term situations.
Sand can serve as an abrasive for cleaning metal cookware when water is unavailable. Heat the pot first, add clean sand, and scrub with a cloth or paper towel. Rinse thoroughly when water becomes available.
Minimal Water Techniques
Steam cleaning uses minimal water while providing effective sanitization. Boil a small amount of water and hold the dishes over the steam while wiping with a clean cloth. This method works particularly well for final sanitization of already-clean dishes.
The “sip and spit” method uses minimal water for basic utensil cleaning. Put a small amount of clean water in your mouth, swish around a dirty spoon or fork, then spit the water out. This technique works for utensils but isn’t practical for larger items.
Alcohol-based sanitizers can provide additional cleaning power when water is scarce. Choose varieties with at least 60% alcohol content and follow up with thorough wiping to remove residue.
For more water conservation techniques and off-grid camping strategies, visit resources from REI’s expert advice section for additional outdoor skills and techniques.
Frequently Asked Questions
Do I really need biodegradable soap for camping?
Yes, absolutely. Regular dish detergent contains phosphates and chemicals that harm the environment, even when disposed of properly. Biodegradable soap breaks down naturally in soil and causes less environmental damage. It’s also often required by park regulations and Leave No Trace principles.
Can I wash dishes in the lake or river?
Never wash dishes directly in natural water sources. Soap—even biodegradable soap—needs soil bacteria to break down properly and can harm aquatic life when introduced directly to water. Always wash at least 200 feet away from any water source and dispose of greywater on land.
How hot should my wash water be?
Warm water is ideal—hot enough to be comfortable and cut through grease, but not scalding. Water temperature around 100-110°F works well. You don’t need extremely hot water for effective cleaning, and scalding water wastes fuel and can be dangerous to handle.
What if I don’t have two containers for washing and rinsing?
You can manage with one container by washing all dishes first, then pouring out soapy water and refilling with clean water for rinsing. It’s less efficient but works when gear is limited. Alternatively, use a large pot for washing and rinse items by pouring clean water over them.
Is the sanitizing step really necessary?
For most camping situations with healthy adults eating well-cooked food, sanitizing isn’t essential if you’re washing thoroughly with hot, soapy water. However, it’s recommended when preparing raw meat, camping with young children or immunocompromised individuals, or on extended trips where illness would be particularly problematic.