
Three hours into what should have been an epic bass fishing trip, I felt that sickening snap. My leader had broken at the knot connection, taking my favorite lure and the fish of a lifetime with it. Standing there with a useless piece of line dangling from my rod, I realized I’d been tying the same weak knot for years without really understanding how to tie two fishing lines together properly.
That frustrating day taught me something valuable: the difference between a good fishing trip and a great one often comes down to knot knowledge. Whether you’re adding a leader to your main line, splicing two sections together, or repairing a break, knowing how to tie two fishing lines together correctly can save your gear, your fish, and your sanity.
After years of testing different knots in various conditions, I’ve discovered the five most reliable connections that work every time. These aren’t complicated tournament knots that require an engineering degree—they’re practical, proven methods that any angler can master.
Why Proper Line-to-Line Connections Matter
How to tie two fishing lines together isn’t just about making any connection work—it’s about creating a bond that’s as strong as your weakest line while maintaining the natural action of your lure or bait. A poorly tied knot can reduce your line strength by 50% or more, turning 20-pound test into 10-pound disappointment.
Beyond strength, the right knot affects:
- Casting distance: Bulky knots create wind resistance and don’t pass through guides smoothly
- Lure action: Heavy connections can dampen the natural movement that attracts fish
- Confidence: Knowing your knots hold lets you fight fish aggressively instead of babying them
The five knots covered here represent the best balance of strength, reliability, and ease of tying. Master these, and you’ll handle 95% of line-joining situations you encounter on the water.
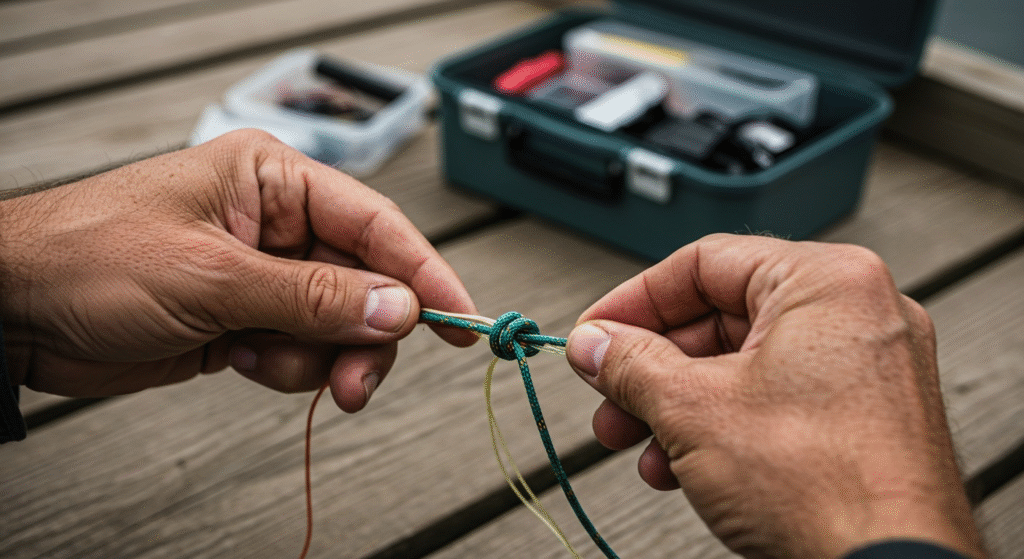
Essential Tools for Successful Knot Tying
Before diving into specific knots, having the right tools makes how to tie two fishing lines together much easier and more reliable:
Basic Requirements
- Sharp line cutters: Clean cuts prevent weak tag ends
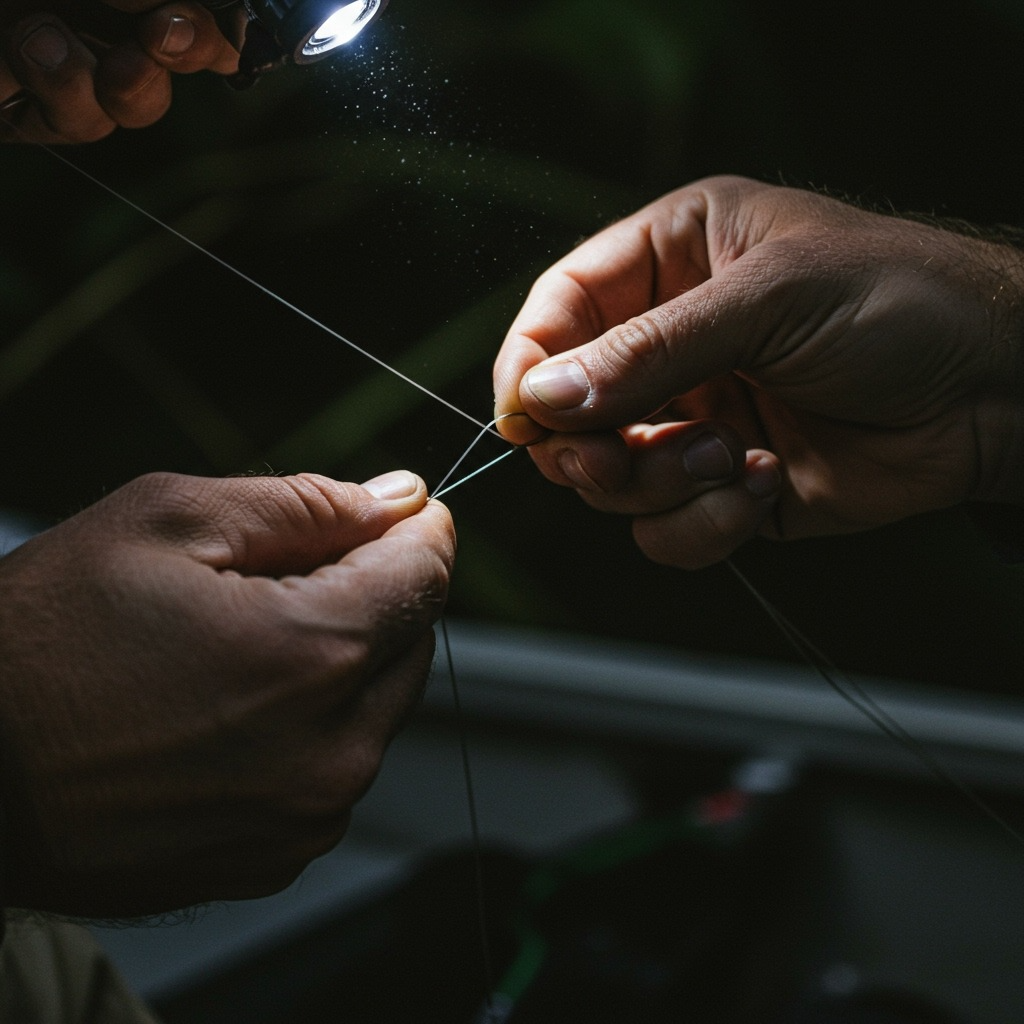
- Good lighting: Seeing what you’re doing prevents mistakes
- Steady surface: A boat gunwale or tackle box provides stability
- Practice line: Cheap mono for learning at home
Pro Tips for Better Knots
- Wet your knots: Saliva or water reduces friction during tightening
- Leave adequate tag ends: 1/8 inch prevents slippage
- Pull evenly: Gradual pressure creates stronger connections than sudden jerks
- Test before fishing: Give every knot a firm pull before casting
For comprehensive knot-tying fundamentals that build on these techniques, our strongest fishing knot guide covers the theory behind what makes connections hold under pressure.

The Double Uni Knot: Best Overall Connection
The Double Uni Knot tops our list because it’s simple, strong, and works with virtually any line combination. Essentially two uni knots tied against each other, this connection retains about 85-90% of your line’s original strength.
When to Use the Double Uni Knot
- Joining similar diameter lines
- Adding leaders to main line
- Splicing broken line back together
- Connecting braid to mono or fluorocarbon
Step-by-Step Tying Instructions
- Overlap the lines: Lay both lines parallel with about 6 inches of overlap
- Form the first uni knot: Take one tag end and make 5-7 wraps through a loop formed with the standing line
- Wet and snug: Moisten the knot and pull the tag end to partially tighten
- Repeat with the other line: Tie an identical uni knot with the second line’s tag end
- Final tightening: Pull both standing lines to bring the knots together
- Trim tag ends: Leave about 1/8 inch of tag end for security
Double Uni Knot Advantages
- Works with all line types and sizes
- Relatively slim profile passes through guides
- Easy to tie even in cold or wet conditions
- Predictable strength retention
Pro tip: Use more wraps (6-7) with slippery braided lines and fewer wraps (4-5) with thicker monofilament.
The Albright Knot: Perfect for Dissimilar Lines
When you need to connect lines of very different diameters or materials, the Albright Knot excels. Originally designed for fly fishing to connect backing to fly line, it works equally well for joining braid to mono leaders or connecting light tippet to heavy shock leader.
Albright Knot Applications
- Braid to mono or fluorocarbon leaders
- Light line to heavy shock leader
- Fly line to backing connections
- Any situation with significant diameter differences
Tying the Albright Knot
- Create a loop: Bend the heavier line back to form a 2-inch loop
- Thread the lighter line: Pass the lighter line through the loop
- Begin wrapping: Wrap the lighter line around both legs of the loop 8-12 times
- Reverse direction: Wrap back toward the loop opening for 3-4 turns
- Thread back through: Pass the tag end back through the loop opening
- Tighten carefully: Wet the knot and pull all four ends gradually
- Final tightening: Pull the standing lines to fully seat the knot
Albright Knot Strengths
- Excellent for very different line sizes
- Smooth profile for long casts
- Strong hold with dissimilar materials
- Compact when properly tied
Important note: Always wrap the thinner line around the thicker line, never the reverse.
The Alberto Knot: Modern Improvement on a Classic
The Alberto Knot represents an evolution of the Albright, designed to be easier to tie while maintaining excellent strength. Many tournament anglers prefer it for braid-to-fluorocarbon connections because of its slim profile and reliability.
Alberto Knot Benefits
- Smoother than the Albright when tied correctly
- Excellent for braid to leader connections
- Passes through guides with minimal resistance
- Strong hold with slippery braided lines
Alberto Knot Tying Process
- Form the initial loop: Double over about 3 inches of the heavier line
- Insert the thinner line: Thread the lighter line through the doubled loop
- Wrap down the loop: Make 7-10 wraps down toward the closed end
- Return wrapping: Wrap back up for 3-5 turns
- Final pass: Thread the tag end back through the original opening
- Dress and tighten: Work the knot down gradually while maintaining proper form
- Trim: Cut tag ends close to the knot body
Alberto vs. Albright
- Alberto: Easier to tie, slightly bulkier
- Albright: More compact, requires more dexterity
Both knots serve similar purposes, so choose based on your tying preference and specific application.
For anglers looking to expand their line connection knowledge beyond basic knots, our how to tie fishing line guide covers advanced techniques for specific situations.
The Blood Knot: Classic Choice for Similar Lines
The Blood Knot represents old-school craftsmanship in knot tying. While more challenging to tie than modern alternatives, it creates an incredibly neat, strong connection when joining lines of similar diameter.
Blood Knot Applications
- Joining sections of mono leader material
- Building tapered fly fishing leaders
- Connecting similar weight lines
- Situations requiring the neatest possible connection
Blood Knot Technique
- Overlap the lines: Cross the two lines with 6-8 inches of working length
- First set of wraps: Wrap one line around the other 5-7 times
- Thread through center: Pass the tag end back through the center opening
- Second set of wraps: Wrap the other line around the first in the opposite direction
- Thread the second end: Pass this tag end through the center opening from the opposite side
- Tighten gradually: Wet thoroughly and pull both standing lines slowly
- Work into shape: The knot should form a neat barrel shape
Blood Knot Characteristics
- Extremely neat appearance when properly tied
- Excellent strength with similar diameter lines
- Requires practice to tie consistently
- Can be challenging in cold weather or with thick lines
Difficulty note: The Blood Knot demands more dexterity than other options, making it less suitable for cold conditions or when wearing gloves.
The Surgeon’s Knot: Fastest Emergency Connection
When you need to connect lines quickly—maybe you’ve broken off and fish are actively feeding—the Surgeon’s Knot provides a fast, reliable solution. It’s essentially an overhand knot tied with both lines together.
Surgeon’s Knot Advantages
- Fastest knot to tie in pressure situations
- Works with any line combination
- Easy to remember and execute
- Reliable strength retention
Simple Surgeon’s Knot Steps
- Lay lines parallel: Overlap the lines by about 8 inches
- Form an overhand knot: Treat both lines as one and tie a simple overhand knot
- Pass through again: For a double surgeon’s knot, pass both lines through the loop a second time
- Wet and tighten: Moisten and pull all four ends evenly
- Trim tag ends: Cut close to the knot body
Surgeon’s Knot Variations
- Single Surgeon’s: One pass through the loop, good for quick repairs
- Double Surgeon’s: Two passes, stronger and more reliable for fighting fish
- Triple Surgeon’s: Three passes, maximum strength but bulkier profile
Speed advantage: Once mastered, you can tie a surgeon’s knot in under 30 seconds even in challenging conditions.
Choosing the Right Knot for Your Situation
Knowing how to tie two fishing lines together means selecting the appropriate knot for your specific needs:
Line Material Combinations
Braid to Mono/Fluoro: Alberto, Albright, or Double Uni
Mono to Mono: Blood Knot (similar sizes) or Double Uni
Different Sizes: Albright or Alberto for significant differences
Emergency Repairs: Surgeon’s Knot for speed
Fishing Application Factors
Casting Distance: Alberto or Albright for smoothest guides passage
Maximum Strength: Blood Knot or Double Uni for similar lines
Ease of Tying: Surgeon’s Knot or Double Uni for simplicity
Neatest Appearance: Blood Knot for the cleanest profile
Environmental Considerations
Cold Weather: Surgeon’s Knot or Double Uni (avoid complex knots)
Low Light: Simpler knots like Surgeon’s or Double Uni
Gloved Hands: Stick to basic knots you can tie by feel
Boat Movement: Stable knots like Double Uni that don’t require perfect dexterity
For specialized fishing techniques that benefit from strong line connections, our fly fishing basics guide covers leader construction and knot selection for fly fishing applications.
Common Mistakes and How to Avoid Them
Inadequate Tag End Length
Problem: Knots slip under pressure when tag ends are too short
Solution: Always leave at least 1/8 inch of tag end after trimming
Dry Tightening
Problem: Friction heat weakens line during tightening
Solution: Always wet knots with saliva or water before final tightening
Uneven Tension
Problem: Pulling one side harder than the other creates weak spots
Solution: Tighten gradually and evenly on all line segments
Wrong Knot Selection
Problem: Using complex knots when simple ones would work better
Solution: Match knot complexity to your skill level and conditions
Insufficient Testing
Problem: Knots fail during the fight because they weren’t tested beforehand
Solution: Give every knot a firm pull before making your first cast
Practice Makes Perfect: Building Knot-Tying Skills
Home Practice Routine
- Use bright, contrasting practice lines for better visibility
- Practice each knot 10-15 times until it becomes automatic
- Time yourself—emergencies require quick, confident tying
- Practice in different lighting conditions
Progressive Skill Building
- Master one knot completely before moving to the next
- Practice with your actual fishing lines after learning with practice cord
- Test knot strength with a scale to verify your technique
- Practice in realistic conditions including cold, wet hands
Advanced Applications
Once you’ve mastered basic line-to-line connections, explore specialized applications like building tapered leaders, creating shock leaders for large fish, or constructing multi-section rigs.
For anglers interested in expanding their overall fishing knowledge beyond knots, our how to start fishing guide covers fundamental skills that complement proper knot tying.
Testing and Maintaining Your Connections
Regular Inspection Schedule
- Before each trip: Check all knots for nicks, fraying, or loosening
- After fighting fish: Inspect connections that experienced stress
- Seasonal replacement: Replace leaders and retie connections periodically
Field Testing Methods
- Visual inspection: Look for deformed knots or line damage
- Gentle pressure test: Pull steadily to verify knot integrity
- Flexibility check: Ensure knots haven’t become brittle or stiff
When to Retie
- Visible damage to the knot or surrounding line
- After catching multiple fish on the same rig
- When knots appear deformed or loosened
- Before targeting species known for hard fights
Expert Resources and Further Learning
Understanding how to tie two fishing lines together opens doors to more advanced fishing techniques and greater confidence on the water. For comprehensive instruction and detailed videos, trusted sources include:
- Take Me Fishing’s comprehensive knot guide offers detailed instructions and video demonstrations
Building on Knot Knowledge
Master these five essential line-joining knots, and you’ll handle virtually any connection challenge. The key is consistent practice, proper technique, and choosing the right knot for each situation.
Remember, even the strongest knot is only as good as the line it’s tied in and the technique used to tie it. Regular practice, careful inspection, and replacement when needed ensure your connections won’t let you down when it matters most.
How to tie two fishing lines together effectively comes down to preparation, practice, and selecting proven techniques. These five knots—Double Uni, Albright, Alberto, Blood, and Surgeon’s—give you reliable options for every fishing situation you’ll encounter.
Frequently Asked Questions
What’s the strongest knot for tying two fishing lines together?
The Blood Knot typically provides the highest strength retention (up to 95%) when joining lines of similar diameter, while the Double Uni Knot offers the best all-around strength and versatility for different line types.
Can I tie braid directly to fluorocarbon with these knots?
Yes, the Alberto, Albright, and Double Uni knots all work excellently for connecting braid to fluorocarbon. The Alberto is particularly popular among tournament anglers for this combination.
Which knot is easiest for beginners to learn?
The Surgeon’s Knot is the simplest to learn and tie, making it perfect for beginners or emergency situations. The Double Uni Knot is also beginner-friendly and more versatile.
How do I know if my knot is tied correctly?
A properly tied knot should tighten smoothly without binding, maintain its intended shape, and pass a firm pull test. Tag ends should be trimmed to about 1/8 inch for security.
Should I use different knots for saltwater versus freshwater fishing?
The same knots work in both environments, but saltwater fishing often benefits from stronger connections like the Alberto or Albright knots due to larger, more powerful fish and the corrosive effects of salt water.