
Putting fishing line on a spinning reel might seem intimidating to beginners, but it’s actually one of the most fundamental skills every angler needs to master. Whether you’re setting up your first reel or replacing old line, doing it correctly will save you countless headaches on the water. A properly spooled reel casts farther, prevents tangles, and gives you the best chance at landing that fish of a lifetime.
Before diving into the spooling process, it’s worth understanding the different types of fishing equipment available. Our comprehensive guide to fishing basics covers essential equipment selection, while experienced anglers might want to explore our bass fishing techniques to maximize their success with properly spooled reels.
This comprehensive guide will walk you through the entire process, from gathering materials to avoiding common mistakes that even experienced anglers sometimes make. By the end of this article, you’ll have the confidence and knowledge to spool your spinning reel like a professional angler.
What You’ll Need
Before starting, gather these essential items:
- Spinning reel (clean and in good working condition)
- Fresh fishing line (monofilament, fluorocarbon, or braided)
- Sharp scissors or line cutters
- Pencil or screwdriver (to support the line spool)
- Damp cloth (for cleaning)
- Optional: Line spooling station or helping hands
- Optional: Electrical tape (especially useful for braided line)
Understanding Your Spinning Reel
A spinning reel consists of several key components that affect the spooling process. The spool is where your line will be stored, while the bail is the wire arm that guides the line onto the spool during retrieval. The drag system controls how much resistance a fish feels when pulling line, and proper adjustment is crucial for successful fishing.
Modern spinning reels are designed to make spooling relatively straightforward, but understanding these components helps you troubleshoot any issues that might arise during the process.
Step 1: Prepare Your Reel
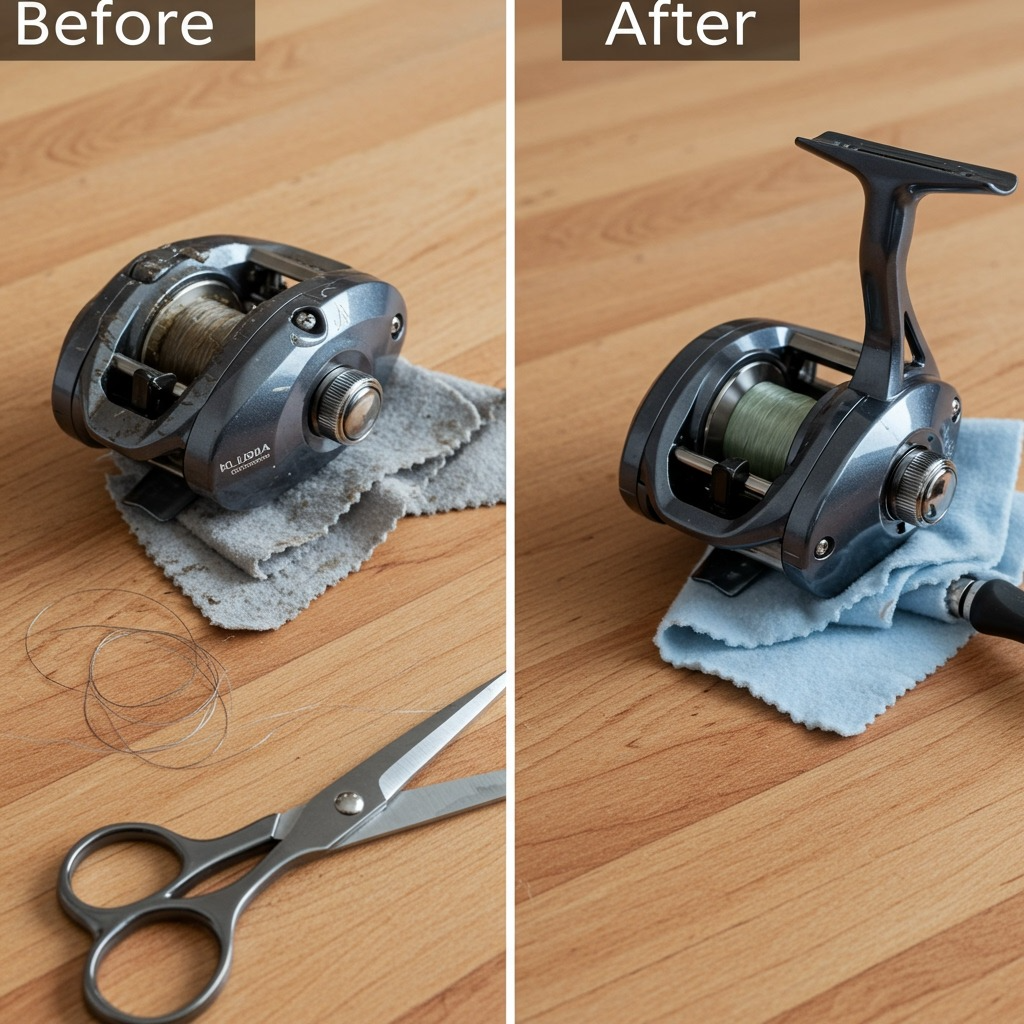
Remove the old line completely using scissors or line cutters. Don’t leave any remnants on the spool, as they can cause bumps and uneven winding that will affect your casting performance and line management.
Clean the spool thoroughly with a damp cloth to remove any dirt, debris, or residue from the old line. A clean spool ensures smooth line flow and better performance throughout your fishing session.
Check your reel’s line capacity, which is usually printed on the side of the spool (e.g., “12lb/200yds” means 200 yards of 12-pound test line). This information is crucial for determining how much line to add.
Step 2: Choose the Right Line
Select the line appropriate for your fishing needs and target species:
Monofilament: Best for beginners, affordable, forgiving, with good stretch properties that help absorb shock during fights with fish. It’s visible to fish but offers excellent knot strength and is easy to handle.
Fluorocarbon: Nearly invisible underwater due to its refractive index matching water, excellent for clear water conditions and spooky fish. It’s stiffer than mono and has less stretch, providing better sensitivity.
Braided: Thinner diameter allows more line capacity, no stretch provides excellent sensitivity and hook-setting power. However, it’s visible to fish and can be challenging for beginners to handle.
Match line weight to your rod’s specifications (printed near the handle) and the fish species you’re targeting. Using a line that’s too heavy or too light for your rod can compromise performance and potentially damage your equipment.
Step 3: Attach the Line to the Reel
Open the bail (the wire arm that guides the line onto the spool) by flipping it up. This allows the line to feed freely during the initial attachment process.
Thread the line end through the rod guides, starting from the tip and working down to the reel. This ensures proper line flow when casting and helps maintain correct orientation throughout the spooling process.
Tie the line to the reel spool using an arbor knot, which is specifically designed for this application:
- Wrap the line around the spool once
- Tie an overhand knot around the main line.
- Tie another overhand knot at the tag end.
- Pull tight against the spool and trim excess.
Alternative method: Some anglers prefer taping the line end to the spool for easier attachment, especially when using slippery braided lines that might slip during initial winding.
Step 4: Position the Line Spool Correctly
This step is crucial for preventing line twist, which is the most common problem when spooling spinning reels:
Place the manufacturer’s spool flat on the ground with the label facing up. This is typically the correct orientation, but always verify by testing.
Check rotation direction by pulling the line off the spool and observing which way it naturally wants to come off. The line should come off the manufacturer’s spool in the same direction your reel rotates when you turn the handle (typically counterclockwise).
Support the spool by threading a pencil through the center hole and having someone hold both ends, or use a commercial line spooling station. Proper support prevents the spool from moving around during the spooling process.
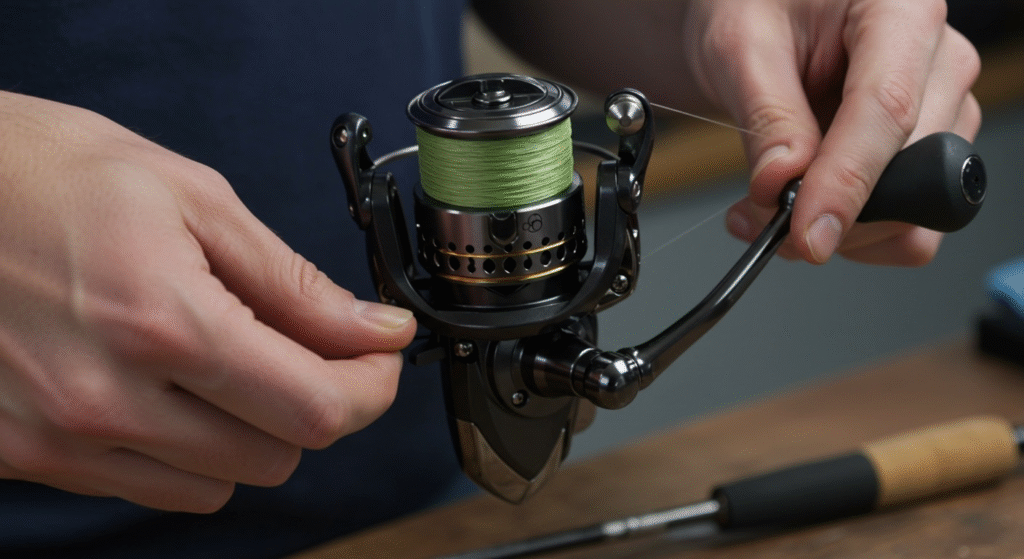
Step 5: Fill the Reel
Close the bail to engage the line pickup mechanism that will guide the line evenly onto the spool.
Apply light but consistent tension by pinching the line between your thumb and forefinger about 12 inches above the reel. This prevents loose coils and ensures tight, even wrapping that will perform better during casting.
Turn the reel handle slowly and steadily while maintaining tension. Don’t rush this process—smooth, consistent winding is key to achieving proper line lay and preventing future problems.
Watch for proper line distribution across the spool. Quality spinning reels have mechanisms that distribute line evenly, but you should still monitor to ensure no high or low spots develop.
Stop when the line is within 1/8 inch of the spool’s edge. This is the optimal fill level that maximizes casting distance while preventing loose coils that cause tangles.
For more advanced fishing techniques that benefit from properly spooled reels, check out our guide on surf fishing, which covers long-distance casting techniques.
Step 6: Final Steps and Testing
Cut the line, leaving enough length to tie on your tackle—typically 6-12 inches depending on your preferred knots and leader setup.
Test the setup by pulling the line off the reel to ensure it flows smoothly without twisting. If you notice spiraling or coiling, you may need to re-spool with the correct orientation.
Secure unused line on the manufacturer’s spool with tape for storage. Proper storage prevents the unused portion from unraveling and maintains its condition for future use.
Understanding Line Twist and Prevention
Line twist is the most common problem when spooling spinning reels, and understanding its causes helps prevent it:
Memory effect: All fishing lines develop memory from being wound on spools for extended periods. This natural coiling must be respected during spooling to prevent twist.
Incorrect orientation: If the line comes off the manufacturer’s spool in the opposite direction from how it goes onto your reel, every turn of the handle adds twist.
Testing method: After spooling 15-20 turns, let several feet of line hang free from your rod tip. If it spirals or coils, flip the manufacturer’s spool over and start again.
Common Mistakes to Avoid
Overfilling or Underfilling
The Goldilocks principle applies here—you want just the right amount. Too many lines create loose coils that tangle during casting and can cause the dreaded “wind knot.” Too little reduces casting distance significantly and makes retrieval more difficult.
Ignoring Line Direction
Line twist is the enemy of smooth casting and can ruin an entire fishing trip. Always ensure the line comes off the manufacturer’s spool in the same direction it goes onto your reel. This might seem minor, but it’s the difference between a reel that performs flawlessly and one that constantly tangles.
Insufficient Tension
Loose line wrapping creates problems later when casting or fighting fish. The line can dig into itself under pressure, causing binding and potential break-offs during crucial moments.
Wrong Drag Setting
Set your drag before fishing, not after hooking a fish. It should be tight enough for solid hook sets but loose enough to let fish run when needed. A good rule of thumb is 25-30% of your line’s breaking strength.
Not Manually Closing the Bail
Always close the bail by hand rather than starting to reel with it open. This prevents loose line from wrapping around the rotor or getting caught in the mechanism, which can cause immediate tangles.
Advanced Techniques and Pro Tips
Using Backing Line
When spooling with expensive braided line, consider using backing line. Put 50-100 yards of cheap monofilament on first, then tie on your braid using a double uni-knot or Albright knot. This saves money and provides a foundation for the main line while ensuring you have enough line capacity for long runs.
Wetting Monofilament and Fluorocarbon
Wet these lines while spooling to reduce friction and memory. This technique, used by professional anglers, helps the line lay better and cast smoothly while reducing the initial stiffness that can cause problems.
Checking for Twist Periodically
Stop every 50 yards or so and let a few feet of line hang freely from your rod tip. If it spins or coils, you’re adding twist and need to adjust your technique immediately rather than continuing and making the problem worse.
Temperature Considerations
Spool line at moderate temperatures when possible. Very cold conditions make the line stiff and difficult to manage, while very hot conditions can affect line memory and handling characteristics.
Line Types and Special Considerations
Spooling Braided Line
Braided line presents unique challenges due to its slippery nature:
Use backing: Most braided lines are slippery enough to slip on bare aluminum spools. Use monofilament backing or apply a small piece of tape to the spool before starting.
Maintain extra tension: Braided line requires more tension during spooling to lay properly. Its thin diameter and slick surface mean loose winding creates more problems than with other line types.
Watch for digging: Braid can dig into itself under pressure more easily than mono or fluoro. Ensure even, tight winding throughout the spooling process.
Fluorocarbon Challenges
Fluorocarbon has unique characteristics that affect spooling:
Stiffness management: Fluorocarbon has more memory than monofilament and can be stiffer, especially in cold weather. Consider leaving spooled reels in warm conditions before fishing to reduce memory effects.
Careful handling: This line type can be more brittle than monofilament, requiring gentle handling during spooling to prevent damage.
Proper tension: Use consistent but not excessive tension, as fluorocarbon can develop flat spots or kinks if handled roughly.
Monofilament Tips
This remains the most forgiving line type for beginners:
Stretch benefits: The natural stretch helps with hook sets and provides cushioning during fights with fish, making it very forgiving of technique errors.
Easy handling: Monofilament is generally the easiest to spool and handle, making it ideal for those learning proper techniques.
Cost effectiveness: Its relatively low cost allows beginners to practice spooling techniques without significant expense.
Maintenance and Storage
Store spooled reels in a cool, dry place away from direct sunlight. UV rays deteriorate fishing line over time, reducing its strength and reliability. Many anglers don’t realize that even small amounts of UV exposure can significantly weaken line.
Replace line regularly—at least once per season for frequent anglers, or whenever you notice nicks, abrasion, or reduced strength. Line replacement is cheap insurance against losing fish due to equipment failure.
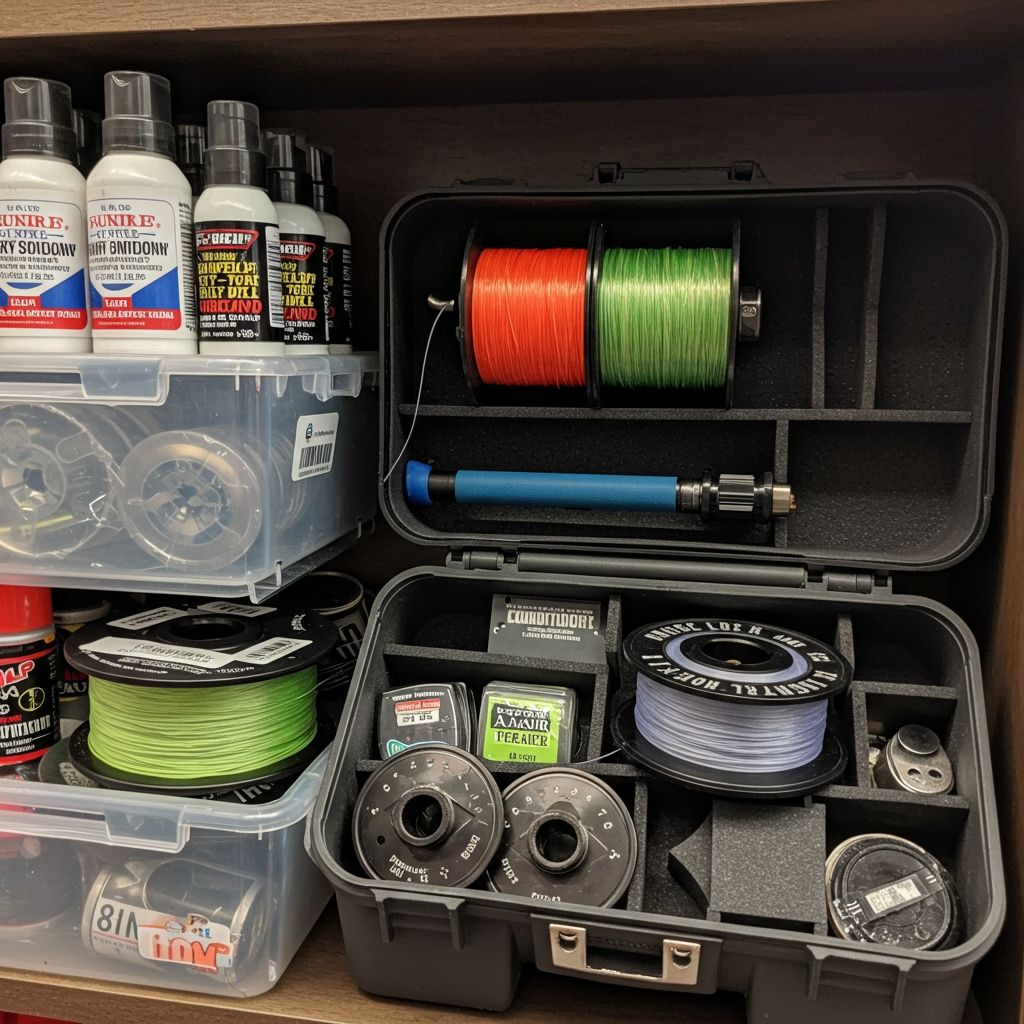
Keep spare spools loaded with different line types or weights for various fishing conditions. This allows quick changes based on conditions or target species without having to re-spool on the water.
Consider line conditioners and treatments that can extend line life and improve performance, especially in extreme conditions or when fishing in saltwater environments.
Specialized Equipment and Tools
Line Spooling Stations
Commercial spooling stations provide consistent tension and proper orientation, making the process easier and more reliable. While not essential, they’re valuable for anglers who frequently change lines or maintain multiple reels.
Electric Spoolers
Some tackle shops offer high-speed electric spooling services. While convenient, these can sometimes wind line too tightly or create excessive friction that weakens the line. Hand spooling often produces better results.
Tension Controls
Various devices help maintain consistent tension during spooling, from simple finger guards to sophisticated mechanical systems. Choose tools that match your spooling frequency and budget.
When to Respool
Replace your line when you notice:
Visible wear, nicks, or abrasion from contact with structure, rocks, or fish teeth. Even small nicks can propagate into failures under stress.
Reduced casting distance often indicates line degradation or improper spooling that’s affecting performance.
Increased line memory (coiling) shows that the line has been on the spool too long and is developing permanent set that affects casting.
Color fading is especially important with fluorocarbon and some specialty lines, where color changes indicate UV damage.
After catching several large fish as the stress can weaken the line even if no visible damage is apparent.
To complement your newly spooled reel, explore our fishing knots guide for essential knot-tying techniques that work best with different line types.
Troubleshooting Common Issues
Line Comes Off in Clumps
Usually caused by overfilling, insufficient tension during spooling, or loose winding. Re-spool with proper tension and correct fill level.
Reduced Casting Distance
Often indicates an underfilled spool, old or damaged line, or poor line lay. Check fill level and line condition, re-spooling if necessary.
Excessive Line Twist
Check that you spooled in the correct direction and consider using a swivel when fishing with lures that tend to spin.
Frequent Tangles
May indicate improper bail closure technique, damaged line guides, or poor spooling practices. Inspect your equipment and technique systematically.
Line Binding Under Pressure
Usually results from loose spooling that allows the line to dig into itself when tension is applied. This requires complete re-spooling with proper technique.
Properly spooling your spinning reel is a skill that pays dividends every time you go fishing. Take your time, follow these steps carefully, and don’t be afraid to start over if something doesn’t feel right. With practice, you’ll be able to spool a reel quickly and confidently, ensuring your tackle is always ready for that next fishing adventure.
Remember, a well-spooled reel is the foundation of successful fishing. Whether you’re targeting panfish in a local pond or chasing larger game fish in open water, having properly loaded line gives you the confidence to make that perfect cast and land the fish of your dreams.
The investment in time and attention to detail during spooling pays off with smoother casts, fewer tangles, and better fish-fighting performance. Every successful angler has mastered this fundamental skill, and now you can too.
For comprehensive fishing guidance and additional techniques, the Take Me Fishing website offers excellent resources for anglers of all skill levels, while Outdoor Life magazine provides expert insights on fishing techniques and equipment selection that complement proper reel spooling.
Frequently Asked Questions
How much line should I put on my spinning reel?
Fill the spool to within 1/8 inch of the edge. This provides optimal casting distance while preventing loose coils that cause tangles. Underfilling reduces casting performance, while overfilling creates management problems.
Which direction should I wind the line?
The line should come off the manufacturer’s spool in the same direction your reel rotates when you turn the handle. Place the spool flat with the label up and check the natural direction the line wants to come off by pulling some line and observing its behavior.
How often should I replace my fishing line?
For frequent anglers, replace line at least once per season or after 30-40 fishing trips. Casual fishers can wait until they notice visible wear, reduced performance, or after a year of storage. Saltwater fishing requires more frequent replacement due to corrosive conditions.
Can I mix different types of line on the same reel?
Yes, using monofilament backing under braided line is common and cost-effective. Connect them with a strong knot, like a double uni-knot or Albright knot. This technique saves money while providing adequate line capacity for most fishing situations.
What’s the best line for beginners?
Monofilament is most forgiving for beginners due to its stretch, affordability, and ease of handling. It’s less likely to cause problems during spooling and fishing, making it ideal for learning proper techniques before advancing to more specialized line types.