
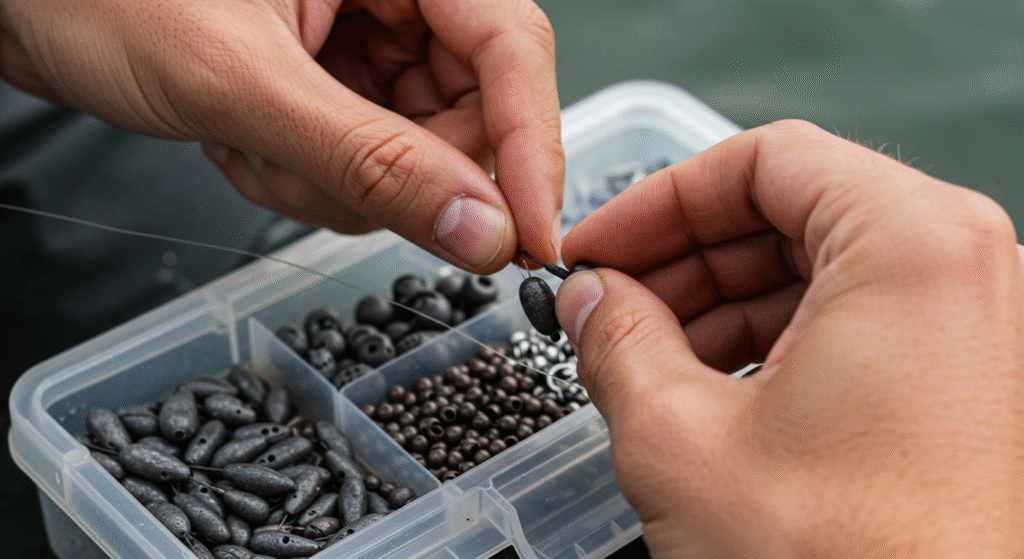
Last weekend, I watched a new angler struggle at the local fishing spot, casting his unweighted line repeatedly while it barely made it halfway to where the fish were feeding. “Why won’t this work?” he muttered in frustration. When I showed him how to put a weight on a fishing line properly, his next cast sailed smoothly to the target zone, and within minutes, he had his first fish. That moment perfectly illustrates why understanding proper weight placement is fundamental to fishing success.
Knowing how to put a weight on a fishing line is one of the most essential skills every angler needs to master. Without proper weight, your bait won’t reach the fish, your cast distance suffers, and your presentation looks unnatural. The good news is that adding weight to fishing line is straightforward once you understand the different methods and when to use each one.
This comprehensive guide covers every method for weighting your fishing line, from simple split shot to advanced sliding rigs. Whether you’re targeting shallow-water panfish or deep-dwelling catfish, understanding these techniques will dramatically improve your fishing success. For those looking to expand their fishing knowledge beyond weights, our How to Start Fishing guide covers all the fundamentals every angler should know.
Understanding Different Types of Fishing Weights
Split Shot Weights: The Versatile Choice
Split shot weights are the most popular option for beginners because they’re easy to use, adjustable, and work in most fishing situations. These small, round weights have a split down the middle that allows you to clamp them directly onto your fishing line.
When to use split shot:
- Light tackle fishing for trout, panfish, or bass
- Fine-tuning your rig when you need just a little more weight
- Float fishing, where precise weight distribution matters
- Situations where you might need to remove or adjust weight quickly
How to attach a split shot properly:
- Position the weight 12-18 inches above your hook for most applications
- Open the split with needle-nose pliers or your thumbnail.
- Place your fishing line in the groove.
- Gently squeeze the split shot closed with pliers (don’t over-tighten)
- Test the placement by gently pulling on the line.
Pro tip: Apply just enough pressure to hold the weight in place. Over-tightening can weaken or cut your line, while being too loose will allow the weight to slide during casting or while fighting fish.
Egg Sinkers: For Deep Water Success
Egg sinkers (also called slip sinkers) are oval-shaped weights with a hole through the center that allows your line to slide freely. This sliding action prevents fish from feeling the weight when they pick up your bait, making them ideal for cautious fish or deep-water fishing.
Best applications for egg sinkers:
- Bottom fishing for catfish, carp, or bass
- Deep water where you need substantial weight to reach the bottom
- Situations where fish need to take bait without feeling resistance
- Carolina rig setups for bass fishing
Setting up an egg sinker rig:
- Thread the egg sinker onto your main line
- Add a small swivel or stopper to prevent the weight from sliding on your hook.
- Tie on a leader (12-24 inches) to the swivel.
- Attach your hook to the end of the leader.
This setup allows fish to pick up and move your bait without immediately feeling the weight, resulting in more successful hook sets.
Bullet Weights: Texas Rig Essentials
Bullet weights are cone-shaped sinkers primarily used with soft plastic baits in Texas rig applications. Their streamlined shape helps reduce snags when fishing through cover like weeds, brush, or rocks.
Texas rig setup process:
- Thread a bullet weight onto your line (pointed end toward the rod)
- Tie on your hook (offset worm hooks work best)
- Thread your soft plastic bait onto the hook.
- Bury the hook point back into the bait for a weedless presentation.
Weight selection for bullet weights:
- 1/8 oz for shallow water (less than 6 feet)
- 1/4 oz for medium depths (6-12 feet)
- 3/8-1/2 oz for deep water or heavy cover
- 3/4 oz or heavier for fishing in strong current
For more advanced rigging techniques that build on these basics, our strongest fishing knot guide ensures your connections hold when fighting big fish.
Weight Placement Strategies for Different Fishing Situations
Above the Hook: Standard Bottom Fishing
Placing weight above your hook is the most common setup for bottom fishing and works well for most freshwater and saltwater applications. This positioning keeps your bait on or near the bottom while allowing natural movement.
Optimal distances from hook:
- 12-18 inches for most bottom fishing situations
- 6-12 inches for precise bottom contact in snaggy areas
- 18-36 inches when fish are spooky or in clear water
- 3-6 inches for ice fishing or when targeting bottom-hugging species
Advantages of this placement:
- Simple to set up and adjust
- Keeps bait at a consistent depth
- Works well with most bait types
- Easy for beginners to understand and implement
Sliding Weight Systems: Natural Presentation
Sliding weight rigs allow fish to pick up bait and move away without immediately feeling resistance from the sinker. This technique is crucial when targeting cautious fish or in areas with heavy fishing pressure.
Key components of a sliding rig:
- Main line with appropriate test strength for target species
- Sliding sinker (egg, barrel, or pyramid shape)
- Swivel or bead to stop the weight
- Leader line (usually lighter than main line)
- Hook appropriate for bait and target species.
When to use sliding weights:
- Fishing for catfish, carp, or other bottom feeders
- Clear water where fish can see your line
- Areas with heavy fishing pressure
- When using live bait that needs to move naturally
Multiple Weight Placement: Deep Water Techniques
Using multiple smaller weights instead of one large sinker can improve your bait presentation in certain situations, especially when fishing deep water or strong current.
Dropper loop technique:
- Create loops in your line at 12-inch intervals
- Attach small weights to each loop.
- This creates a stair-step effect that keeps bait suspended at various depths.
- Particularly effective for species that feed at different levels
Benefits of multiple weight systems:
- Covers more water column simultaneously
- Reduces the chance of getting stuck on the bottom structure
- Allows for different bait types at different depths
- More natural presentation in moving water
For detailed information about setting up various fishing rigs, our comprehensive How to Set Up a Fishing Rod guide covers complete tackle assembly from start to finish.
Choosing the Right Weight for Conditions
Water Depth Considerations
Matching weight to water depth ensures your bait reaches the target zone without being excessive or insufficient for the conditions.
Shallow water (0-6 feet):
- Use minimal weight to avoid spooking fish
- Split shot or small bullet weights (1/16-1/8 oz)
- Consider weighted hooks instead of separate sinkers.
- Focus on natural presentation over casting distance.
Medium depth (6-15 feet):
- Standard egg sinkers or larger split shot
- 1/4 to 3/8 oz weights handle most situations
- Balance between reaching the bottom and maintaining sensitivity
- Adjust based on current and wind conditions.
Deep water (15+ feet):
- Heavier weights are necessary to reach the bottom efficiently
- 1/2 oz to 2 oz, depending on current and depth
- Consider pyramid or bank sinkers that hold better.
- May need heavier tackle to feel bites at depth
Current and Wind Factors
Moving water requires heavier weights to maintain bait position and feel bites effectively. Still water allows lighter weights and more natural presentations.
Still water weight selection:
- Minimal weight to maintain natural bait movement
- Focus on precise depth control.
- Lighter weights improve bite detection.
- Consider environmental factors like thermal layers.
Current fishing adjustments:
- Increase weight until you can feel bottom contact
- Use pyramid or flat sinkers that resist rolling.
- Position upstream of the target area to account for drift
- Check the weight frequently as the current speed changes.
Wind compensation:
- Heavier weights help cut through surface chop
- Consider the wind’s effect on your line and bobber.
- Adjust the casting angle to work with the wind direction.
- Use weights that sink quickly to minimize wind drift.
Species-Specific Weight Selection
Different fish species have varying preferences for bait presentation speed, depth, and movement patterns that influence optimal weight selection.
Panfish (bluegill, crappie, perch):
- Light weights (split shot or 1/16 oz)
- Minimal hardware to avoid spooking
- Focus on natural bait movement.
- Often suspend baits rather than bottom fishing.
Bass fishing applications:
- Varied weights depending on technique and cover
- Texas rigs: 1/4-1/2 oz bullet weights
- Carolina rigs: 1/2-3/4 oz egg sinkers
- Finesse techniques: 1/8-1/4 oz
Catfish and carp:
- Heavy weights (1-4 oz) to anchor baits on the bottom
- Sliding sinker rigs for natural bait pickup
- Strong tackle to handle the weight and fish size
- Circle hooks are often paired with heavy sinkers.
Our early spring bass fishing guide provides detailed information about adjusting weight selection for seasonal bass fishing patterns.
Advanced Weighting Techniques
Carolina Rig Setup
The Carolina rig is an advanced technique that combines the benefits of weighted fishing with natural bait presentation, making it deadly effective for bass and other game fish.
Carolina rig components:
- Main line with sliding egg sinker (1/2-3/4 oz)
- A glass or plastic bead to protect the knot and create noise
- Barrel swivel to stop the sliding weight
- Leader line (18-36 inches) lighter than main line
- Offset worm hook with soft plastic bait.
Assembly process:
- Thread egg sinker onto main line (pointed end toward rod)
- Add a bead behind the sinker.
- Tie on the barrel swivel.
- Attach the leader to the other end of the swivel.
- Tie the hook to the leader end.
- Rig soft plastic bait Texas-style
Carolina rig advantages:
- Covers water quickly while maintaining bottom contact
- Separates weight from bait for natural presentation
- Effective in various depths and cover types
- Allows bait to move freely while keeping weight on the bottom
Drop Shot Rigging
Drop shot rigs suspend bait above the bottom at a precise distance, making them ideal for finicky fish or when targeting specific depth zones.
Drop shot setup:
- Tie a hook 18-24 inches from the line end using a Palomar knot
- Leave the tag end pointing down from the hook.
- Tie weight to tag end (1/4-3/8 oz drop shot weights)
- Hook soft plastic bait through the nose, leaving it to dangle naturally.
Drop shot benefits:
- Keeps bait in the strike zone regardless of bottom contour
- Minimal movement is required to attract fish.
- Works excellently in clear water
- Ideal for vertical presentations
Three-Way Swivel Rigs
Three-way rigs separate your weight and bait using a specialized swivel, creating natural presentations while maintaining good bottom contact.
Three-way rig construction:
- Tie the main line to one eye of the three-way swivel
- Attach a 6-12-inch dropper line with sinker to the second eye.
- Connect an 18-36-inch leader with a hook to the third eye.
- Use bank sinkers or pyramid weights for the best bottom holding.
When to use three-way rigs:
- Strong current situations where the weight must hold bottom
- When targeting specific depth while avoiding snags
- Drift fishing techniques
- Situations requiring precise bait placement
Weighted Hook Alternatives
Sometimes the best approach is to eliminate separate weights entirely by using hooks with built-in weight systems.
Weighted hook options:
- Jig heads with various weights and hook styles
- Aberdeen hooks with removable weights
- Weighted offset hooks for Texas-style rigging
- Weighted circle hooks for live bait fishing
Advantages of weighted hooks:
- Simplified rigging with fewer components
- Better balance and natural bait presentation
- Reduced line twist and tangles
- Easier to adjust weight by changing hooks
For comprehensive information about hook selection and rigging, our How to tie a hook on a fishing line guide covers essential knot-tying techniques for all these applications.
Common Mistakes and How to Avoid Them
Over-Weighting Your Line
Using too much weight is one of the most common mistakes that can ruin your fishing success. Excessive weight makes your presentation unnatural, reduces bite sensitivity, and can spook fish.
Signs you’re using too much weight:
- Bait sinks like a rock with no natural movement
- Can’t feel subtle bites through heavy sinker
- Frequent snags on the bottom structure
- Bait stays motionless instead of moving with the current.
Solutions for over-weighting:
- Start with minimal weight and add more only if needed
- Use the lightest weight that achieves your goals.
- Consider a split shot for fine-tuning instead of changing the entire sinker.
- Match weight to fishing conditions rather than using one standard size.
Improper Weight Placement
Weight placement dramatically affects how your bait behaves in the water and how fish respond to it.
Common placement errors:
- Too close to hook: Makes bait look unnatural and can interfere with hooksets
- Too far from the hook: Reduces casting accuracy and depth control.
- Wrong type for conditions: Using sliding weights when fixed weights work better, or vice versa
- Inadequate leader length: Doesn’t allow enough separation between weight and bait
Optimal placement guidelines:
- Most situations: 12-18 inches above the hook provides good balance
- Spooky fish: Increase distance to 24-36 inches
- Precise bottom contact: Reduce distance to 6-12 inches
- Multiple species: Experiment with different distances to find what works
Line Damage from Improper Installation
Incorrect weight attachment can weaken or damage your fishing line, leading to lost fish and frustration.
Avoiding line damage:
- Don’t over-tighten split shot weights
- Use proper pliers designed for fishing applications.
- Check the line regularly for nicks or wear near the weight attachments.
- Replace damaged line sections immediately.
- Consider using rubber-lined split shot to reduce line damage.
Ignoring Environmental Factors
Failing to adjust weight selection based on changing conditions leads to poor fishing results throughout the day.
Environmental factors to monitor:
- Water level changes that affect depth and current
- Wind conditions that influence casting and line control
- Temperature changes that affect fish behavior and metabolism
- Time of day influences that change fish feeding patterns
Adaptive strategies:
- Carry various weight sizes for changing conditions
- Monitor conditions continuously during fishing trips.
- Be willing to completely change techniques when conditions warrant
- Learn to read water and weather patterns that affect weight needs.
Specialized Applications and Advanced Tips
Ice Fishing Weight Considerations
Ice fishing requires specialized weighting techniques due to the vertical presentation and unique challenges of fishing through ice.
Ice fishing weight selection:
- Heavier weights (1/4-1/2 oz) to cut through the current under ice
- Tear-drop shaped jigs that flutter naturally
- Quick-sinking weights to reach fish in the strike zone fast
- Minimal hardware to avoid spooking fish in clear water
Ice fishing rigging tips:
- Use shorter leaders (6-12 inches) for better bite detection
- Consider glow-in-the-dark weights for low-light conditions under ice.
- Adjust weight frequently as fish change depths throughout the day.
- Carry multiple rod setups with different weights for varying conditions.
Saltwater Weight Adaptations
Saltwater fishing often requires heavier weights due to the tide, current, and the size of the target species.
Saltwater considerations:
- Corrosion-resistant weights (lead-free options preferred)
- Heavier weights (2-8 oz) for strong tidal currents
- Pyramid and bank sinkers for better bottom holding
- Sliding rigs for large fish that need to run with bait
Tide and current management:
- Increase the weight size during peak tide flow
- Use flat sinkers that resist rolling in the current.
- Position weights to work with the tide direction
- Monitor tide charts and adjust techniques accordingly.
Fly Fishing Weight Integration
Adding weight to fly fishing setups requires careful consideration to maintain proper casting mechanics and natural presentation.
Fly fishing weight options:
- Split shot placed 12-18 inches above the fly
- Weighted flies with built-in weight systems
- Sinking leaders that add weight without hardware
- Weighted fly line for deeper presentations
Maintaining casting performance:
- Add weight gradually to avoid disrupting casting rhythm
- Practice casting with weighted setups before fishing
- Adjust casting stroke to accommodate additional weight.
- Consider shorter, more powerful rods for weighted fly fishing.
Tournament and Competition Strategies
Competitive fishing often requires precise weight selection to maximize efficiency and adapt quickly to changing conditions.
Competition considerations:
- Pre-tournament practice to determine optimal weight for conditions
- Multiple setups with different weights are ready for quick changes
- Precision measurement of weight placement for consistency
- Quick-change systems, like snap swivels, are for rapid adjustments.
Efficiency maximization:
- Organize weights by size and type for quick selection
- Use consistent rigging techniques to reduce setup time.
- Practice weight changes until they become automatic.
- Monitor other anglers’ success and adapt weight selection accordingly.
For additional competitive fishing insights and advanced techniques, our fly fishing for bass guide covers specialized approaches that often require precise weight management.
Maintenance and Storage of Fishing Weights
Organizing Your Weight Collection
A well-organized tackle box makes selecting and using the right weight quick and efficient, improving your overall fishing experience.
Storage recommendations:
- Separate containers for different weight types and sizes
- Clear labeling of weight sizes for quick identification
- Rust prevention through proper storage in dry conditions
- Easy access organization that allows quick changes on the water
Weight inventory management:
- Regular inventory to replace lost or damaged weights
- Size variety covering your typical fishing conditions
- Quality over quantity – better to have fewer good weights than many poor ones
- Backup supplies for popular sizes you use frequently
Environmental Considerations
Traditional lead weights pose environmental concerns that responsible anglers should address through proper selection and disposal.
Environmentally friendly alternatives:
- Tungsten weights provide density without toxicity
- Steel weights offer affordable, non-toxic options.
- Bismuth weights provide performance similar to lead.
- Tin weights work well for lighter applications.
Proper disposal practices:
- Never discard weights in or near water bodies
- Recycle lead weights through appropriate facilities.
- Choose non-toxic options when available and practical.
- Report lost weights in sensitive areas where removal programs exist.
Weight Modification and Customization
Sometimes modifying existing weights provides better performance than buying new specialized options.
DIY modification techniques:
- Painting weights for visibility or camouflage
- Adding noise makers like beads or rattles
- Shaping weights for better holding power
- Combining weights for custom sizes
Safety considerations for modifications:
- Proper ventilation when working with lead
- Protective equipment, including gloves and eye protection
- Safe heating practices for melting or reshaping weights
- Proper disposal of modification materials and waste
For comprehensive tackle organization and maintenance tips, explore trusted resources, including West Marine’s fishing guides, Reel Coquina’s technical articles, and instructional videos that demonstrate proper techniques.
Understanding how to put a weight on a fishing line is fundamental to fishing success, but the real skill lies in selecting the right weight for specific conditions and target species. Whether you’re using simple split shot for panfish or complex Carolina rigs for bass, proper weight selection and placement can make the difference between a successful day and going home empty-handed.
Remember that weight placement is just one component of successful fishing. Combine these techniques with proper bait selection, appropriate tackle, and good water reading skills for the best results. Start with basic applications like split shot and egg sinkers, then gradually experiment with more advanced techniques as your skills and confidence develop.
The key to mastering fishing weights is experimentation and adaptation. What works in one situation may not work in another, so be willing to adjust your approach based on conditions, target species, and fishing results. With practice and patience, proper weight selection will become second nature, dramatically improving your fishing success across all species and conditions.

Frequently Asked Questions
How far should I place the weight from my hook?
For most fishing situations, place weights 12-18 inches above your hook. Increase this distance to 24-36 inches for spooky fish in clear water, or decrease to 6-12 inches when you need precise bottom contact in snaggy areas.
What’s the difference between split shot and egg sinkers?
Split shot clamps directly onto your line and stay in a fixed position, making them ideal for light tackle and precise presentations. Egg sinkers slide freely on your line and stop at a swivel, allowing fish to take bait without feeling weight resistance.
How do I know if I’m using too much weight?
Signs of over-weighting include your bait sinking unnaturally fast, inability to feel subtle bites, frequent bottom snags, and bait that doesn’t move naturally with the current. Start light and add weight only as needed.
Can I use multiple small weights instead of one large weight?
Yes, using multiple smaller weights can improve presentation by creating a more gradual sink rate and covering multiple depth zones. This technique works especially well in deep water or when targeting species that feed at different levels.
What’s the best weight for beginner anglers?
Split shot weights are ideal for beginners because they’re easy to attach and remove, allow for fine adjustments, and work well for most freshwater species. Start with a variety pack of sizes from BB to #1.