
Last summer, I watched my buddy Steve unload what looked like cooler soup—soggy sandwiches, waterlogged vegetables, and mysteriously flavored ice water that had once been perfectly good camping food. His frustrated expression as he dumped out another failed cooler attempt reminded me of my own early camping disasters. I learned the hard way that there’s a science to packing a cooler properly, and mastering it can make or break your outdoor adventures.
How to pack a cooler for camping isn’t just about throwing ice and food together—it’s about creating a strategic cooling system that keeps your food fresh, organized, and safe throughout your entire trip. Whether you’re planning a weekend getaway or an extended wilderness expedition, proper cooler packing techniques will transform your camping meals from soggy disappointments into delicious outdoor feasts.
Understanding cooler dynamics connects directly to broader camping skills and food safety practices. Before heading out, make sure you have all the necessary permits and understand why you need a fishing license if you’re planning to catch dinner during your camping adventure. According to the USDA Food Safety and Inspection Service, proper cooler management is crucial for preventing foodborne illness during outdoor activities.
Choosing the Right Cooler and Pre-Trip Preparation
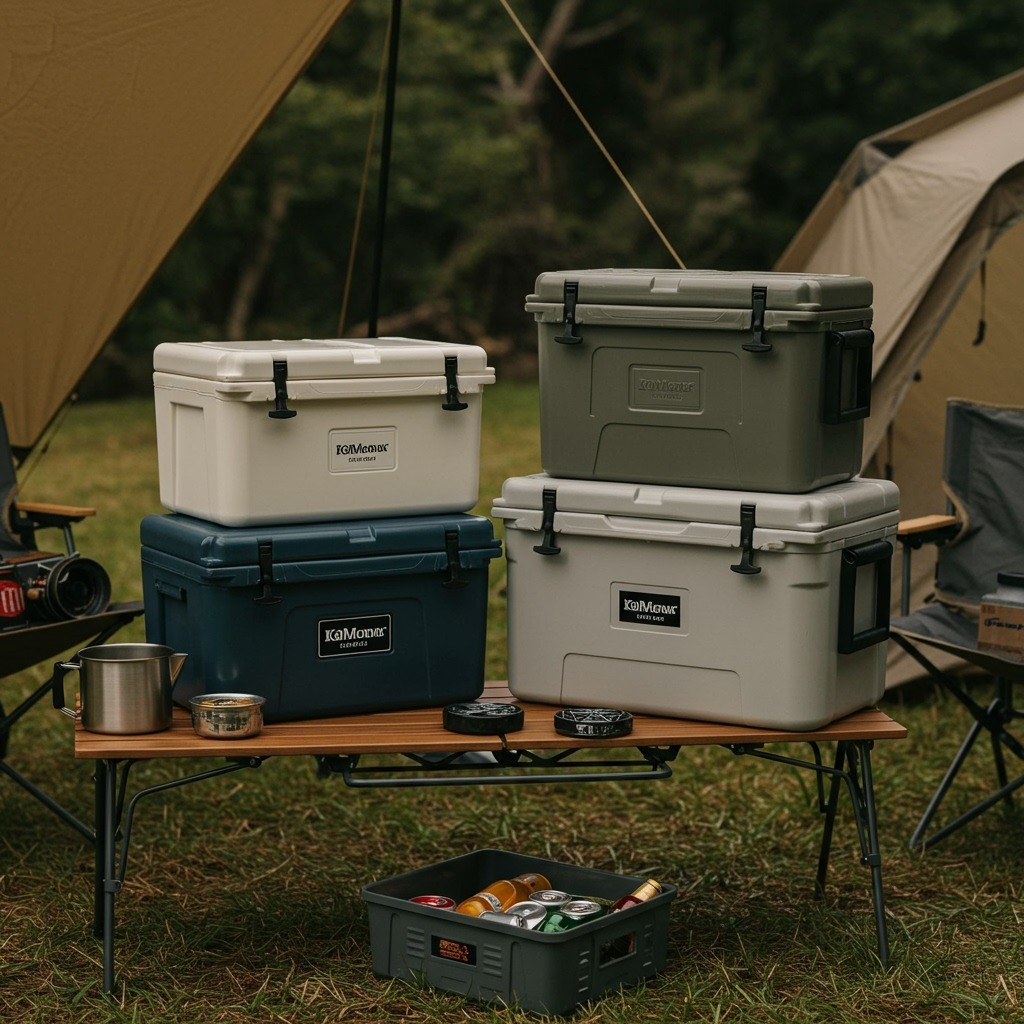
Before learning packing techniques, you need the right equipment for the job. Not all coolers are created equal, and your choice will significantly impact how well your food stays cold and organized throughout your trip.
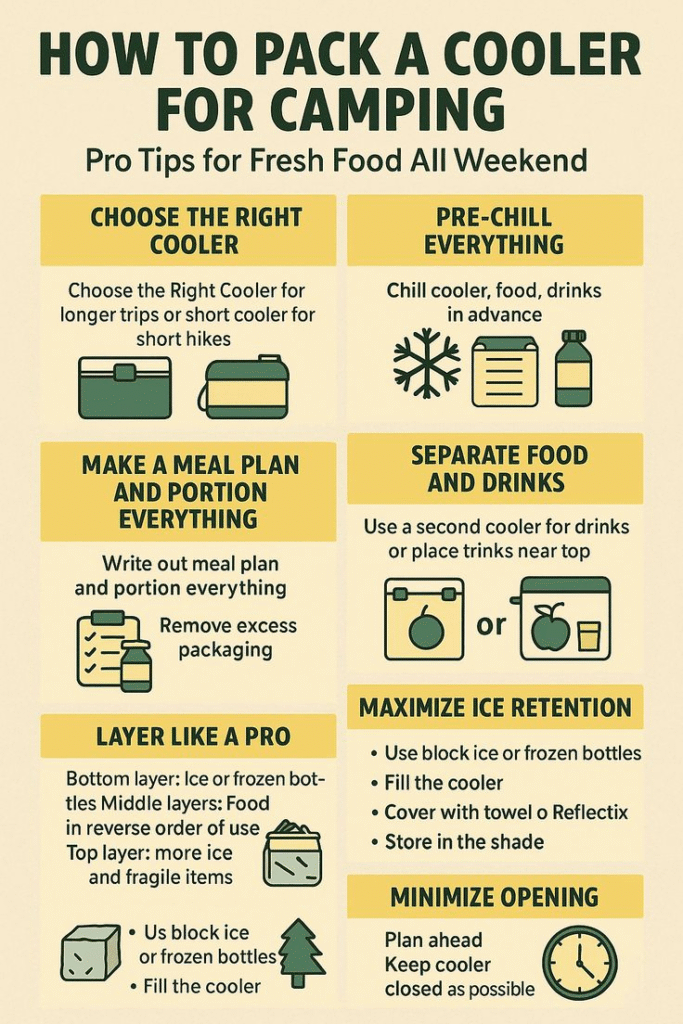
A quality camping cooler should have thick insulating walls that keep cold in and heat out, a tight-sealing lid that prevents air exchange, hard-sided construction for durability and efficiency, and an appropriate size for your group and trip duration. Soft-sided coolers with zipper closures simply won’t maintain temperature control for multi-day camping trips.
Size considerations matter more than you might think. A cooler that’s too large will have excess air space that reduces efficiency, while one that’s too small won’t hold adequate ice for proper food preservation. The general rule is one cooler per 2-3 people for weekend trips, with larger or additional coolers for longer expeditions. A 45-50-quart cooler typically serves 2-4 people for 2-3 days when properly packed.
Pre-Trip Preparation: The Foundation of Success
Successful cooler packing begins long before you reach the campground. Pre-trip preparation determines whether your cooler performs optimally or struggles from the start. This crucial step separates experienced campers from frustrated beginners.
Pre-chill your cooler by adding a bag of sacrificial ice 2-4 hours before packing. This ice will melt as it cools the insulation, but you’ll discard it before loading your actual food and ice. The investment in this extra ice pays dividends in extended cooling performance.
Food preparation dramatically improves cooler efficiency. Pre-chill everything possible—cold drinks from the refrigerator perform better than room-temperature beverages. Frozen meats not only stay cold longer but also act as additional cooling elements. Organize by meal and access frequency, with items needed first being easily accessible without disturbing the entire cooler contents.
Transfer items to appropriate containers, replacing flimsy store packaging with sturdy, leak-proof containers. Pre-cut vegetables and prepare ingredients when possible to reduce prep work at camp and minimize container sizes needed in the cooler.
For extended camping trips that include fishing opportunities, understanding how to use a fishing rod properly can provide fresh meals that reduce cooler dependency.
The Science of Ice and Strategic Layering
Understanding different ice types and their applications transforms cooler performance from mediocre to exceptional. The type of ice you choose significantly impacts how long your food stays cold and how organized your cooler remains.
Traditional ice cubes provide excellent contact with food and beverages, cooling items quickly and filling gaps effectively. However, they melt rapidly due to their high surface area and create the dreaded cooler soup. Block ice melts much more slowly than cubes due to reduced surface area relative to volume. A solid block can last 2-3 times longer than the same weight in cubes.
Frozen water bottles create reusable ice blocks that offer significant advantages over traditional ice. They provide cooling without creating standing water and serve dual purposes as drinking water when they melt. Use various bottle sizes—gallon jugs for main cooling power, two-liter bottles for versatile sizing, and standard water bottles for filling gaps.
Layer-by-Layer Packing Strategy
Proper cooler packing follows a strategic layering system that maximizes cooling efficiency while maintaining organization. Think of your cooler as a temperature-controlled filing system where placement determines both performance and accessibility.
Bottom Layer: Start with your primary cooling source at the bottom. Block ice or frozen water bottles create the coldest zone where you’ll place frozen meats, items for later in the trip, anything requiring freezer temperatures, and your main ice supply.
Middle Layer: The middle section maintains consistent cold temperatures while providing reasonable access for daily needs. This zone handles dairy products and eggs, fresh vegetables and fruits, leftovers and prepared meals, and condiments and sauces.
Top Layer: Reserve the top layer for items you’ll access regularly throughout the day. Quick access reduces the time your cooler stays open, preserving cold temperatures for everything below. Include beverages and snacks, items needed for immediate meals, frequently used condiments, and first-day perishables.
Fill air gaps strategically with ice cubes, small ice packs, or additional frozen items. Every air pocket represents a space where warm air can enter and cold air can escape. Use cubed ice around oddly-shaped items, stuff small ice packs in corners and edges, add frozen water bottles between larger items, and pack extra towels to fill remaining spaces.
Many successful campers enjoy combining their cooler planning with other camp meal preparation. Our guide on best camping snacks provides excellent options that pack efficiently and provide sustained energy for outdoor adventures.

Organization Systems and Temperature Management
Beyond temperature management, a smart organization prevents the frustrating cooler archaeology that plagues many camping trips. Effective organization systems save time, reduce cooler opening frequency, and maintain food quality throughout your adventure.
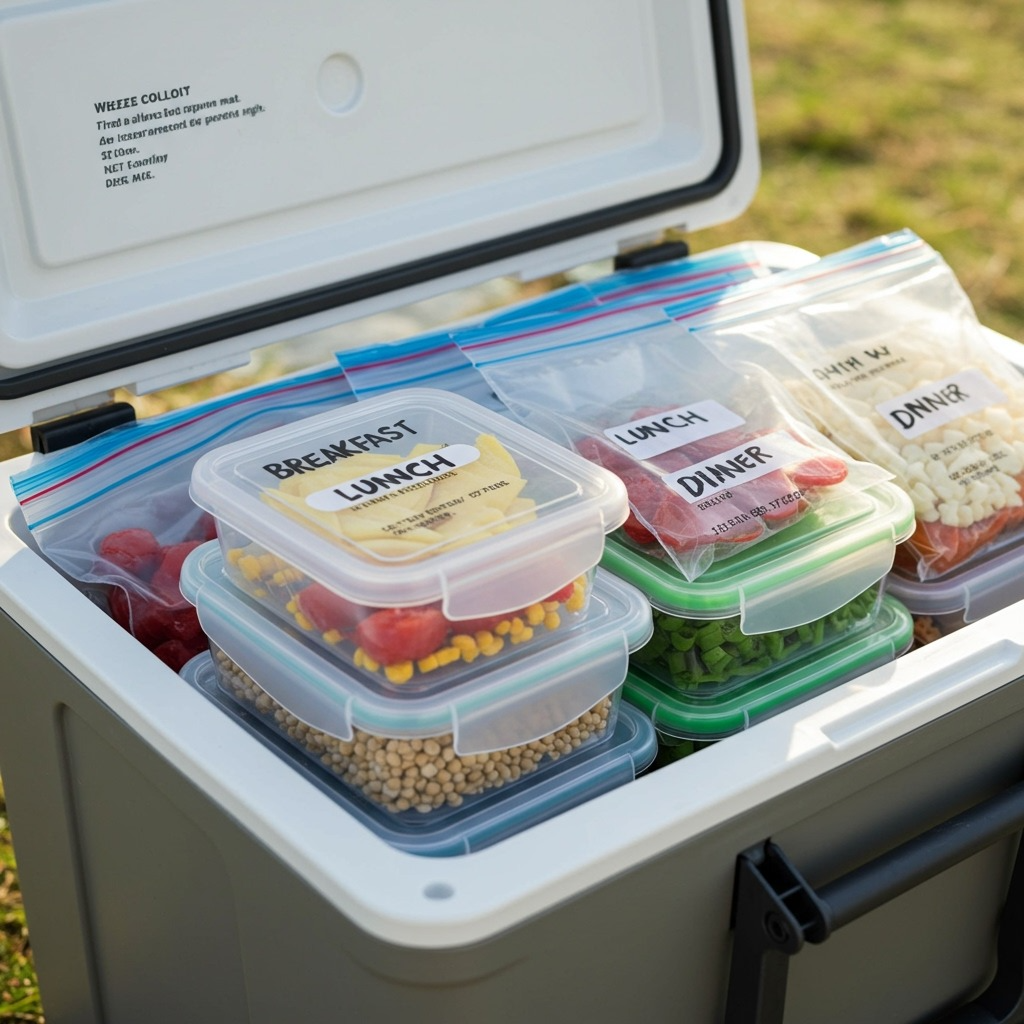
Invest in a set of clear, stackable containers that fit your cooler dimensions. Restaurant supply stores offer commercial-grade containers at reasonable prices that outperform typical household storage options. Choose containers with clear sides for easy identification, secure leak-proof lids, a stackable design for efficiency, and appropriate sizes for typical food portions.
Heavy-duty reusable shopping bags create flexible organization zones within your cooler. Use different colored bags or add labels to identify contents quickly. One bag might contain breakfast items, another lunch components, and a third dinner ingredients. This bag system allows quick removal of entire meal components and reduces time with the cooler open.
Organize your cooler by meals rather than food types. Pack ingredients for specific meals together so you can grab everything needed without extensive searching. This approach works especially well for prepared or partially prepared meals and provides faster meal preparation with reduced cooler access time.
Temperature Management and Safety
Proper temperature management goes beyond keeping food cold—it’s essential for preventing foodborne illness in outdoor environments. Understanding food safety temperatures and monitoring techniques protects your health while maximizing food quality.
Critical temperature zones include the freezer zone (0°F or below) required for frozen meats and long-term storage, the refrigerator zone (40°F or below) essential for dairy and fresh meats, and the danger zone (40°F-140°F) where bacteria multiply rapidly and foods shouldn’t remain for more than 2 hours.
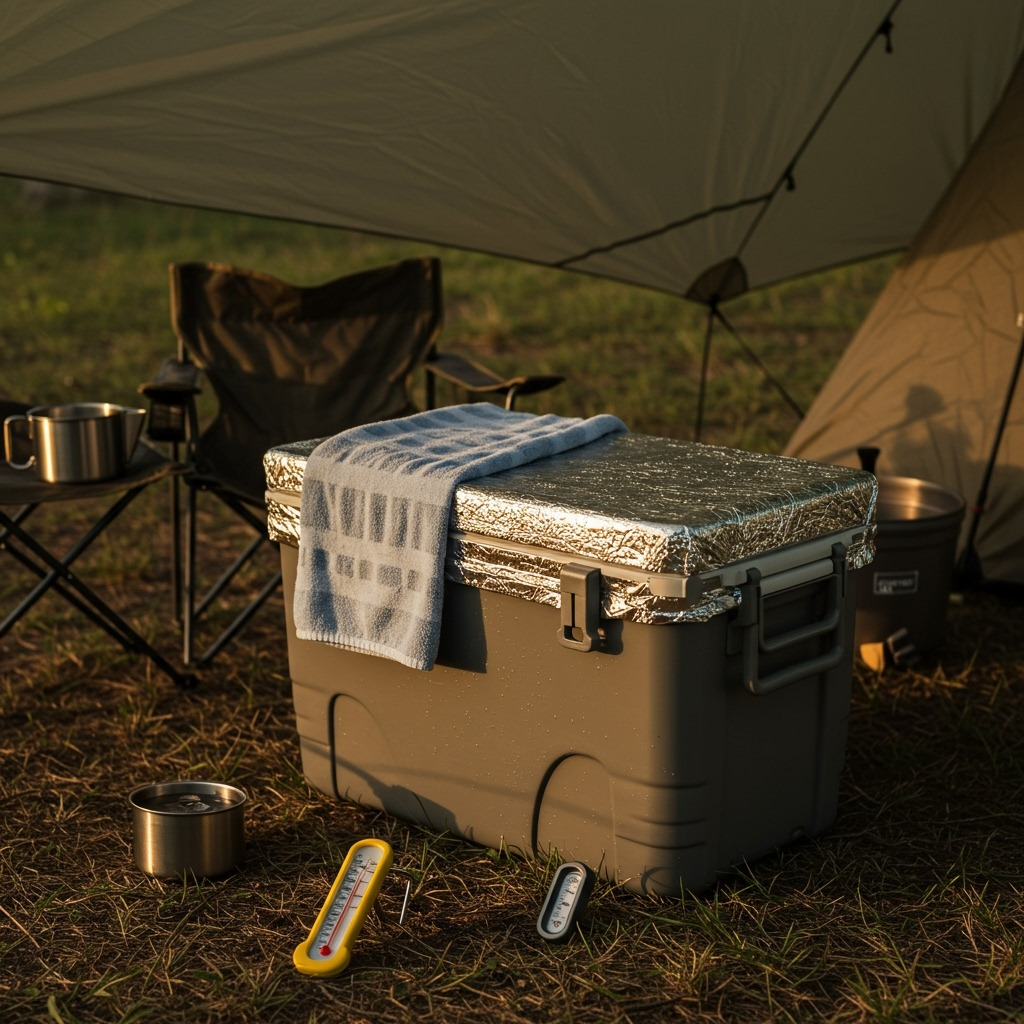
A simple cooler thermometer removes guesswork from food safety decisions. Place the thermometer probe in the warmest part of your cooler (usually near the top) to monitor worst-case temperatures. Use the first-in, first-out principle, separate raw and ready-to-eat foods, trust your senses when evaluating food quality, and pack perishables strategically based on when you’ll use them.
According to the National Park Service, proper food storage and temperature control are essential for both safety and wildlife protection during camping activities.
Advanced Techniques and Troubleshooting
Experienced campers employ advanced techniques that can extend cooling performance by days rather than hours. These professional-grade strategies transform ordinary coolers into highly efficient cooling systems suitable for extended wilderness adventures.
External insulation enhancement includes creating reflective covers using emergency blankets, using the wet towel technique for evaporative cooling in hot climates, and managing shade positioning throughout the day. These methods can add 12-24 hours of cooling performance to any cooler.
Serious camping operations often employ multiple cooler systems with different functions: a food cooler opened only at mealtimes that maintains the lowest temperatures, a beverage cooler accessed frequently throughout the day, and an ice reserve cooler sealed until needed. This system dramatically extends food safety margins on long trips.
Environmental cooling strategies include utilizing natural refrigeration from cold streams or lakes, underground cooling by digging cool-box pits in shaded ground, and night cooling by taking advantage of cool nighttime temperatures to exchange warm air for cool air when the ambient temperature drops significantly.
Common Problems and Solutions
Even experienced campers encounter cooler problems, but knowing how to diagnose and solve issues quickly prevents food loss and trip disappointment. Common cooler problems usually have straightforward solutions when you understand the underlying causes.
Rapid ice melt issues typically stem from poor pre-chilling, excess air space, frequent opening, inadequate insulation, or hot storage locations. Solutions include thorough pre-chilling, tighter packing with less air, limited opening frequency, external insulation addition, and relocating to shade.
Organization breakdown occurs from poor initial organization, items shifting during transport, or a lack of systematic packing. Implement container or bag systems, secure items against shifting, and maintain packing consistency across trips.
Temperature control failures result from seal failure, insulation breakdown, insufficient ice, or excessive ambient heat. Check and repair seals, add external insulation, increase ice ratios, and relocate coolers when necessary.
Most cooling problems stem from inadequate preparation or poor understanding of cooling principles. Invest time in a proper setup rather than dealing with problems later. Test new equipment at home before important trips, develop and refine your packing system through experience, monitor performance and adjust techniques based on results, and learn from failures rather than repeating mistakes.
For those planning camping trips that include winter activities, our guide on how to stay warm while camping provides essential techniques for cold-weather outdoor adventures where cooler performance differs significantly from summer conditions.
FAQ Section
How much ice should I use in my cooler for camping?
Use a 2:1 ratio of ice to food by volume. This means if your food takes up one-third of the cooler, ice should fill two-thirds. For extended trips, consider even higher ice ratios. Block ice or frozen water bottles last longer than cubed ice and create less mess.
Should I drain water from melted ice in my cooler?
No, don’t drain melted ice water until you can replace it with fresh ice. The cold water helps insulate the remaining ice and maintains lower temperatures. Only drain if the water level threatens food safety or you’re adding fresh ice.
How long will food stay cold in a properly packed cooler?
With quality equipment and proper packing, expect 3-5 days of safe food storage. Premium coolers with optimal conditions can extend this to 7+ days. Factors include ambient temperature, cooler quality, packing technique, and opening frequency.
What’s the best way to organize food in a camping cooler?
Pack by layers: frozen items and main ice on the bottom, daily perishables in the middle, frequently accessed items on top. Use waterproof containers or bags to group meals together. Keep raw meats separate from ready-to-eat foods for safety.
Can I use regular ice from the grocery store for camping?
Yes, but choose your ice type strategically. Block ice lasts longer for extended trips, while cubed ice provides quick cooling and fills gaps well. Frozen water bottles offer the best combination of longevity and convenience, plus they become drinking water as they melt.