
Three miles into my first backpacking trip, I was already questioning my life choices. My shoulders screamed, my back ached, and every step felt like I was carrying a bag of concrete instead of camping gear. Meanwhile, my hiking partner Sarah glided up the trail like she was carrying nothing more than a day pack. Same gear, same trail—completely different experience.
The difference? Sarah knew how to pack a backpack properly, and I had no clue.
That painful lesson taught me that backpacking success starts long before you hit the trail. How you pack your backpack can make the difference between an enjoyable adventure and a miserable slog. Whether you’re planning your first overnight trip or looking to improve your packing game, mastering these techniques will transform your backpacking experience.
The Science Behind Smart Packing
Your backpack isn’t just a storage container—it’s a precision weight distribution system. Understanding how weight affects your body mechanics is the first step to comfortable backpacking.
When you pack randomly, heavy items create torque that pulls you backward, forcing your body to compensate by leaning forward. This unnatural posture leads to fatigue, pain, and potential injury. Smart packing keeps your center of gravity balanced and allows you to maintain natural posture even with 30+ pounds on your back.
Key Packing Principles
Weight Distribution Rules:
- Heavy items belong close to your back and centered vertically
- Weight should be evenly balanced left to right.
- Dense items work better than bulky ones for core placement.
Accessibility Strategy:
- Frequently needed items go in easily reached locations.
- Camp-only gear can be buried deep in the pack.
- Emergency items need quick access without unpacking everything.
The Three-Zone Packing System
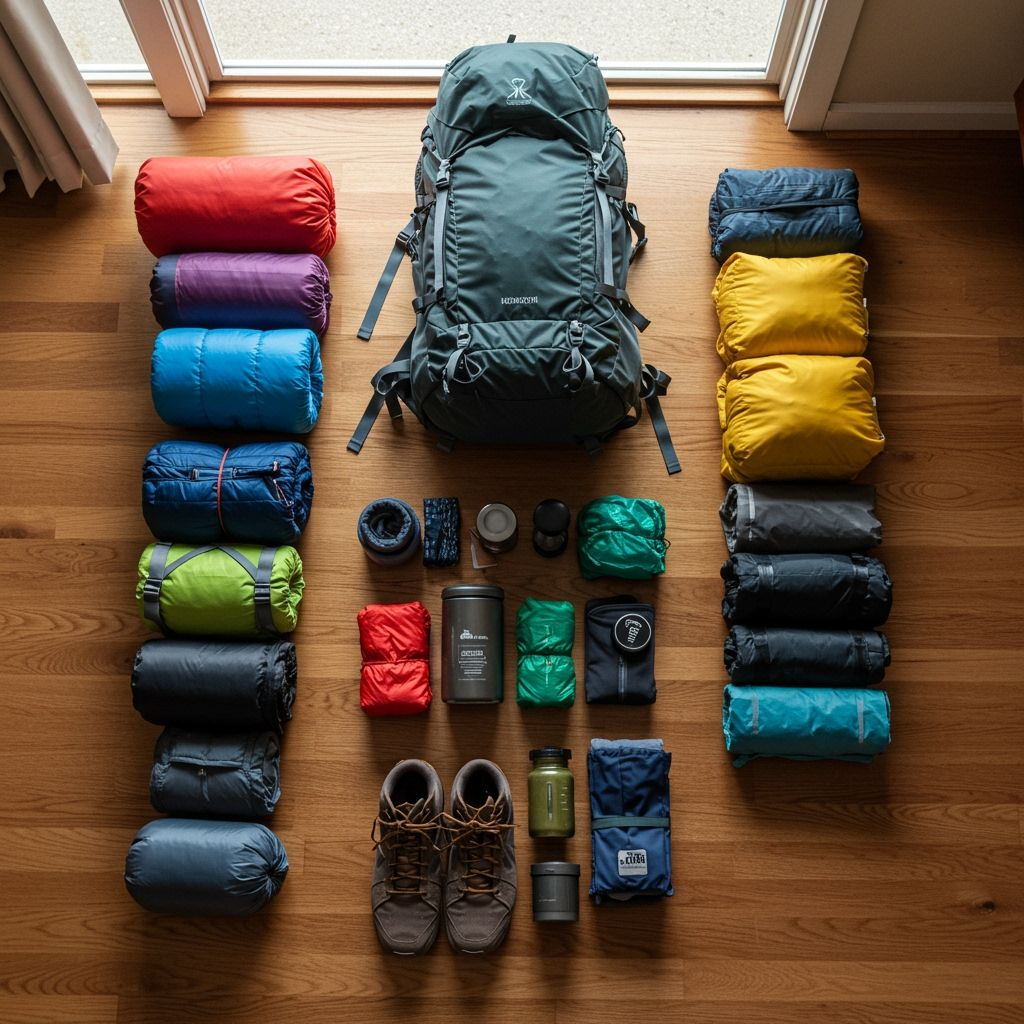
Most experienced backpackers use a three-zone approach that organizes gear by weight, bulk, and frequency of use. This system creates a stable, comfortable load while keeping essentials accessible.
Bottom Zone: The Foundation
This zone is for bulky, lightweight gear you won’t need until camp. Think of it as your pack’s foundation—soft, compressible items that create a stable base and cushion your back.
Bottom Zone Essentials:
Sleeping System:
- Sleeping bag (compressed in a stuff sack or pack’s bottom compartment)
- Sleeping pad (especially ultralight models that pack tiny)
- Pillow or inflatable pillow substitute
Clothing:
- Sleep clothes (base layers, camp clothes, extra socks)
- Camp shoes (lightweight booties or sandals)
- Extra underwear and socks
Pro Packing Tip: Your sleeping bag acts as internal shock absorption. A well-compressed sleeping bag makes the perfect foundation that won’t shift during the hike.
Core Zone: The Heavy Hitters
The middle section carries your heaviest, densest gear positioned close to your back. This placement creates a stable center of gravity and prevents the pack from pulling you backward.
Core Zwe one Items:
Food and Cooking:
- Main meals (not trail snacks)
- Cooking gear (stove, pot, fuel)
- Bear canister (if required, packed with food and scented items)
Water Supply:
- Water reservoir or bottles
- Water treatment supplies
- Emergency water reserves
Weight Distribution Strategy: Keep heavy items as close to your spine as possible. Use soft items like your tent body or extra clothing to wrap around hard objects and prevent shifting.
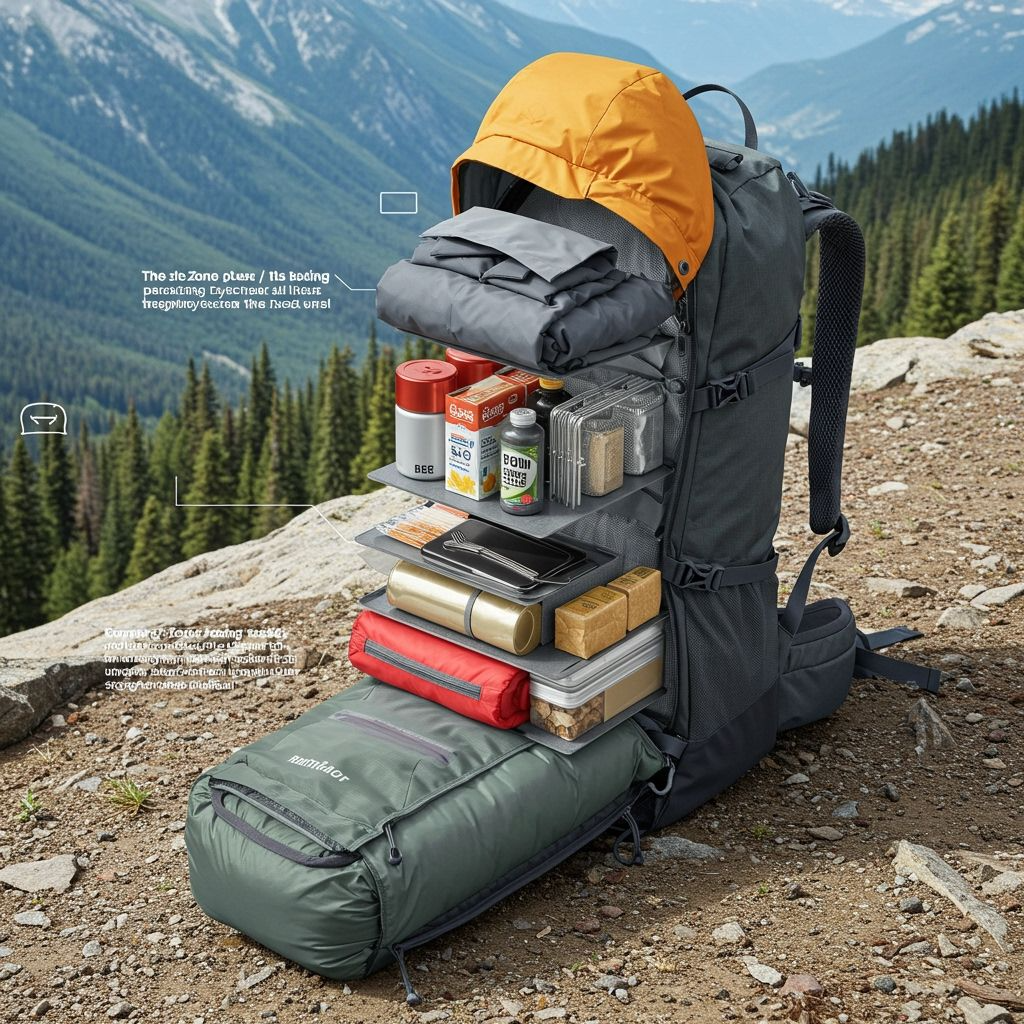
Top Zone: Trail Essentials
The upper section holds bulky items you might need during the hike. These are typically weather protection and safety gear that need quick access without unpacking your entire bag.
Top Zone Gear:
Weather Protection:
- Rain jacket and pants
- Insulated jacket (puffy or fleece)
- Extra layers for temperature changes
Safety and Navigation:
- First aid kit
- Map and compass
- Emergency whistle and signaling devices
Camp Setup:
- Tent (some hikers prefer this location for quick setup)
- Headlamp and extra batteries
- Multi-tool or knife
Some hikers prefer keeping their tent in the top zone for quick setup if the weather threatens. Experiment to see what works best for your hiking style.
Peripheral Storage: Making Every Pocket Count
Modern backpacks offer numerous storage options beyond the main compartment. Using these strategically keeps essentials accessible while maintaining your pack’s balance.
Hip Belt Pockets: The Trail MVP
Hip belt pockets are your best friends on the trail because you can access them without removing your pack or asking for help.
Hip Belt Essentials:
- Trail snacks and energy bars
- Lip balm and sunscreen
- Phone (in airplane mode to save battery)
- Small first aid items (pain relievers, bandages)
- Energy gels or electrolyte supplements
Lid/Brain Compartment
The removable top compartment (brain) often doubles as a day pack for side trips from base camp.
Brain Storage Priorities:
- Map and navigation tools
- Emergency supplies (whistle, signal mirror)
- Personal items (ID, cash, permits)
- Small repair kit (duct tape, safety pins)
Side Pockets: Hydration and Quick Access
Side pockets work perfectly for water bottles and items you need regularly.
Side Pocket Strategy:
- Water bottles (positioned for easy reach while hiking)
- Water treatment tablets or drops
- Bug spray and insect repellent
- Rain cover for pack
- Trekking poles (when not in use)
Understanding how to stay cool while camping becomes crucial when packing for summer adventures where hydration access is critical.
Advanced Packing Techniques
The Tetris Approach
Think of packing like playing Tetris—you’re filling every gap efficiently. Use soft items to fill spaces around rigid gear, creating a solid, unified load that won’t shift during your hike.
Gap-Filling Strategies:
- Tent footprint wrapped around cooking gear
- Extra clothes stuffed between the bear canister and the pack walls
- Socks tucked into corners and odd spaces
- Stuff sacks compressed into irregular spaces.
Compression Strategies
Compression straps aren’t just decorative—they’re essential for pack stability.
Compression Steps:
- Pack with straps completely loose
- Fill all sections using the three-zone system.
- Tighten side compression straps to eliminate dead space.
- Adjust the top compression to secure the load.
- Test the pack—it should feel solid, not shifting.
Pro Tip: Over-compression can damage gear and make items harder to access. Find the sweet spot between stability and accessibility.
Waterproofing Your Load
Even waterproof packs can fail in extended rain. Smart packers add multiple layers of protection.
Waterproof Strategy:
- Line your entire pack with a large trash bag
- Use dry bags for critical items (sleeping bag, electronics, spare clothes)
- Keep one complete dry outfit sealed in its own bag.
- Store rain gear where you can grab it quickly
- Pack electronics in waterproof cases.
Seasonal Packing Variations
Spring: Variable Weather Preparation
Spring conditions change rapidly, requiring flexible packing strategies that account for everything from snow to summer heat.
Spring Adjustments:
- Layer clothing options for temperature swings
- Pack extra rain protection for spring storms.
- Include sun protection for increasing UV exposure.
- Prepare for muddy trail conditions.
Summer: Heat and Hydration Focus
Summer packing prioritizes staying cool and hydrated while protecting gear from afternoon thunderstorms.
Summer Priorities:
- Carry more water (plan for 3-4 liters per day minimum)
- Pack sun protection in easily accessible pockets.
- Keep electrolyte supplements in a hip belt.
- Position the cooling towel for easy access.
- Include extra battery power for the GPS in the heat.
Fall: Layer Management
Fall hiking requires strategic layering as temperatures drop and weather becomes less predictable.
Fall Considerations:
- Pack multiple insulation options
- Include waterproof gloves and a hat.
- Prepare for shorter daylight hours.
- Account for wet leaves and slippery conditions
Winter: Warmth and Safety Priority
Cold-weather packing requires redundant warmth systems and easy access to safety gear.
Winter Essentials:
- Keep one pair of dry gloves accessible at all times.
- Store emergency shelter (bivy, space blanket) in outside pocket.
- Pack extra calories (cold burns more energy)
- Insulate water bottles to prevent freezing.
- Include hand and foot warmers for emergencies.
For those planning winter adventures, understanding how to stay warm while camping becomes essential for both packing decisions and overall safety.
Common Packing Mistakes to Avoid
The Heavy-on-Top Error
Placing heavy items too high makes your pack top-heavy and unstable. This creates a backward pull that forces you to lean forward unnaturally.
Signs of Top-Heavy Packing:
- Pack feels like it’s pulling you backward
- Shoulder straps dig in painfully.
- Difficulty maintaining balance on uneven terrain
- Increased fatigue after short distances
The Accessibility Trap
Burying essentials deep in your pack creates unnecessary frustration. If you’re constantly unpacking half your gear to find rain protection, you’ve prioritized wrong.
Accessibility Guidelines:
- Weather gear: Top zone or external pockets
- Trail snacks: Hip belt or easily reached pockets
- Water: Side pockets for bottles, core zone for reservoirs
- First aid: Top zone or lid compartment
- Navigation tools: Hip belt or lid compartment
The External Gear Overload
Hanging too much gear on your pack’s exterior creates snag hazards and throws off your balance.
Exterior Gear Rules:
- Keep external items lightweight and well-secured
- Use gear loops for long items (trekking poles, tent poles)
- Avoid dangling items that can catch on branches.
- Consider the pack volume increase before going external.
- Secure all external gear with backup attachments.
Hydration System Strategies
Reservoir vs. Bottles: The Great Debate
Both systems have advantages depending on your hiking style and group dynamics.
Hydration Reservoirs:
- Pros: Hands-free hydration, consistent intake, no stopping needed
- Cons: Difficult to monitor consumption, hard to refill without unpacking
- Best for: Solo hikers, desert conditions, long water carries
Water Bottles:
- Pros: Easy to refill, portion control, and weight distribution flexibility
- Cons: Requires stopping to drink (unless hiking with partners)
- Best for: Group hiking, frequent water sources, flexible hydration needs
Hybrid Approach: Many experienced backpackers use both—a reservoir for consistent hydration and bottles for easy refilling and electrolyte mixing.
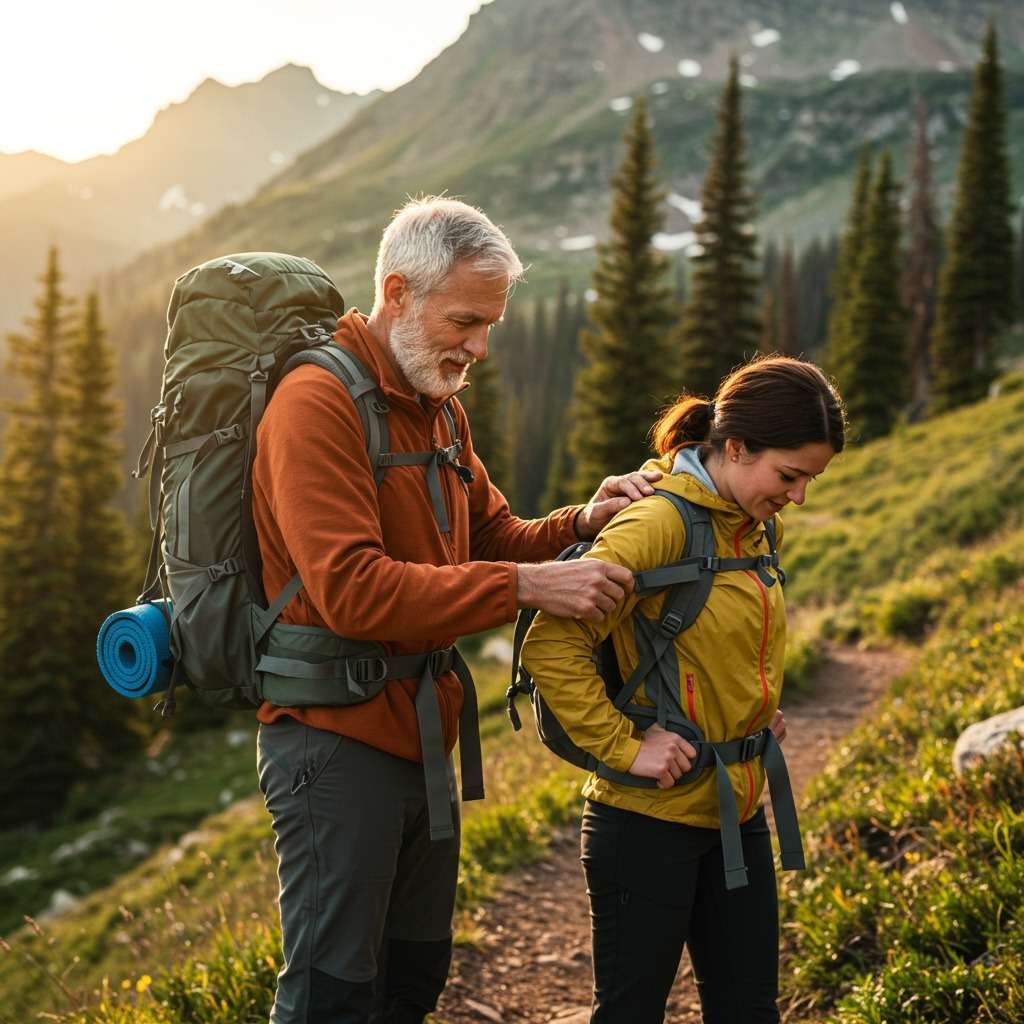
Pack Fitting and Final Adjustments
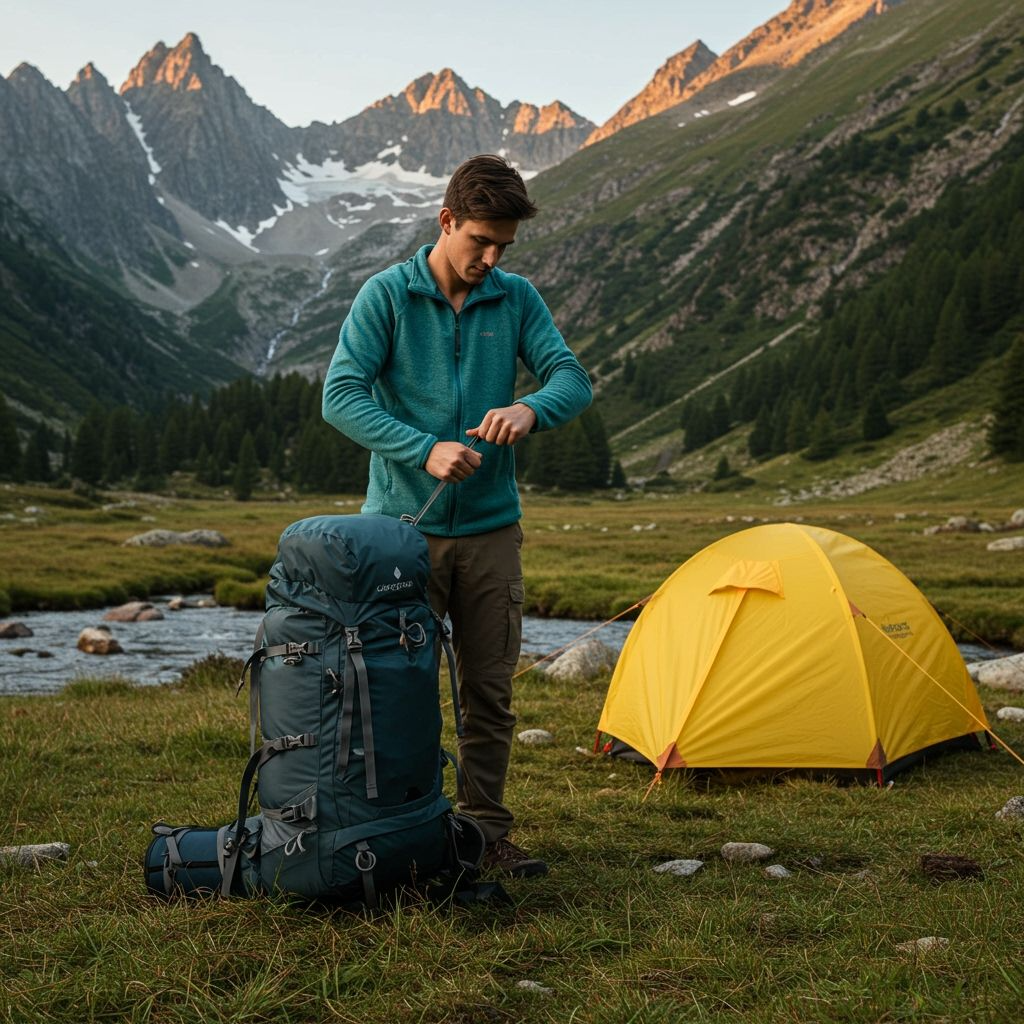
The Proper Lifting Technique
How you put on your pack matters as much as how you pack it. Improper lifting can damage your gear and strain your back.
Safe Pack Mounting Steps:
- Position the pack upright next to you at waist height
- Grab the haul loop (top center strap) securely.
- Lift to thigh height and rest momentarily.
- Slip one arm through the shoulder strap while supporting the pack.
- Lean forward and swing the pack onto your back in one smooth motion.
- Secure the second shoulder strap immediately.
- Buckle the hip belt first, then adjust all straps.
Trail Adjustments Throughout the Day
Your pack will feel different after hiking for hours. Smart hikers make micro-adjustments throughout the day to maintain comfort.
Adjustment Schedule:
- First 30 minutes: Loosen shoulder straps as you warm up
- Every 2 hours: Check hip belt tightness as the padding compresses
- Climbing sections: Adjust the load lifters to keep the weight close
- Rest breaks: Assess pressure points and hot spots
Organization Systems That Work
Packing Cubes and Stuff Sacks
Organization systems prevent the dreaded “gear explosion” when you need to find one specific item buried in your pack.
Organization Categories:
Clothing Systems:
- One cube for clean clothes
- Separate bag for dirty/damp items
- Dedicated sock and underwear pouch
Technical Gear:
- Electronics in a padded, waterproof case
- First aid organized by injury type
- Repair kit with tools and materials
The Color-Coding Revolution
Using different colored stuff sacks helps you quickly identify contents without unpacking everything or reading labels.
Effective Color Strategy:
- Red: First aid and emergency gear
- Blue: Clothing and personal items
- Green: Food and cooking supplies
- Yellow: Electronics and navigation tools
- Black: Tools and repair items
Food Packing Specifics
Bear Safety Integration
In bear country, food packing isn’t just about organization—it’s about survival and following regulations that protect both hikers and wildlife.
Bear-Safe Packing Protocol:
- Use approved bear canisters when required by regulations
- Pack ALL scented items (toothpaste, deodorant, soap) with food.
- Fill the bear canister completely to prevent rattling noise.
- Position the bear canister in the core zone for optimal weight distribution.
- Never leave food unattended outside of proper storage.
Multi-Day Meal Planning
Efficient food packing requires planning beyond just cramming everything together.
Daily Organization Strategy:
- Pre-package meals by day in labeled bags
- Keep breakfast easily accessible for quick morning prep.
- Store dinner ingredients together for easy camp cooking.
- Separate trail snacks for easy hip-belt access
- Plan leftover management to minimize waste.
Learn more about bear safety and food storage from the National Park Service’s comprehensive guide.
Emergency Preparedness Integration
Safety Item Placement
Emergency gear placement can mean the difference between a minor inconvenience and a serious situation.
Critical Access Items:
- First aid supplies in multiple locations (comprehensive kit in top zone, basics in hip belt)
- An emergency whistle is attached to the pack’s shoulder strap.
- Emergency shelter (space blanket, bivy) in external pocket
- Fire starting materials in a waterproof container
Communication and Navigation Backup
Technology fails, weather changes, and situations evolve—redundancy saves lives.
Backup Systems:
- Paper map and compass, even when using GPS
- Emergency communication device (satellite messenger)
- Extra batteries in waterproof storage
- Emergency contact information in multiple locations
Pack Maintenance on the Trail
Daily Care Routine
A few minutes of pack care each day prevents major problems and extends your gear’s lifespan.
Morning Pack Check:
- Inspect all zippers and closures
- Verify compression strap security.
- Check for any damage from the previous day.
- Clean debris from the pack exterior
Evening Pack Care:
- Air out the pack interior if damp
- Check hip belt padding for wear.
- Secure pack away from animals
- Plan next day’s organization.
Field Repairs
Basic pack repairs can save your trip when you’re miles from the nearest gear shop.
Essential Repair Skills:
- Duct tape patches for fabric tears
- Safety pin fixes for broken zippers
- Paracord replacement for broken straps
- Seam sealing for waterproofing issues
For comprehensive outdoor skills beyond packing, explore REI’s complete outdoor education resources that cover everything from navigation to wilderness first aid.
FAQ: Pack Packing Mastery
How much should my fully loaded backpack weigh?
Aim for 20-25% of your body weight for multi-day trips. A 150-pound person should target 30-37 pounds maximum. New backpackers often benefit from starting lighter and building up to full loads as skills and conditioning improve.
Should I pack my tent inside or outside my backpack?
Modern lightweight tents usually fit inside your pack’s main compartment, which is preferable for balance and weather protection. External mounting is acceptable for larger tents, but secure them well and consider rain protection. Internal packing generally provides better weight distribution.
How do I prevent my sleeping bag from getting compressed permanently?
Store sleeping bags loosely at home in large storage sacks or hung up in a closet. Only compress them in stuff sacks during actual trips. High-quality down bounces back from compression better than synthetic fill, but both materials benefit from loose storage.
What’s the best way to pack dirty clothes during multi-day trips?
Use a separate, breathable stuff sack for dirty clothes to prevent odor buildup. Pack them in the bottom zone where weight and smell won’t affect trail comfort. Some hikers designate one clothing cube specifically for dirty items and wash them at water sources when possible.
How often should I reorganize my pack during a multi-day trip?
Reorganize whenever your pack feels unbalanced or you’re struggling to find essentials. Many experienced backpackers do a quick repack each morning, moving used items and adjusting for the day’s conditions. Don’t suffer through poor organization—a few minutes of repacking can transform your hiking experience and prevent injury.
Ready to transform your backpacking experience? Proper pack loading is one of those skills that seems complicated at first but becomes second nature with practice. Start by experimenting with the three-zone system at home, then fine-tune your approach on shorter day hikes before tackling longer adventures.
Remember, there’s no single “perfect” way to pack—the best system is the one that keeps you comfortable, organized, and safe on the trail. Every hiker develops personal preferences based on their gear, body type, hiking style, and the specific demands of their adventures.
The investment in learning these fundamentals pays dividends every time you shoulder your pack. A well-packed backpack doesn’t just carry your gear—it becomes an extension of your body that enhances rather than hinders your outdoor experience.