
Coffee is more than just a morning pick-me-up. It’s a ritual, a moment of calm, and a way to connect with your surroundings. When camping, that first sip of coffee can be transformative. It bridges the gap between waking up in the wild and embracing the day ahead.
But making coffee outdoors doesn’t mean settling for instant packets or bland brews. With the right tools and techniques, you can enjoy a cup that rivals your favorite café—even in the middle of nowhere.
Here’s how you can brew the perfect coffee while camping, no matter your style or preferences.
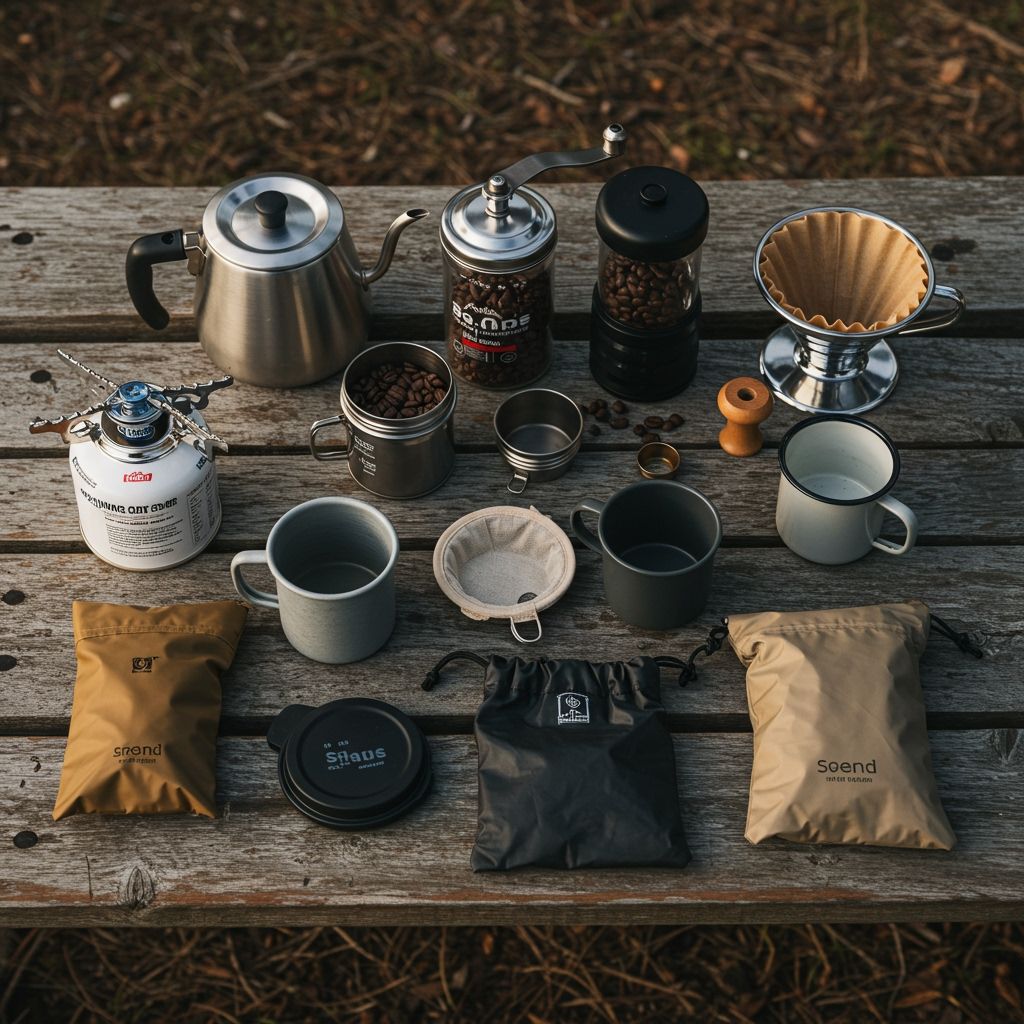
Table of Contents
Essential Gear for Camp Coffee
Before diving into brewing methods, let’s talk about the essentials. Making coffee outdoors requires some preparation, but it doesn’t have to be complicated.
Here’s what you’ll need:
- Heat Source: A campfire, portable camping stove, or burner.
- Kettle or Pot: Lightweight and durable options work best.
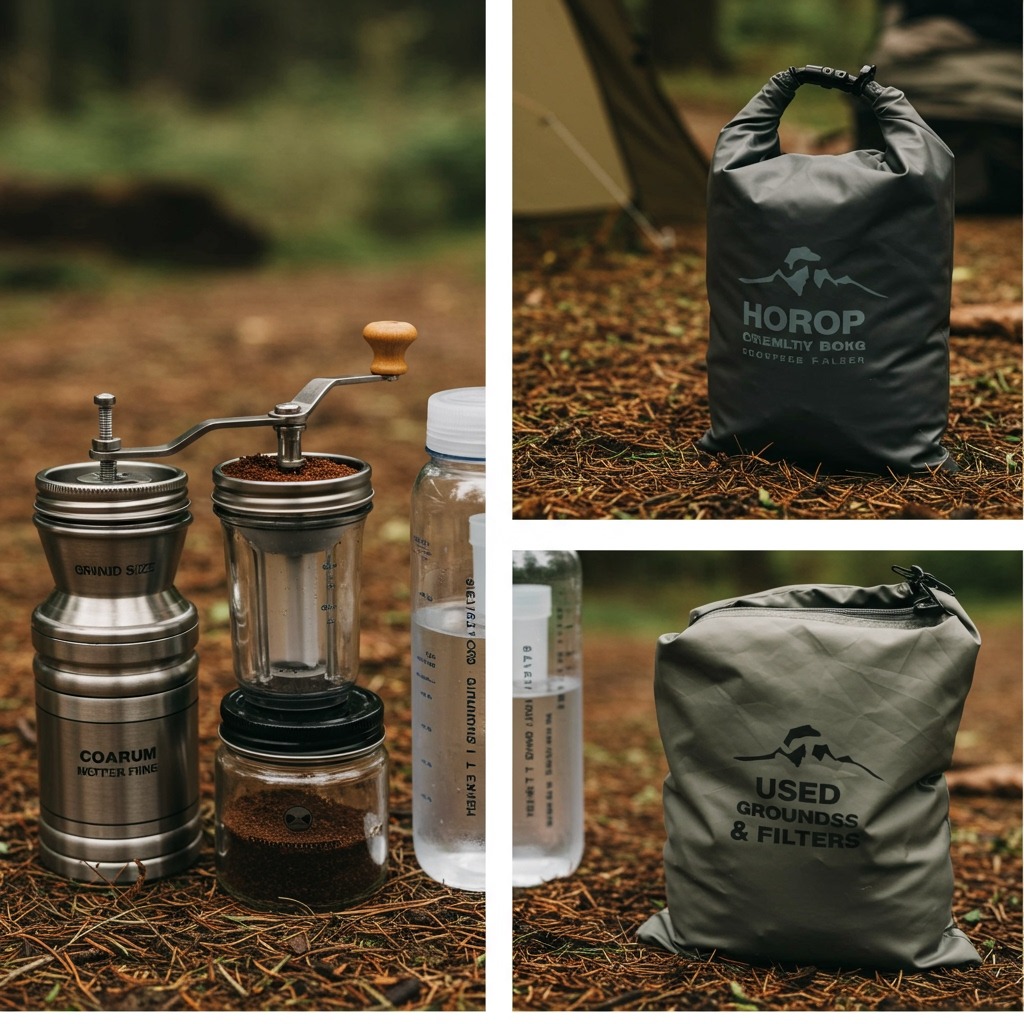
- Coffee Grounds: Pre-ground coffee is more convenient for camping, but if you’re a purist, bring a hand grinder.
- Brewing Device: Depending on your preferred method, this could be a French press, AeroPress, pour-over cone, or percolator.
- Reusable Filters: If your method requires them.
- Mug: A sturdy, insulated mug is ideal for keeping your coffee warm.
Pro Tip: Always pack an extra bag for used grounds and filters. Leave no trace behind.
Top Methods for Brewing Coffee Outdoors
There’s no one-size-fits-all approach to camp coffee. The best method depends on your taste preferences, the gear you have, and how much effort you’re willing to put in.
Here are four tried-and-true methods to consider:
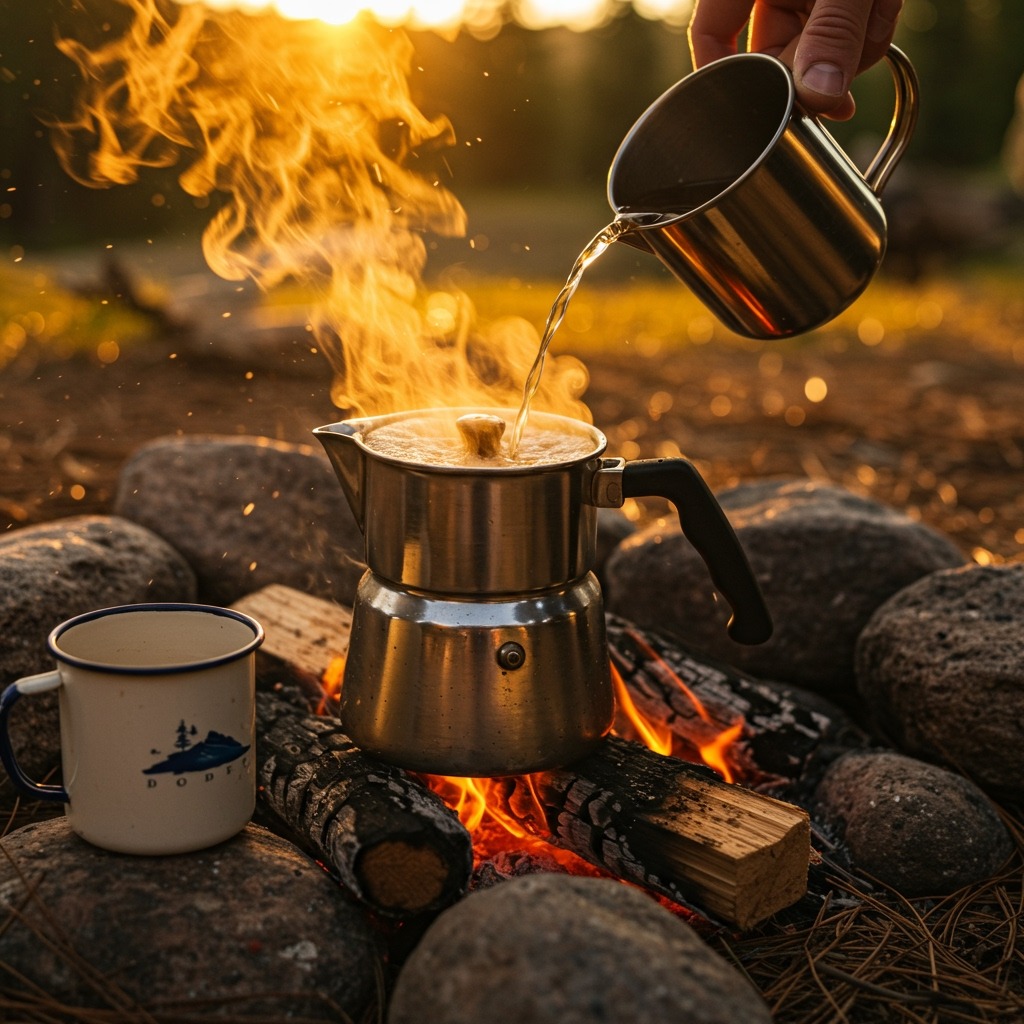
1. Cowboy Coffee
Cowboy coffee is as simple as it gets. It’s perfect if you don’t want to carry extra gear.
Steps:
- Boil water in a pot over your campfire or stove.
- Remove from heat and add coarse coffee grounds (about 2 tablespoons per cup of water).
- Stir and let it steep for 4–5 minutes.
- Slowly pour the coffee into your mug to avoid getting grounds in your cup.
Why It Works:
- No fancy equipment is needed.
- It’s quick and easy to make.
Pro Tip: Add a splash of cold water before pouring—it helps settle the grounds at the bottom of the pot.
To learn more about it, read How to Make Cowboy Coffee: A Simple Guide
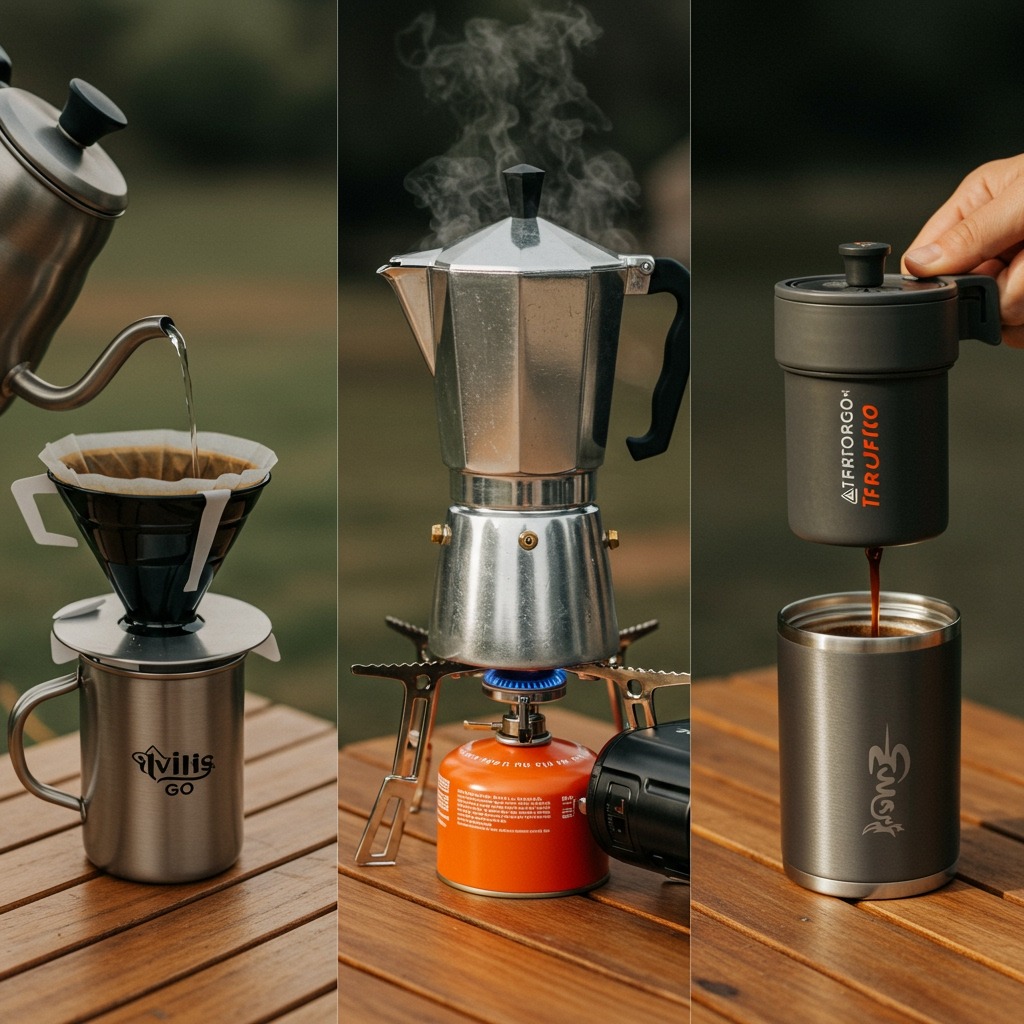
2. Pour Over
Pour-over brewing is ideal for campers who value precision and flavor clarity. It’s lightweight and portable, making it a great option for outdoor adventures.
Steps:
- Heat water to just below boiling (around 200°F).
- Place a pour-over cone with a filter over your mug.
- Add medium-ground coffee (1–2 tablespoons per cup).
- Slowly pour hot water over the grounds in circular motions until your mug is full.
Why It Works:
- Produces clean-tasting coffee with no sediment.
- Easy to control brewing time and strength.
Pro Tip: Use a collapsible silicone pour-over cone to save space in your backpack.
3. Percolator
The percolator is a classic camping tool that’s been around for decades. It’s durable and great for brewing multiple cups at once.
Steps:
- Fill the percolator with water just below the basket.
- Add coarsely ground coffee (1 tablespoon per cup of water) into the basket.
- Place it over low heat until water starts bubbling into the dome.
- Let it simmer for 5–10 minutes, depending on how strong you like your coffee.
Why It Works:
- Perfect for group camping trips.
- Durable and easy to use over a campfire.
Pro Tip: Keep an eye on the heat—too much can make your coffee bitter.
4. AeroPress Go
The AeroPress Go is designed specifically for travelers and campers who want high-quality coffee without bulky equipment.
Steps:
- Heat water to around 175–185°F.
- Add fine-ground coffee (1 scoop) into the AeroPress chamber.
- Pour hot water up to the marked line and stir gently. 4 Insert the plunger and press slowly into your mug.
Why It Works:
- Produces smooth, rich coffee with minimal bitterness.
- Compact design makes it easy to pack and carry.
Pro Tip: Experiment with different grind sizes and brewing times to find your perfect flavor profile.
Tips for Perfect Camp Coffee
Making great coffee outdoors isn’t just about following steps—it’s about adapting to your environment and being mindful of details that can elevate your brew.
Here are some practical tips:
- Grind Size Matters: Use coarse grounds for methods like Cowboy Coffee or percolators; medium-fine grounds work best for AeroPress or pour-over.
- Water Quality: Don’t underestimate this! Use filtered or bottled water instead of directly from natural sources unless you’ve purified it first.
- Pre-Measured Portions: Save time by pre-measuring your coffee before packing it—this ensures consistency in flavor during every brew.
- Keep It Fresh: Store your coffee in an airtight container to preserve its flavor and aroma during your trip.
- Clean Up Properly: Always pack out used grounds and filters in a sealed bag to minimize environmental impact.
Why Camp Coffee Is More Than Just Coffee
Brewing coffee while camping isn’t just about caffeine—it’s about creating an experience that enhances your connection with nature.
Think about it: When was the last time you slowed down enough to enjoy every step of making something? Camping gives you that opportunity.
Instead of rushing through your morning routine, take those few extra minutes to savor each step:
- Heating the water
- Smelling freshly ground beans
- Watching steam rise as you pour
These small moments add depth to your outdoor experience.
Thoughtful Questions To Consider
As you plan your next camping trip, ask yourself:
- Are you prioritizing convenience over taste? Or vice versa?
- Can you challenge yourself to try a new brewing method on this trip?
- What if making coffee became part of your camping ritual rather than just another task?
You don’t need fancy equipment or barista-level skills to make great coffee while camping—all it takes is preparation, experimentation, and an appreciation for the process itself.
Pack your gear, pick a method that suits you best, and make every sip count—because good coffee tastes even better when enjoyed under an open sky.