
Three years ago, I was admiring a friend’s custom fishing rod when he casually mentioned, “I built this myself.” I stared at him in disbelief—this wasn’t some crude stick-and-string contraption, but a beautifully crafted piece of equipment that looked like it came straight from a high-end tackle shop. That moment sparked my own journey into rod building, and I discovered that making your own fishing rod isn’t just possible, it’s incredibly rewarding. Whether you want to create something unique, repair damaged equipment, or simply enjoy the satisfaction of catching fish on gear you built with your own hands, learning how to make a fishing rod opens up a whole new dimension of fishing enjoyment.
From simple bamboo poles perfect for beginners to sophisticated custom builds using modern materials, this guide will walk you through everything you need to know about crafting your own fishing equipment.
Why Make Your Own Fishing Rod
Building your own fishing rod offers several compelling advantages beyond the obvious satisfaction of creating something with your hands. Custom rods can be tailored exactly to your fishing style, preferred species, and personal preferences for length, action, and aesthetics. You control every component, from the blank’s power rating to the thread color used in guide wraps.
Cost considerations play a role, too—while initial tool investment can be significant, building multiple rods becomes increasingly economical. Quality blanks often cost a fraction of finished rod prices, allowing you to create premium equipment at budget-friendly prices.
The skills you develop also prove valuable for rod repair and modification. Understanding rod construction means you can fix broken guides, replace worn grips, or update old equipment rather than replacing it entirely. This knowledge transforms you from a gear consumer into someone who truly understands their equipment.
Finally, rod building provides a perfect indoor fishing activity during the off-season or bad weather. Many anglers find the meditative process of wrapping guides and applying finishes as relaxing as fishing itself.
Understanding Fishing Rod Components
Before diving into construction techniques, understanding the basic components helps you appreciate how rods function and what each element contributes to performance.
Rod Blanks: The Foundation
The blank is your rod’s backbone, determining its fundamental characteristics like length, power, and action. Modern blanks are typically made from graphite (carbon fiber), fiberglass, or composite materials that blend both.
Graphite blanks offer sensitivity and light weight but require careful handling to avoid damage. Fiberglass provides durability and forgiveness but adds weight. Composite blanks attempt to capture the benefits of both materials.
Power ratings (light, medium, heavy) indicate the rod’s lifting strength and appropriate line weights. Action describes where the rod bends—fast action rods bend primarily at the tip, while slow action rods bend throughout their length.
Guides: Directing the Line
Guides direct the fishing line along the rod and significantly impact casting performance. Modern guides feature ceramic or titanium inserts that reduce friction and heat buildup during long casts.
Single-foot guides provide flexibility and light weight, while double-foot guides offer superior strength and durability. Guide placement affects rod action, with closer spacing providing more support for the blank.
Handles and Reel Seats
Cork remains the most popular handle material due to its light weight, grip characteristics, and appearance. EVA foam provides durability and weather resistance but lacks cork’s traditional appeal.
Reel seats must match your reel type—spinning reels require different seats than baitcasting reels. Quality reel seats lock reels securely while providing comfortable hand placement.
Thread and Finishes
Thread wraps secure guides while providing opportunities for decorative accents. Traditional silk thread has largely given way to modern synthetic materials that resist fading and provide consistent tension.
Epoxy finishes protect thread wraps while creating the smooth, professional appearance associated with quality rods. Proper epoxy application requires patience but creates durable, attractive results.
Simple Bamboo Rod: Your First Build
Starting with a traditional bamboo rod teaches fundamental principles while using readily available materials. This project requires minimal tools and provides immediate fishing satisfaction.
Selecting Your Bamboo
Choose straight bamboo canes 8-10 feet long with consistent taper and no cracks or weak spots. Garden centers often stock suitable bamboo, or you can harvest your own from established stands.
Remove all side branches and sand the surface smooth, paying special attention to nodes where branches were attached. Natural bamboo varies in strength, so test flexibility by gently bending the cane.
Curing for Durability
Fresh bamboo contains oils and moisture that can cause splitting or warping. Heat curing removes excess moisture while hardening the surface.
Using a heat gun or careful flame treatment, warm the bamboo until you see oils beading on the surface. Wipe away these oils and allow the bamboo to cool completely. This process significantly increases durability and strength.
Creating Line Guides
Simple wire guides can be fashioned from coat hangers or purchased wire. Heat the wire and bend it around cylindrical objects to create loops of appropriate size.
Attach guides by drilling small holes and securing with wire or strong thread. Space guides evenly along the rod’s length, with smaller guides toward the tip and larger ones near the handle.
Finishing Touches
Wrap guide attachment points with strong thread, securing the wraps with simple knots or adhesive. Add a comfortable grip using cord, leather, or purchased handle materials.
Attach your fishing line to the rod tip, and you’ve created a functional fishing rod using traditional methods. While simple, these rods can be surprisingly effective for many fishing situations.
The comprehensive DIY Fishing Rod guide from Instructables provides detailed step-by-step instructions for creating bamboo rods with homemade reels.

Building with Modern Materials
Modern rod building uses manufactured components that provide superior performance and durability compared to traditional materials. This approach requires more investment but produces professional-quality results.
Selecting Quality Components
Rod blanks from reputable manufacturers provide consistent performance and reliability. Consider your target species and fishing techniques when choosing blank specifications.
Guide sets typically include appropriately sized guides for your blank length and type. Quality guides use ceramic or silicon carbide inserts that resist groove formation and provide smooth line flow.
Handle components should match your fishing style and aesthetic preferences. Cork handles remain popular, but synthetic materials offer durability advantages for heavy-use applications.
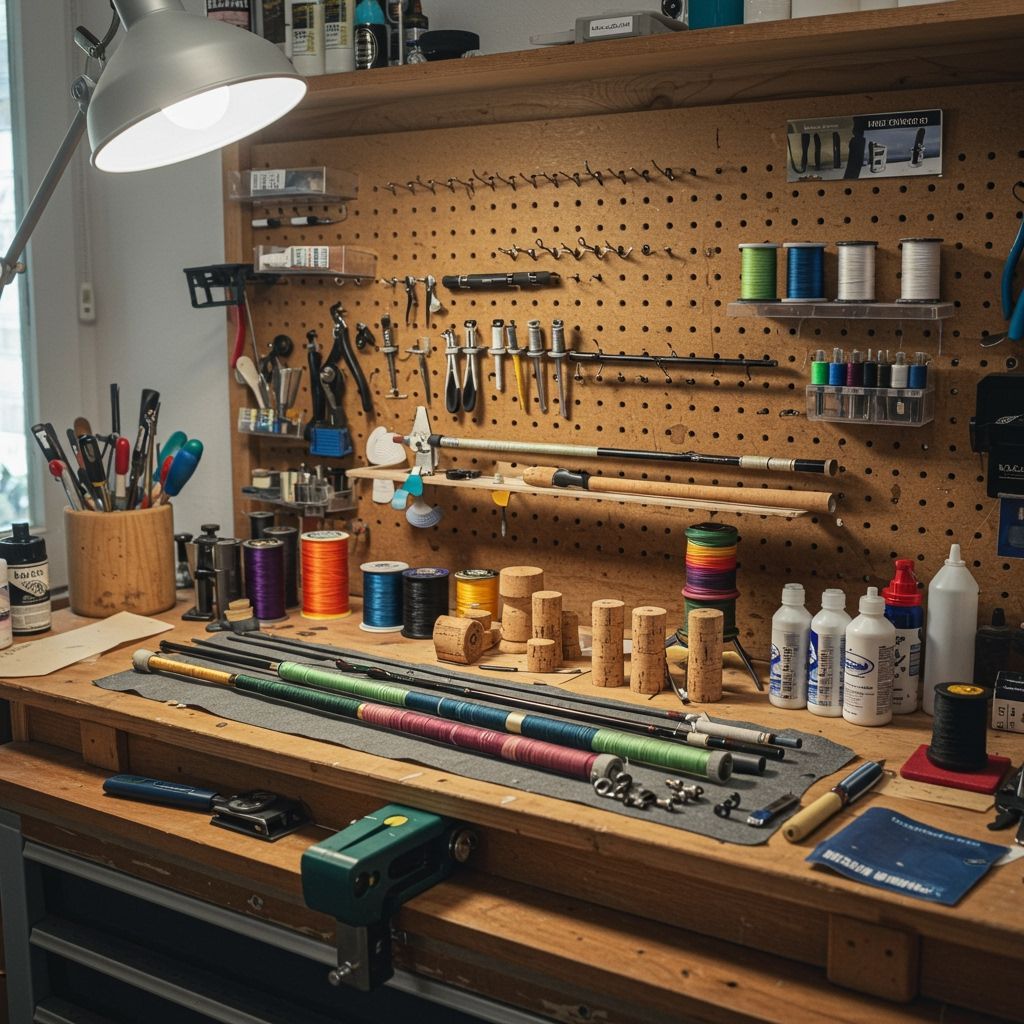
Essential Tools and Workspace
Rod building requires specific tools, though you can start with the basics and expand as skills develop. Essential tools include thread tension devices, epoxy mixing supplies, and rod turning motors for finish application.
A dedicated workspace helps maintain organization and prevents contamination of finishes. Good lighting and ventilation become crucial when working with epoxy and other chemical products.
Consider borrowing or sharing expensive tools like rod-turning motors until you determine your long-term interest in rod building. Many local fishing clubs have tools available for member use.
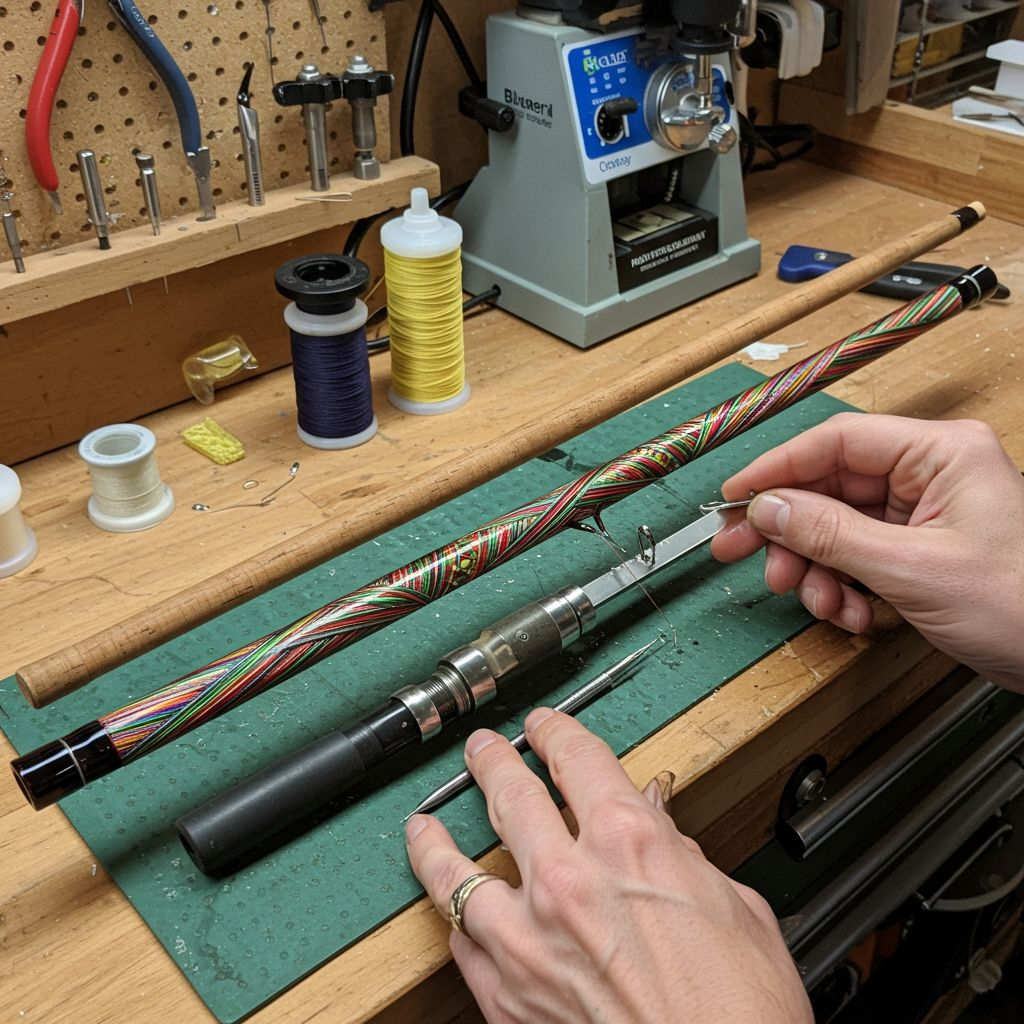
Professional Assembly Techniques
Modern rod building follows established sequences that ensure proper component integration and professional appearance. The process typically begins with finding the rod’s spine—its natural bending preference.
Handle assembly combines cork or foam grips with reel seats and other hardware before attachment to the blank. Proper fit requires careful reaming and test fitting to avoid forcing components.
Guide placement follows manufacturer recommendations but can be adjusted based on fishing techniques and personal preferences. Temporary placement allows testing before permanent attachment.
Thread wrapping requires consistent tension and careful technique to create even, professional-looking wraps. Practice on spare materials before working on your actual rod.
Advanced Construction Techniques
Experienced rod builders can incorporate advanced techniques that create truly custom equipment tailored to specific fishing applications.
Custom Guide Spacing
While manufacturer recommendations provide starting points, experienced builders often adjust guide spacing to optimize rod performance for specific techniques or line types.
Closer guide spacing provides more blank support and smoother line flow, but adds weight. Wider spacing reduces weight but may create a line slap against the blank during casting.
Computer programs can calculate optimal guide spacing based on rod specifications and intended use, though experienced builders often rely on feel and testing.
Decorative Elements
Custom thread work, inlays, and artistic elements transform functional rods into personalized art pieces. Decorative wraps require advanced thread handling skills and patience.
Color-changing threads, metallic accents, and complex patterns can create unique visual effects. However, decorative elements should enhance rather than compromise rod function.
Performance Modifications
Advanced builders sometimes modify blanks by adding cork rings, adjusting flex patterns, or incorporating custom components. These modifications require a deep understanding of rod mechanics and potential consequences.
Tip replacements, guide conversions, and length adjustments allow updating older rods or adapting equipment for new fishing techniques. Proper execution requires experience and appropriate tools.
The detailed rod-building guide from Gone Fishing Northwest offers comprehensive instruction for advanced techniques and professional finishing methods.
Tools and Equipment for Rod Building
Success in rod building depends heavily on having appropriate tools and understanding how to use them properly. While you can start with basic equipment, certain tools become essential for professional results.
Basic Tool Kit
A basic rod building kit includes thread tension devices, mixing cups for epoxy, brushes for finish application, and measurement tools. Many suppliers offer starter kits that include everything needed for the first project.
Sharp razor blades or X-Acto knives are essential for cutting thread and trimming excess materials. Quality blades make clean cuts that improve finished appearance.
Masking tape serves multiple purposes, from temporary component placement to protecting finished areas during subsequent work. Use high-quality tape that removes cleanly without residue.
Specialized Equipment
Rod turning motors rotate rods during finish application, ensuring even epoxy distribution and preventing drips or runs. While expensive, these motors significantly improve finish quality.
Handle reamers create proper fits between blanks and handle components. Gradual enlargement prevents splitting while ensuring snug fits that won’t loosen with use.
Thread tension devices maintain consistent wrap tightness while preventing over-tensioning that can break the thread or damage components. Simple spring-loaded devices work well for most applications.
Workspace Requirements
Good lighting is essential for detailed work like thread wrapping and finish application. Adjustable LED lights provide excellent visibility without generating heat that affects epoxy curing.
Adequate ventilation becomes crucial when working with epoxy and other chemical finishes. Proper ventilation protects health while preventing finish contamination from airborne particles.
Organizational systems keep small parts and materials accessible while preventing loss or contamination. Labeled storage containers and dedicated work surfaces improve efficiency and results.
Safety Considerations and Best Practices
Rod building involves potentially hazardous materials and tools that require appropriate safety precautions and proper handling techniques.
Chemical Safety
Epoxy resins and hardeners can cause skin and respiratory irritation. Always wear gloves when handling these materials and ensure adequate ventilation in work areas.
Read and follow all manufacturer safety instructions for chemical products. Keep safety data sheets available and understand proper first aid procedures for accidental exposure.
Dispose of chemical waste according to local regulations. Many communities have special disposal programs for hobbyist chemical waste that shouldn’t go in regular trash.
Tool Safety
Sharp cutting tools require careful handling and proper storage. Always cut away from your body and keep blades sharp—dull blades require more pressure and are more likely to slip.
Power tools like drill presses and rotary tools require appropriate safety equipment, including eye protection and proper work holding methods.
Heat guns and other heating devices can cause burns or start fires if used improperly. Never leave heating devices unattended and ensure proper ventilation.
Workspace Safety
Maintain clean, organized work areas to prevent accidents and improve results. Clutter creates trip hazards and can contaminate finishes or materials.
Proper lighting reduces eye strain and prevents errors that could result in injury or damaged work. Position lights to minimize shadows and glare.
Keep first aid supplies readily available and understand basic treatment for common workshop injuries like cuts and chemical exposures.
Understanding how to line a fishing pole becomes important once you complete your custom rod construction.
Maintenance and Care of Custom Rods
Once you’ve built your custom fishing rod, proper maintenance ensures years of reliable service and protects your investment in time and materials.
Regular Inspection
Check guide inserts regularly for cracks or grooves that can damage the fishing line. Replace damaged guides promptly to prevent line failure during use.
Examine thread wraps for wear or loosening, especially around heavily used guides. Early detection allows simple repairs that prevent more extensive damage.
Inspect cork handles for compression or damage that affects grip comfort. Minor cork repairs can extend handle life significantly.
Cleaning and Storage
Clean your rod after each fishing trip, paying special attention to saltwater exposure that can corrode guides and reel seats. Fresh water rinse followed by thorough drying prevents most corrosion issues.
Store rods properly to prevent warping or damage. Horizontal storage in rod racks distributes weight evenly, while protective cases prevent damage during transport.
Avoid extreme temperatures during storage, as expansion and contraction can affect epoxy finishes and component fits.
Professional Services
Some maintenance tasks exceed typical hobbyist capabilities and require professional services. Guide replacement, major repairs, and refinishing projects often benefit from professional expertise.
Build relationships with local rod repair services for complex maintenance needs. Many professional builders offer repair services and can provide guidance for DIY maintenance.
For those interested in understanding different fishing equipment, learning about types of fishing rods provides valuable context for your custom building projects.
FAQ: Rod Building Essentials
How much does it cost to build your first fishing rod?
Basic bamboo rods can cost under $20 in materials, while modern component builds typically cost $75-150 for quality parts. Tools add initial expense but serve multiple projects.
How long does it take to build a fishing rod?
Simple bamboo rods can be completed in 3-6 hours, while modern component builds typically require 8-12 hours spread over several days to allow for curing time.
Do I need special skills to build fishing rods?
Basic manual skills and patience are sufficient for simple builds. More advanced techniques require practice, but most people can learn through careful instruction and practice.
Can I repair my own fishing rods?
Rod building skills directly transfer to repair work. Guide replacement, tip repairs, and handle rebuilding become manageable with basic rod-building knowledge.
What’s the most challenging part of rod building?
Thread wrapping often challenges beginners due to tension control and achieving even wraps. Practice on scrap materials before working on actual projects.
Building your own fishing rod combines practical skills with creative expression while producing equipment perfectly suited to your fishing style and preferences. Whether you start with simple bamboo construction or dive into modern component building, the skills you develop will enhance your fishing experiences for years to come.
Start with simple projects to develop basic skills before attempting complex builds. Focus on understanding each component’s function rather than just following instructions. This knowledge will serve you well as you advance to more sophisticated techniques and custom modifications.
Remember that rod building is both art and science—embrace the learning process and don’t expect perfection on your first attempts. Each rod you build teaches valuable lessons that improve future projects. The satisfaction of catching fish on equipment you’ve crafted yourself makes every hour spent learning these skills worthwhile.