

There’s a quiet revolution happening in the coffee world, moving away from colossal, sugary concoctions towards something more refined, more focused. If you’ve found yourself craving a coffee that delivers intense flavor without being overwhelmed by milk, you’re likely on the path to discovering the cortado.
Are you ready to unlock the true potential of your home espresso setup? Do you want to know how to make a cortado that rivals your favorite cafe’s, one that showcases the rich character of your espresso while offering just enough milk to soften its edges? This isn’t just about mixing ingredients; it’s about mastering a technique.
In this comprehensive guide, we’ll strip away the mystery. You’ll learn exactly what a cortado is, why its ratio and milk texture are so crucial, what equipment you need, and a step-by-step process to craft this exquisite beverage perfectly every time. Get ready to elevate your coffee game.

Understanding the Cortado: More Than Just Coffee & Milk
Before we dive into the mechanics of creation, let’s nail down what exactly a cortado is and why it stands out in a crowded field of espresso-based drinks.
What is a Cortado? Origins and Philosophy
The name “cortado” comes from the Spanish verb “cortar,” meaning “to cut.” In coffee terms, it literally means the espresso is “cut” or “diluted” with a small amount of warm milk. This isn’t a splash of milk; it’s a deliberate addition designed to reduce the acidity of the espresso, bringing out its sweeter, more nuanced notes without masking its bold flavor.
The philosophy behind the cortado is balance. It’s for those who appreciate the intensity of espresso but prefer a smoother, less acidic sip. It’s served in a small, often handle-less glass, typically around 4.5 ounces (130-150ml), which encourages a quick, enjoyable experience. The experience of drinking a cortado coffee is about savoring the espresso’s character, not burying it.
Key Characteristics: Ratio, Texture, Temperature
Three elements define a classic cortado:
- Ratio: While some variation exists, the standard is a 1:1 ratio of espresso to milk. This means a double shot of espresso (roughly 2 ounces or 60ml) is paired with an equal amount of warm, steamed milk. This precise balance is what “cuts” the espresso without diluting its presence.
- Microfoam: This is where many home baristas stumble. A cortado uses microfoam, which is steamed milk that is velvety, glossy, and has very fine, imperceptible bubbles. It’s milk that has been integrated with air, not frothed into a stiff, airy cap like a traditional cappuccino. The microfoam should be liquid enough to pour smoothly and integrate seamlessly with the espresso.
- Temperature: A cortado is served warm, not scalding hot. The ideal milk temperature is between 140-150°F (60-65°C). This temperature allows the milk’s sweetness to shine without burning the espresso or your tongue, ensuring the delicate flavors are preserved.
Cortado vs. Its Cousins: Macchiato, Flat White, Piccolo, Latte
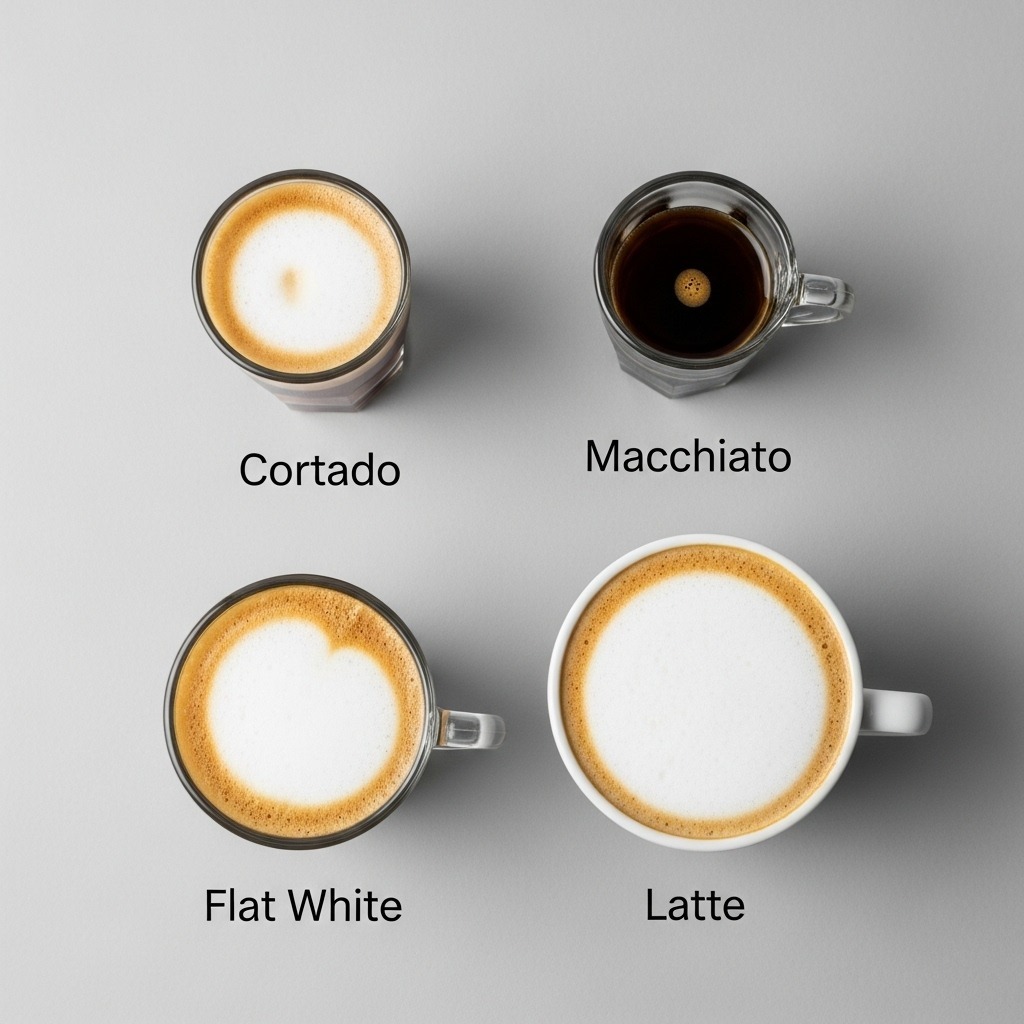
The world of espresso drinks can be confusing. Here’s how a cortado differs from some common relatives:
- Macchiato: Often the most confused with a cortado. A traditional macchiato (“marked” in Italian) is an espresso “marked” with just a dollop of steamed milk foam. It’s significantly more espresso-forward and typically smaller than a cortado, with much less actual liquid milk.
- Flat White: Larger than a cortado, usually 5-6 ounces. While it also uses microfoam, it has more milk than a cortado and a thinner layer of foam, creating a “flat” surface. It’s a stronger, smaller version of a latte, but still milkier than a cortado. For a more in-depth comparison of a latte coffee versus other drinks, you can explore further.
- Piccolo Latte: Very similar to a cortado, often effectively the same drink. “Piccolo” is Italian for “small.” It typically refers to a single espresso shot topped with milk in a small glass, making it a smaller version of a latte. The distinction can be regional, but for most purposes, a piccolo is a cortado by another name.
- Latte: The largest of the bunch, usually 8 ounces or more, with a much higher milk-to-espresso ratio and a thicker, fluffier layer of foam on top, often used for elaborate latte art.
Gearing Up: Essential Equipment for Your Cortado Journey
You can’t make a great cortado without the right tools. While some coffee drinks can be made simply, a cortado demands precision, and that starts with your equipment.
A. Espresso Machine: The Heart of the Operation
This is non-negotiable. To make an authentic cortado, you need true espresso.
- Types: From manual lever machines to semi-automatic and super-automatic models, choose one that fits your budget and skill level. Semi-automatic machines offer the most control for aspiring baristas.
- Importance: A good espresso machine provides consistent pressure (9 bars is ideal) and stable temperature, both critical for proper extraction.
B. Grinder: Non-Negotiable for Fresh, Flavorful Espresso
A quality grinder is arguably as important as your espresso machine.
- Burr Grinder: Invest in a burr grinder. Blade grinders “chop” beans unevenly, leading to inconsistent extraction and poor flavor. A burr grinder crushes beans uniformly, allowing for a precise and repeatable grind size.
- Importance: Espresso requires a very fine, consistent grind. Any inconsistency will lead to uneven extraction, resulting in bitter or sour shots. The ability to precisely adjust your grind is crucial.
C. Tamper: For Proper Puck Preparation
After grinding, you need to compress the coffee grounds evenly in the portafilter.
- Importance: Proper tamping ensures uniform water flow through the coffee bed, preventing channeling (where water finds easy paths through loose spots, leading to underextraction).
D. Scale: Precision for Beans and Liquid Yield
Precision is key in specialty coffee.
- Importance: Use a digital scale to measure your coffee beans before grinding (your dose) and the liquid espresso that comes out (your yield). This consistency is vital for repeatable quality.
E. Milk Pitcher: Stainless Steel, Appropriate Size
- Material: Stainless steel is best as it conducts heat well, allowing you to gauge milk temperature by hand.
- Size: A 12-20 ounce (350-600ml) pitcher is usually sufficient for a single cortado, allowing enough room for the milk to expand during steaming.
F. Thermometer (Optional but Helpful for Milk)
While experienced baristas can steam milk by feel, a thermometer ensures you hit the ideal temperature (140-150°F / 60-65°C) consistently, preventing scorched or cold milk.
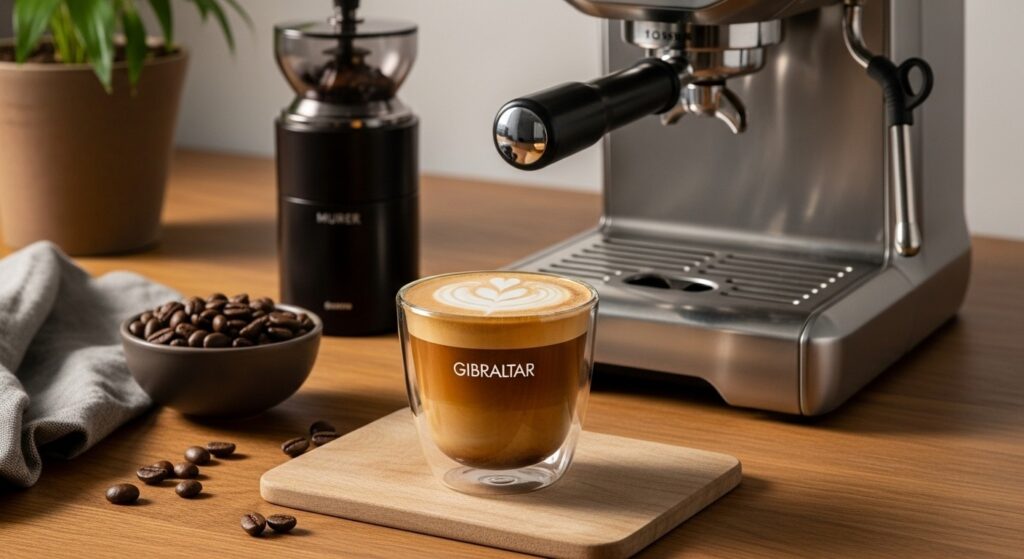
G. Serving Glass: Classic 4.5 oz Gibraltar or Similar
The shape of the glass (often a Gibraltar glass) helps showcase the layered appearance of the cortado and provides a comfortable grip. A small, clear glass is best.
H. Quality Coffee Beans: Freshly Roasted, Whole Bean
Your final product is only as good as your ingredients.
- Freshness: Buy whole beans roasted within the last 2-4 weeks. Stale beans produce flat, lifeless espresso.
- Variety: Experiment with different roasts and origins to find what you like best for a cortado.
The Espresso Shot: The Foundation of Your Cortado
The heart of any great cortado is a perfectly pulled espresso shot. Without a strong, balanced base, your drink won’t shine.

A. Choosing Your Beans: Roast Level, Freshness
- Roast Level: Medium to medium-dark roasts generally work best for milk drinks. They have enough body and chocolatey/nutty notes to stand up to the milk without being too overwhelming or overly acidic. Lighter roasts can be fantastic for straight espresso but might get lost with milk.
- Freshness is King: Always buy whole beans. Once roasted, coffee rapidly loses its volatile aromas. Aim to use beans within 2-4 weeks of their roast date. Store them in an airtight container away from light, heat, and moisture. Consider learning how to roast coffee beans at home if you’re serious about freshness.
B. Grinding and Dosing: Precision is Key
- Grind Size: Espresso requires a very fine grind, resembling powdered sugar or fine sand. It should clump slightly when pinched. If it’s too coarse, your shot will run too fast; too fine, and it will choke your machine.
- Dose: Use a digital scale to weigh your coffee beans precisely. For a double shot, a common starting point is 18 grams of coffee. Consistency in dose is crucial for consistent extraction. For more on getting the right grind, check out our guide on how to grind coffee beans.
C. Tamping: Even and Level
- Process: After grinding and dosing into your portafilter, distribute the grounds evenly. Then, apply firm, even pressure with your tamper, ensuring the coffee bed is perfectly level.
- Importance: An uneven tamp leads to uneven water flow, causing channeling and a poor extraction.
D. The Pull: Aim for a “God Shot.”
This is where your espresso machine does its work.
- Target Time & Yield: For a double shot (18g in), aim for a yield of 36-40ml (around 1.5-2 ounces) of espresso in 25-30 seconds, from the moment you hit the brew button until the shot ends.
- Visual Cues: Watch the shot as it pulls. It should start with a few drops, then transition to a steady, even stream that resembles a “mouse tail.” The crema (the reddish-brown foam on top) should be rich and uniform.
- Troubleshooting:
- Shot runs too fast (under 25 seconds): Your grind is too coarse. Make it finer.
- Shot runs too slow/chokes (over 30 seconds or barely drips): Your grind is too fine. Make it coarser.
- Shot tastes sour: Often underextracted (too fast, grind too coarse, too low temperature).
- Shot tastes bitter: Often overextracted (too slow, grind too fine, too high temperature).
Steaming the Milk: The Art of Microfoam
The milk in a cortado isn’t just heated milk; it’s perfectly textured microfoam. This is the difference between a good cortado and a great one.
A. Choosing Your Milk: Whole Milk for Best Texture
- Whole Milk: The fat content in whole milk creates the best, most stable microfoam. It provides a creamy mouthfeel and sweetness that complements espresso beautifully.
- Alternatives: Oat milk often performs very well, creating a creamy texture. Almond and soy milk can be more challenging but are achievable with practice. Always use cold milk for best results.
B. The Cold Start: Pitcher and Milk Chilled
Start with a cold stainless steel milk pitcher and cold milk straight from the fridge. This gives you more time to texture the milk before it gets too hot.
C. Purge the Steam Wand: Remove Condensation
Before you start, open the steam wand for a second or two to release any condensed water. This prevents watery milk and ensures you get pure steam.
D. Aeration (Stretching): Creating the Initial Foam
This is the “hissing” stage where you introduce air into the milk.
- Position: Submerge the steam wand tip just below the surface of the milk, near the side of the pitcher.
- Sound: Open the steam valve fully. You should hear a gentle “tearing paper” or “kissing” sound. This is air being gently incorporated.
- Goal: Do this for only a few seconds, or until the milk volume increases by about 20-30%. The goal is to create very small, uniform bubbles, not large frothy ones.
E. Texturing (Integrating): Achieving Silken Microfoam
This is where you integrate the air into the milk, making it velvety smooth.
- Position: Submerge the steam wand deeper into the milk, positioning it off-center.
- Action: The steam should create a whirlpool effect, circulating the milk and folding the introduced air throughout. You’ll hear a quiet “whooshing” sound.
- Goal: Continue until the pitcher is almost too hot to touch. The milk should look glossy and resemble wet paint. It should have a uniform, fine texture, without visible large bubbles.
F. Temperature: Stop Before It’s Too Hot
- Target: For a cortado, aim for 140-150°F (60-65°C). The pitcher will feel almost too hot to hold.
- Why? Overheated milk develops a “scalded” flavor and loses its natural sweetness.
G. Swirl and Tap: Remove Large Bubbles, Integrate
- Tap: Once steamed, tap the pitcher firmly on the counter a few times to burst any remaining large bubbles.
- Swirl: Swirl the milk vigorously to ensure the microfoam is fully integrated and has a consistent, glossy texture. It should pour like liquid velvet.
The Pour: Bringing It All Together
This is the final, satisfying step where your perfectly extracted espresso meets your velvety microfoam.
A. Combine Quickly: Espresso First, Then Milk Immediately
Have your espresso shot pulled and sitting in your serving glass. As soon as your milk is steamed and swirled, it’s time to pour. Don’t let your espresso sit and die; its flavors degrade quickly.
B. The Gentle Pour:
- Start High: Hold the pitcher relatively high above the glass and pour a steady, thin stream. This allows the denser, liquid milk to dive under the crema, gently mixing with the espresso and integrating the two components.
- Lower Pitcher: As the cup fills, lower the pitcher closer to the surface. You’ll notice the microfoam layer beginning to form on top. For a classic cortado, you’re not aiming for latte art, but rather a uniform, thin layer of velvety microfoam that blends seamlessly with the espresso.
- Fill: Fill the glass to about 1:1 espresso to milk ratio.
C. The Result: A Balanced, Harmonious Drink
You should have a small, warm drink with a rich, uniform color and a delicate, creamy top layer. The balance of espresso and milk should be evident, allowing the coffee’s flavor to shine through, softened by the milk’s sweetness and texture. Sip and enjoy immediately!
Troubleshooting Common Cortado Problems
Even with the best instructions, perfection takes practice. Here are some common issues and how to fix them.
- A. Espresso is too weak/strong or tastes off:
- Weak/Sour (underextracted): Your grind is too coarse, your dose is too low, or your water temperature is too low. Adjust grind finer, increase dose slightly, or pre-heat your machine more effectively.
- Strong/Bitter (overextracted): Your grind is too fine, your dose is too high, or your water temperature is too high. Adjust grind coarser, decrease dose, or check machine temperature settings.
- Actionable Tip: Measure everything with a scale: dose in, yield out, and time. This data helps you pinpoint the problem.
- B. Milk is too bubbly/thin:
- Too Bubbly/Frothy: You’re incorporating too much air during the aeration (stretching) phase, or not integrating it enough during the texturing phase. Keep the steam wand tip just barely below the surface during aeration, and then fully submerge it for the whirlpool effect.
- Too Thin/Watery: Not enough aeration, or the milk wasn’t cold enough to start. Ensure you hear the gentle “tearing” sound for a few seconds.
- Actionable Tip: Practice steaming water with a drop of dish soap. The soap helps visualize the microfoam.
- C. Not hot enough/too hot:
- Not Hot Enough: You stopped steaming too soon. You need to steam until the pitcher is almost too hot to touch.
- Too Hot/Scalded Taste: You steamed too long, or your steam power is too high for the volume of milk. Use a thermometer or learn to feel the temperature. Stop steaming before the milk hits 160°F (70°C).
Elevate Your Cortado Experience: Beyond the Basics
You’ve mastered the fundamentals. Now, let’s look at ways to truly refine your cortado game.
- A. Serve in a Gibraltar Glass: While any small glass will do, the classic 4.5 oz Gibraltar glass (sometimes called a “rocks glass”) is iconic for cortados. Its shape showcases the layers beautifully and is comfortable to hold.
- B. Experiment with Different Beans and Milk Types: Don’t limit yourself. Try different roast levels of espresso beans. Explore oat, almond, or even high-quality alternative milks to see how they change the flavor profile and texture.
- C. Clean Your Machine: Regular cleaning is not just about hygiene; it’s about consistency. Backflushing your espresso machine, cleaning the portafilter, and keeping your steam wand spotless prevents old coffee oils and milk residue from tainting future shots. Learn how to clean a coffee maker thoroughly to maintain peak performance.
- D. Practice: Like any craft, making a perfect cortado takes repetition. Don’t get discouraged by initial failures. Every shot is a learning opportunity. The more you make, the more intuitive the process becomes.
FAQ: Your Cortado Questions Answered
Q1: What’s the ideal ratio for a cortado?
A: The ideal ratio for a cortado is typically 1:1 espresso to milk. This means for a standard double shot of espresso (around 2 oz / 60ml), you’d add about 2 oz (60ml) of steamed milk.
Q2: Can I make a cortado without an espresso machine?
A: Strictly speaking, no. A true cortado requires authentic espresso. While you can use strong how to make french press coffee or Moka pot coffee with steamed milk, it won’t have the same crema, intensity, or flavor profile as a proper espresso-based cortado.
Q3: What milk is best for a cortado?
A: Whole milk generally produces the best microfoam due to its fat content, resulting in a rich, creamy texture. Oat milk is often an excellent alternative, offering a similar creaminess.
Q4: Why is my milk too frothy/bubbly?
A: This usually means you’ve introduced too much air during the initial “aeration” phase of steaming, or you haven’t integrated that air thoroughly enough during the “texturing” phase. Aim for a quiet tearing sound, not a loud hissing, and ensure a strong whirlpool action to blend the air into the milk. For more expert tips, consult resources from the Specialty Coffee Association.
Q5: Is a cortado supposed to be hot or lukewarm?
A: A cortado should be warm, not scalding hot. The ideal milk temperature is between 140-150°F (60-65°C). This temperature allows the milk’s sweetness to shine without burning the coffee or your palate.
Conclusion: Sip, Savor, and Share
The journey of learning how to make a cortado is a rewarding one. It’s about precision, practice, and a deep appreciation for the subtleties of coffee. When you nail it, the satisfaction of that perfectly balanced, rich, and velvety sip is incomparable.
So, embrace your inner barista. Don’t be afraid to experiment, to taste, and to refine your technique. The world of exceptional coffee is waiting for you, one perfectly crafted cortado at a time. Enjoy the process, savor the flavor, and share your newfound skill with friends.