
I still remember the first time I tried to put a line on a fishing reel by myself. I was 12 years old, excited about my brand-new rod and reel combo, and convinced I could figure it out without help. Three tangled messes and nearly two hours later, my dad finally stepped in to rescue the situation. What should have been a simple 10-minute task had turned into an afternoon of frustration because I didn’t know the proper steps for how to line a fishing pole.
That experience taught me something important: setting up your fishing gear correctly from the start saves time, prevents headaches, and gets you on the water faster. Whether you’re a complete beginner or just need a refresher, this guide will walk you through every step of putting line on your fishing rod the right way.
Understanding Your Equipment First
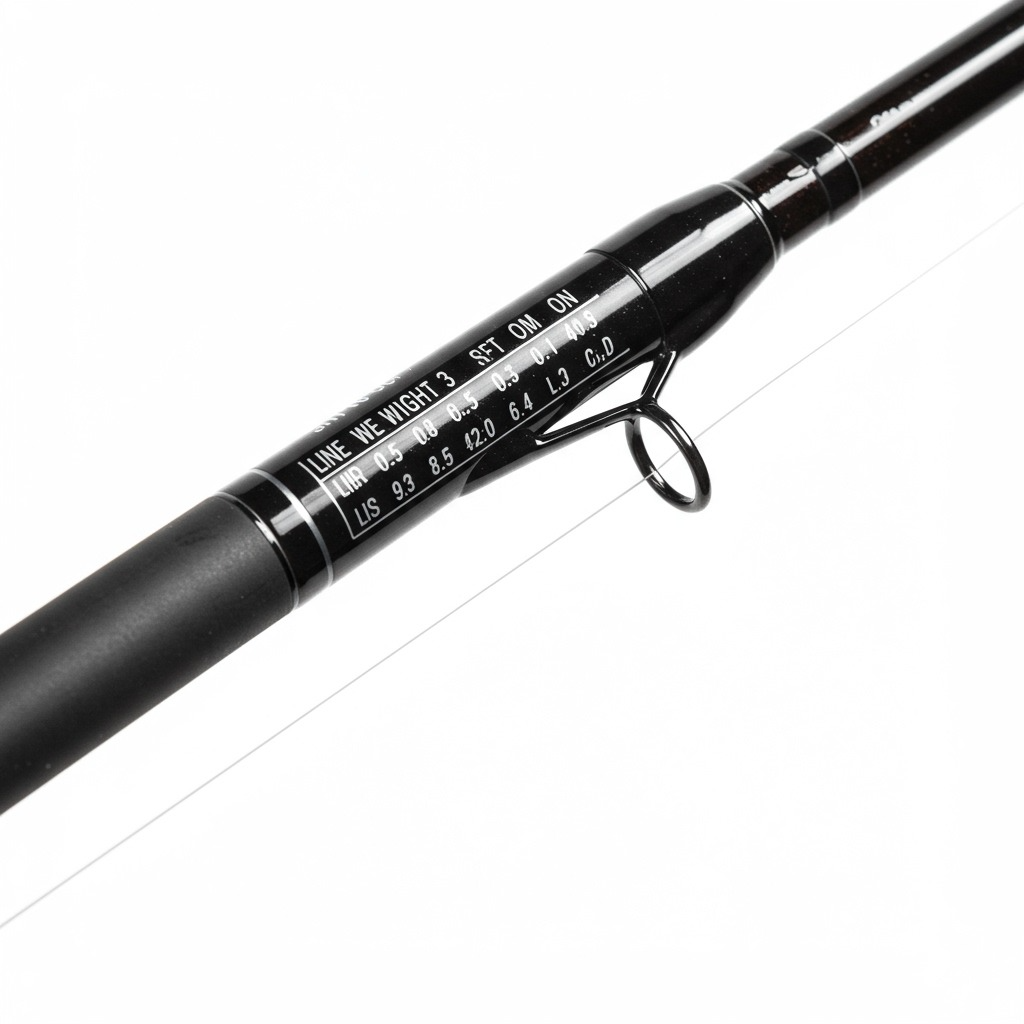
Before diving into the actual process, you need to match your fishing line to your rod and reel specifications. Every fishing rod has a line weight rating printed somewhere on the blank—usually near the handle. You’ll see something like “6-10 lb” or “15-30 lb test.” This tells you the recommended line strength range for optimal performance.
Using line that’s too light might break under normal fishing pressure, while line that’s too heavy can affect your rod’s action and casting distance. Your reel will also have capacity information printed on the spool, showing how much line it can hold at different weights.
Most spinning reels can handle 100-200 yards of line, depending on the weight. For example, a typical 2500-size reel might hold 200 yards of 8-pound test or 150 yards of 10-pound test. Check these specifications before buying the line to ensure you get the right amount.
Gathering Your Tools and Materials
You don’t need much to line a fishing pole properly, but having the right items makes the job much easier:
- Your rod and reel combo (properly assembled)
- Fresh fishing line (matching your rod’s specifications)
- Sharp line clippers or scissors
- A friend to help (optional but helpful)
- Good lighting or a headlamp
- A pencil or dowel rod (for threading through the line spool)
Make sure your rod sections are properly connected and your reel is securely attached before starting. The guides should all align in a straight line from reel to rod tip. If your guides are twisted or misaligned, loosen the reel seat and readjust before proceeding.
Step 1: Prepare Your Reel and Rod
Start by laying your assembled rod on a flat surface where you can work comfortably. Open the bail on your spinning reel—that’s the wire arm that flips up and down. With the bail open, take the end of your fishing line (called the tag end) and thread it down through the guide closest to your reel.
This first threading step is crucial because it helps maintain proper tension while you’re loading the line onto the spool. Many beginners skip this step and wonder why their line doesn’t spool evenly. The line should pass through the guide smoothly without any binding or resistance.
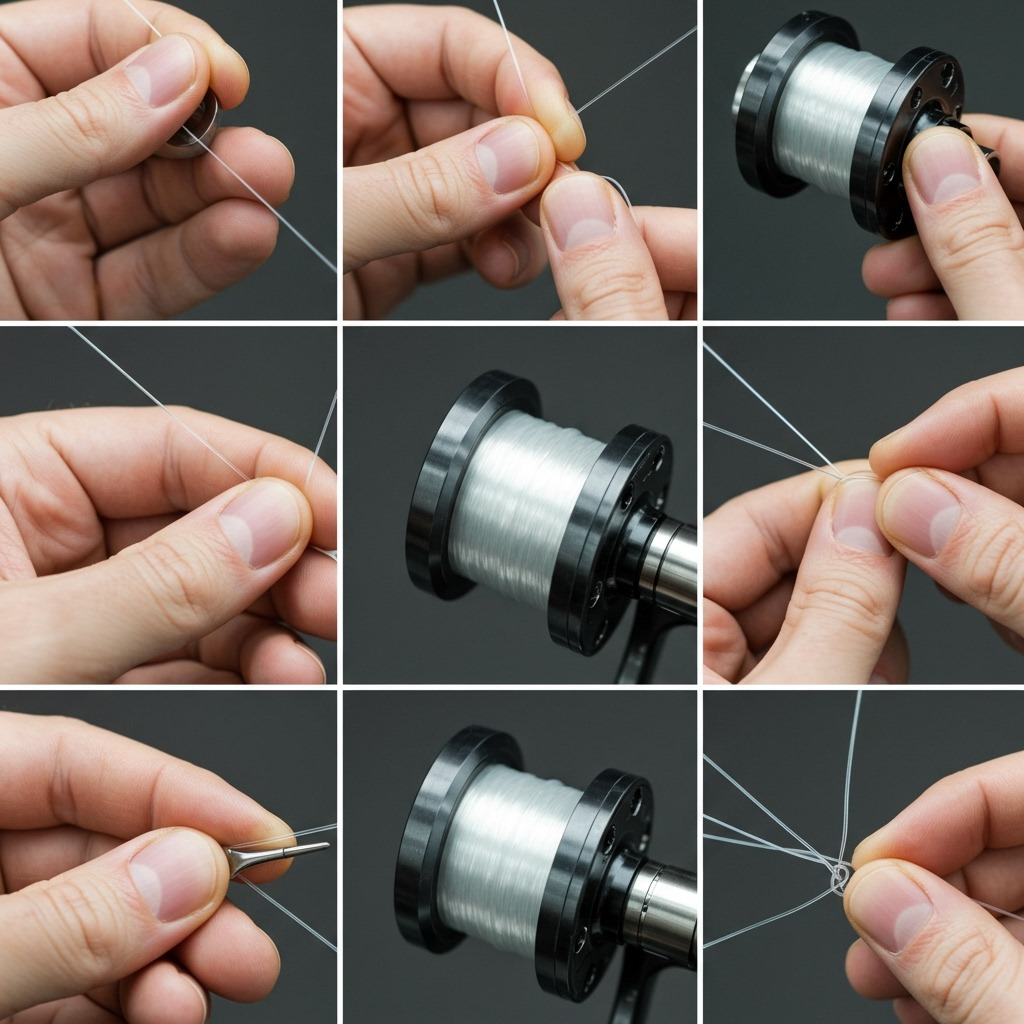
Step 2: Attach the Line to the Reel Spool
Now comes the most important part: securing your line to the reel spool. The arbor knot is the gold standard for this connection because it grips the smooth spool surface securely and won’t slip under pressure.
How to Tie the Arbor Knot:
- Loop the tag end of the line around the center of the reel spool
- Bring the tag end back and tie a simple overhand knot around the main line.
- Tie another overhand knot in just the tag end, close to the first knot.
- Pull the main line to snug both knots against the spool.
- Trim any excess tag end.
The arbor knot works because the two knots jam against each other and the spool, creating a secure connection that won’t slip when you’re reeling in fish or casting. Make sure both knots are tight against the spool before proceeding.
Step 3: Close the Bail and Begin Spooling
After your arbor knot is secure, close the bail on your reel. Now pick up your rod and place the spool of new line on the floor. Here’s a critical detail many people miss: the line should come off the spool in a counter-clockwise direction when you’re looking down at it.
If the line comes off clockwise, it will create twists that cause tangles and casting problems later. When in doubt, unspool a few feet and see which direction feels natural—the line should lie flat without twisting. You can test this by pulling out 20 feet of line and seeing if it naturally coils or lies straight.
Hold the rod comfortably and maintain light tension on the line by pinching it against the rod or holding it between your fingers as you turn the reel handle. This tension ensures the line wraps tightly and evenly on the spool. Too much tension can break light line, while too little creates loose coils.
Step 4: Fill the Spool Properly
Continue reeling until the line sits about 1/8 inch below the lip of the spool. This spacing is important—too little line and you’ll lose casting distance, too much and you’ll get tangles and line spilling off during casts. Most manufacturers mark the optimal fill line on their spools.
The line should lie evenly across the spool width. If it starts building up on one side, you may need to guide it manually or check that your line is coming off the supply spool correctly. Quality reels have level-wind mechanisms that distribute line automatically, but budget reels might require manual guidance.
For those planning extended fishing trips, understanding different types of camping can help you access remote fishing spots where properly spooled gear becomes even more critical. Nothing ruins a wilderness fishing adventure like a tangled line from improper spooling.
Step 5: Thread the Remaining Guides
Once your reel is full, cut the line to separate it from the supply spool. Open the bail again and thread the tag end through each remaining guide on your rod, working from the bottom (closest to the reel) toward the tip.
Take your time with this step—missing a guide is frustrating and requires re-threading the entire rod. Leave about 3-4 feet of line extending past the rod tip when you’re done. This gives you enough working length to tie on hooks, lures, or other terminal tackle.
Count your guides as you thread them to ensure you don’t miss any. Most spinning rods have 6-8 guides plus the tip guide. The guides should be large near the reel and gradually decrease in size toward the tip.
Step 6: Test Your Setup
Before heading to the water, test your setup by making a few practice casts in an open area. The line should flow smoothly off the reel without tangles or twists. If you notice problems, it’s better to address them now than on the water when fish are biting.
Pay attention to how the line lies on the spool after each cast. It should distribute evenly across the width of the spool, not bunch up in one area. Make several practice casts of varying lengths to ensure everything works properly.
Common Mistakes and How to Avoid Them
Overfilling the Spool: Too much line causes tangles and poor casting performance. Always leave that 1/8-inch gap at the spool rim. When in doubt, err on the side of slightly underfilling rather than overfilling.
Wrong Line Direction: Line coming off the supply spool in the wrong direction creates twists. Always check the orientation before spooling. If you notice twists developing, stop and flip the supply spool over.
Loose Arbor Knot: A poorly tied or loose arbor knot will slip, causing the line to spin freely on the spool. Take time to tie and tighten it properly. Test it by pulling firmly on the line before proceeding.
Insufficient Tension: Spooling without proper tension creates loose coils that cause problems later. Maintain steady, light pressure throughout the process. Your fingers should provide just enough resistance to keep the line snug.
Missing Guides: Threading the line through only some of the guides affects casting and line control. Double-check that you’ve gone through every guide. A systematic approach helps prevent this mistake.
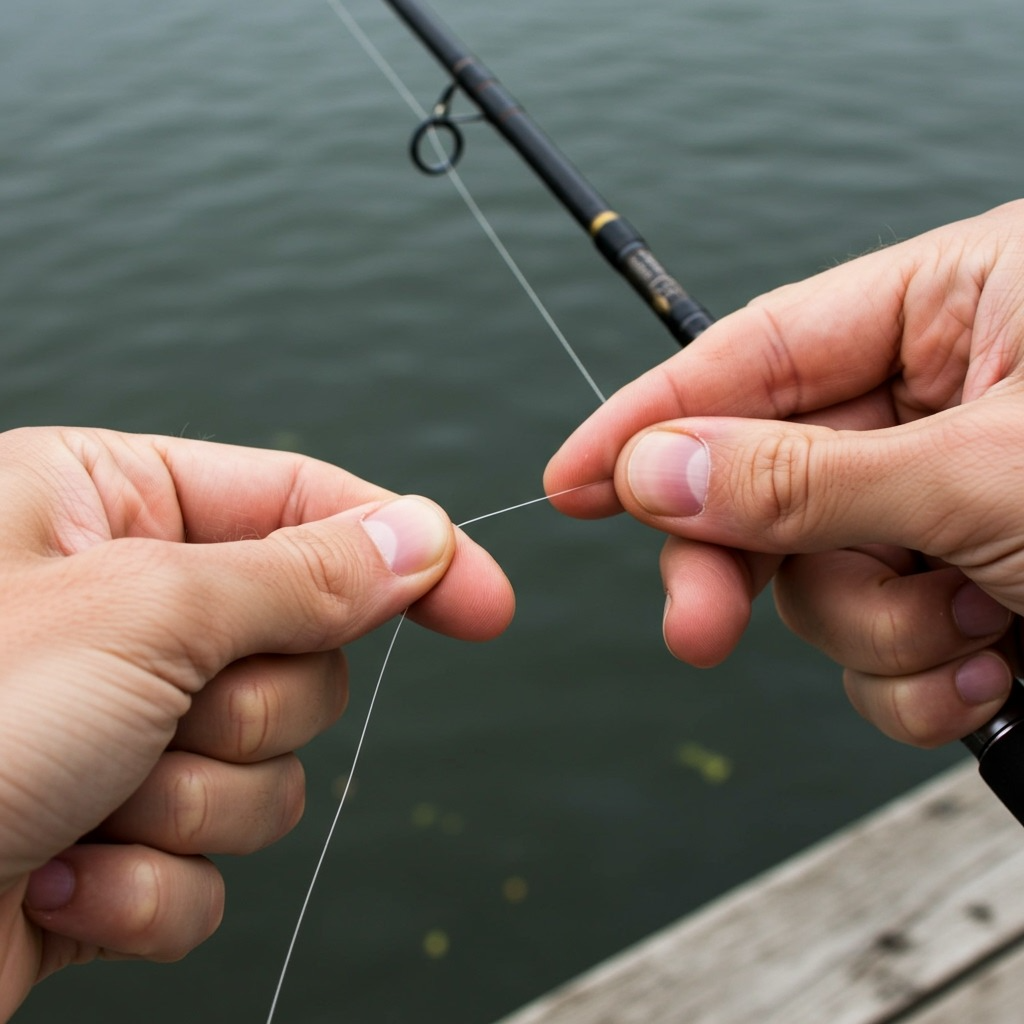
For detailed information on connecting your line to hooks and lures once your rod is set up, check out our guide on how to tie a hook on a fishing line.
Different Line Types and Special Considerations
Monofilament: The most beginner-friendly option. It’s forgiving, relatively inexpensive, and works well for most freshwater applications. It has some stretch, which helps absorb shock when fighting fish. Monofilament also floats, making it ideal for topwater presentations.
Fluorocarbon: Nearly invisible underwater and more sensitive than mono, but more expensive and can be trickier to work with. It’s stiffer and has less stretch. Fluorocarbon sinks faster than mono, making it excellent for bottom fishing.
Braided Line: Extremely strong for its diameter with no stretch, offering excellent sensitivity. However, it requires more care when spooling and often benefits from a monofilament or fluorocarbon leader. Braid can dig into itself under pressure, so proper spooling technique is crucial.
Each line type requires slightly different handling during the spooling process. Braided lines need extra attention to prevent wind knots, while fluorocarbon requires more careful tension control due to its stiffness.
Seasonal Maintenance and Line Care
Spring Setup: As you prepare for the new season, check your line for nicks, memory coils, or UV damage. Replace if necessary—old line fails at the worst possible moments. Spring is also an excellent time to clean your reel and check the drag system.
Summer Fishing: Hot weather can make lines more pliable, but UV exposure gradually weakens them. Store spools in cool, dark places when not in use. Consider using a line conditioner to reduce memory and improve casting performance.
Fall Preparation: Before putting gear away for winter, check your line capacity and condition. It’s easier to respool at home than streamside. Fall fish are often larger and more aggressive, putting extra stress on your line.
Winter Storage: Extreme cold can make lines brittle. If you fish in cold weather, let your gear warm up gradually before use. Store reels with slightly loose drag to prevent spring compression damage.
Many anglers combine their fishing trips with camping adventures. Learn about staying warm while camping during those early spring or late fall fishing expeditions when proper gear setup becomes even more important.

Troubleshooting Common Problems
Line Twists: Usually caused by incorrect spool orientation during loading. To fix: let out 50-100 yards of line and troll slowly behind a boat, or walk it out in a field and reel it back. Alternatively, cut off the twisted section and start fresh.
Tangles When Casting: Often from overfilling the spool or insufficient tension during spooling. Check your spool capacity and tension if needed. Wind knots typically form when the line loops over itself during the cast.
Line Slipping on Spool: Your arbor knot may have failed. Cut off the line, retie the arbor knot properly, and respool. This problem usually occurs when the initial knot wasn’t tightened sufficiently.
Uneven Line Lay: Can happen if you don’t maintain consistent tension or if your line supply spool isn’t feeding smoothly. Focus on steady, even pressure while reeling. Some reels benefit from manual line guidance during spooling.
Advanced Tips for Better Performance
Backing Line: For expensive lines like fluorocarbon or braid, you can save money by using cheaper monofilament as backing to fill the bottom third of your spool, then finish with your premium line. This also helps prevent line slippage on the spool.
Line Conditioner: Some anglers swear by line conditioners that reduce memory and improve casting performance. These are especially helpful with monofilament that’s been stored for long periods.
Multiple Spools: Consider buying extra spools for your reel so you can quickly switch between different line types or weights without respooling. This is particularly useful for anglers who target multiple species.
Regular Maintenance: Check your line regularly for nicks, especially near the hook end. Replace the first 10-20 feet periodically, as this section sees the most wear from casting and fighting fish.
When to Replace Your Fishing Line
Even a properly maintained line doesn’t last forever. Replace your line when you notice:
- Visible nicks, cuts, or abrasions
- Persistent memory coils that won’t disappear
- Discoloration from UV exposure
- Reduced strength (test by pulling gently)
- Poor casting performance
Most recreational anglers should replace their line at least once per season, more often if they fish frequently or in tough conditions. Professional guides often replace lines monthly or even weekly during busy seasons.
For those interested in expanding their fishing knowledge, learning about how to string a fishing pole provides additional insights into a complete rod setup and maintenance.
Professional Spooling Services
Many tackle shops offer professional spooling services for a small fee. This can be worth it for expensive lines or if you’re having trouble getting consistent results. Professional services ensure proper tension, line direction, and fill levels.
However, learning to do it yourself gives you independence on the water and helps you understand your equipment better. Once you master the technique, you can respool anywhere with basic tools.
FAQ: Common Line Setup Questions
How much line should I put on my reel?
Fill the spool to about 1/8 inch below the rim. This gives you maximum casting distance while preventing tangles from overfilling.
Can I use any type of line on my rod and reel?
While most reels can handle different line types, always check your rod’s line weight rating and your reel’s capacity specifications for best performance.
Why does my line twist when I cast?
Line twists usually result from incorrect spool orientation when loading line, or from using lures that spin in the water without a swivel.
How often should I replace my fishing line?
Replace the line at least once per season for regular anglers, or whenever you notice signs of wear like nicks, discoloration, or reduced strength.
Do I need to wet my line before spooling?
While not necessary, some anglers wet monofilament line before spooling to reduce friction and help it lay more smoothly on the spool.