
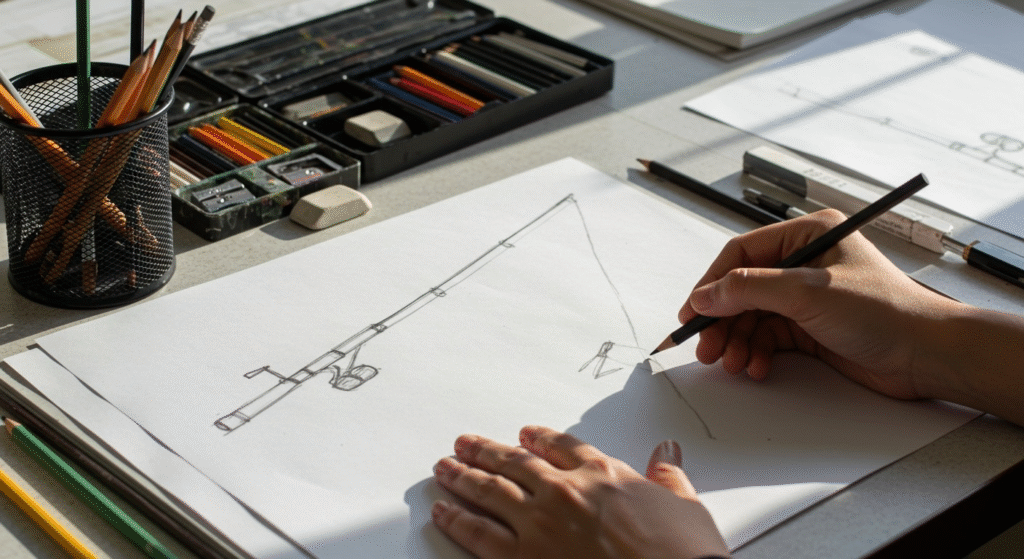
I’ll never forget the day my eight-year-old nephew asked me to teach him how to draw a fishing pole. “It’s just a stick with a string, right, Uncle Mike?” he said confidently. Twenty minutes later, after several crumpled attempts, we both realized that drawing even simple objects like fishing poles requires breaking them down into manageable steps. That experience taught me the importance of having a clear, systematic approach to drawing anything – especially something as detailed as a fishing rod.
Whether you’re an art teacher looking for a fun project, a parent helping with homework, or simply someone who enjoys sketching outdoor scenes, learning how to draw a fishing pole opens up countless creative possibilities. From simple cartoon-style rods to detailed, realistic drawings, mastering this skill will enhance your ability to create fishing scenes, outdoor adventures, and nature illustrations.
Essential Drawing Materials
Before diving into the drawing process, gathering the right materials makes a significant difference in your results and overall experience.
Basic Supplies You’ll Need
Pencils: Start with a range of pencils from 2H (hard, light lines) to 4B (soft, dark lines). A standard HB pencil works perfectly for beginners.
Paper: Any drawing paper works, but heavier paper (at least 90gsm) handles erasing better and won’t tear easily.
Eraser: A kneaded eraser provides precise control, while a standard pink eraser works for larger corrections.
Ruler: Helpful for getting proportions right, especially for the rod’s length.
Optional supplies: Blending stumps for shading, colored pencils or markers for finishing touches.
Setting Up Your Workspace
Choose a well-lit area with a flat surface. Position your paper so the fishing pole will be drawn horizontally across the page – this gives you the most space and makes proportions easier to manage.
Understanding Fishing Pole Anatomy
Before drawing, it’s crucial to understand the basic components of a fishing pole. This knowledge helps you create accurate, believable drawings rather than generic “stick with string” sketches.
Main Components
Rod/Blank: The long, tapered main shaft that provides flexibility and strength
Handle/Grip: The area where you hold the rod, often textured or wrapped
Reel: The mechanism that holds and releases fishing line
Reel Seat: The mounting system that secures the reel to the rod
Guides/Eyes: Small rings along the rod that guide the fishing line
Tip-Top: The final guide at the rod’s tip
Fishing Line: The thin line extending from the reel through the guides
Hook/Lure: The business end that catches fish
Understanding these components ensures your drawing includes all essential elements and looks realistic.
Step 1: Drawing the Basic Rod Shape
Start with the foundation – the rod itself. This forms the backbone of your entire drawing.
Creating the Main Rod Line
Draw a gentle, curved line across your paper, starting thick on the left (handle end) and tapering to a point on the right (tip end). The curve should be subtle – imagine the rod has a slight bend from its own weight or from a fish pulling on the line.
Pro tip: Keep this initial line light. You’ll darken it later, but starting light allows for easy corrections.
Establishing Proportions
A typical fishing rod measures 6-8 feet long. On paper, make your rod about 8-10 inches long, leaving space for the reel and handle details. The rod should taper from about pencil thickness at the base to barely visible at the tip.
Adding the Second Edge
Draw a second line parallel to your first, creating the rod’s thickness. Keep the gap between lines consistent with the taper – wider at the base, narrower at the tip. Don’t worry about perfection; slight variations add character to your drawing.
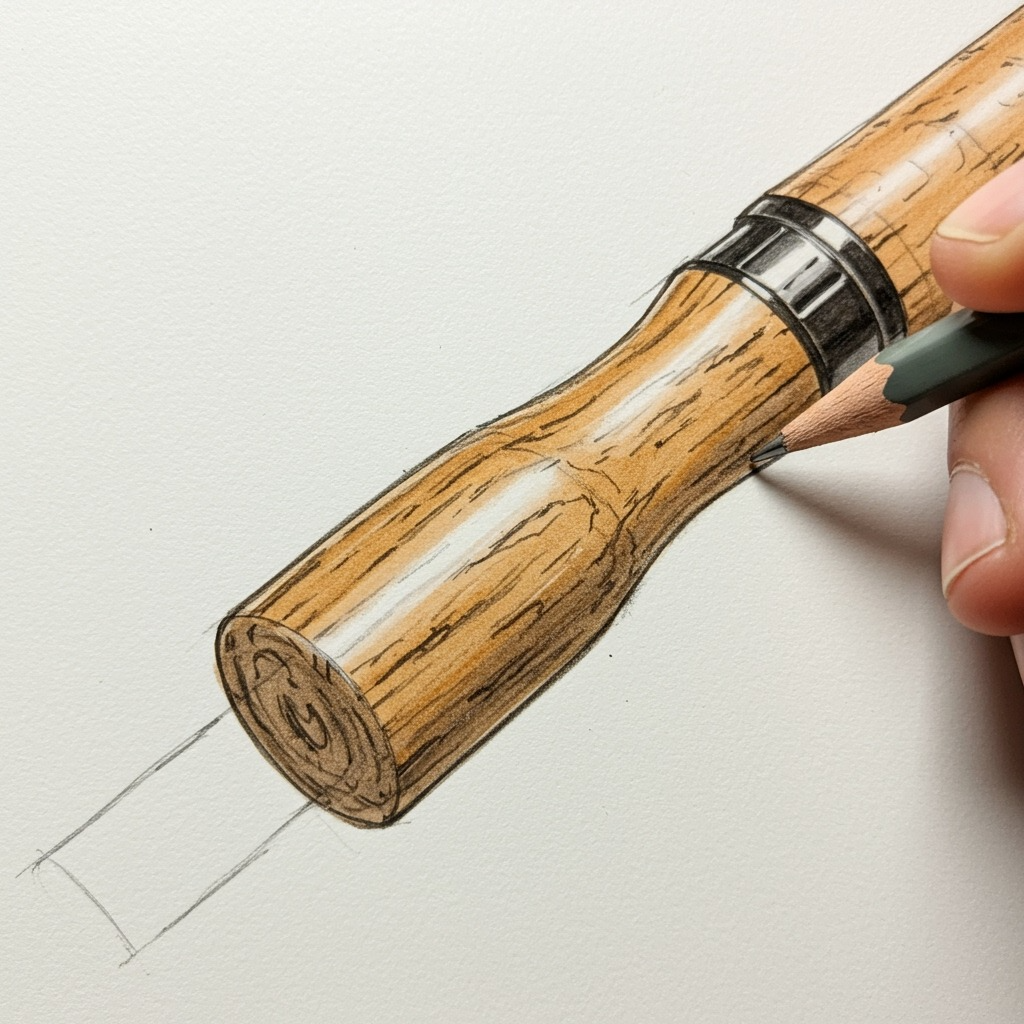
Step 2: Adding the Handle and Grip
The handle gives your fishing pole personality and makes it look functional rather than decorative.
Drawing the Handle Base
At the thick end of your rod, extend the lines about 1-2 inches beyond where the rod ends. This creates the handle section that extends behind the reel.
Creating Handle Texture
Real fishing rod handles often have cork or foam grips with distinctive textures. Add small horizontal lines, dots, or crosshatching patterns to suggest this texture. Keep the pattern consistent, but don’t make it too busy – suggestion is more effective than excessive detail.
Handle Proportions
The handle should be slightly thicker than the rod base and about 1/4 the total length of your fishing pole. This proportion looks natural and functional.
Step 3: Drawing the Reel
The reel is often the most detailed part of a fishing pole drawing and can seem intimidating. Break it down into simple shapes.
Basic Reel Shape
Draw a circle where the reel attaches to the rod, typically about 1/3 of the way up from the handle end. This circle represents the main reel body.
Adding Reel Details
Inside the main circle, draw a smaller circle – this represents the spool where the line is stored. Add a small rectangular shape at the bottom for the reel foot (the part that attaches to the rod).
Reel Handle
From the side of the main circle, draw a small “L” shaped line extending outward. At the end of this line, add a small oval for the handle grip. This handle allows anglers to retrieve the line.
Connecting to the Rod
Draw small curved lines above and below the reel to show how it attaches to the rod. These represent the reel seat that secures the reel in place.
If you’re interested in learning more about fishing equipment and techniques, check out our comprehensive guide on fly fishing basics to understand different types of fishing gear.
Step 4: Adding the Guides (Line Eyes)
Guides are the small rings that direct the fishing line along the rod. They’re essential for a realistic fishing pole drawing.
Placement and Sizing
Draw 4-6 guides along your rod, starting with the largest near the reel and getting progressively smaller toward the tip. Space them roughly evenly, but they don’t need to be perfectly uniform.
Drawing Individual Guides
Each guide looks like a small circle attached to the rod by two short lines. Draw a circle, then add two short lines connecting it to the rod – one on top, one on the bottom.
The Tip-Top Guide
At the very end of your rod, draw the final guide. This one is typically smaller and sits directly on the rod tip rather than being attached by legs.
Maintaining Perspective
As guides get smaller toward the tip, they should also appear more compressed due to perspective. The ones near the handle show full circular shapes, while those at the tip appear more oval.
Step 5: Drawing the Fishing Line
The fishing line brings your drawing to life and suggests action and purpose.
Starting from the Reel
Begin your line at the reel, then draw it passing through each guide along the rod. The line should have slight curves between guides – perfectly straight lines look unnatural.
Line Beyond the Rod
Extend the line beyond the rod tip, letting it curve downward naturally. You can show the line going into water, hanging straight down, or curved as if there’s tension from a fish.
Line Thickness
Keep the fishing line very thin – just a light pencil line. Real fishing line is nearly invisible, so your drawn line should be subtle but visible enough to complete the composition.
Step 6: Adding the Hook and Lure
The business end of your fishing setup adds interest and completes the functional aspect of your drawing.
Simple Hook Design
Draw a basic “J” shape at the end of your line. Add a small circle at the top of the “J” for the eye where the line attaches. Include a small barb (a tiny backwards-pointing line) near the point.
Alternative: Adding a Lure
Instead of a plain hook, you might draw a fishing lure. Simple lures can be represented by small oval shapes with a hook at the end. Add a few lines to suggest the lure’s surface details.
Bobber Option
Many fishing setups include a bobber (float) on the line. Draw a small circle or oval on the line above your hook, and add a horizontal line through its middle to show the waterline when it’s floating.
Step 7: Refining and Adding Details
With all basic elements in place, it’s time to refine your drawing and add finishing touches.
Darkening Final Lines
Go over your main lines with a darker pencil or pen, making the rod, reel, and other major components stand out clearly. Keep the fishing line light and subtle.
Adding Shadows and Depth
Add light shading under the reel and along the bottom edge of the rod to give your drawing dimension. Keep shadows simple and consistent with a single light source.
Surface Details
Add small details like brand names on the reel, grip texture on the handle, or reflections on metallic parts. Don’t overdo it – a few well-placed details are more effective than busy over-detailing.
Background Elements (Optional)
Consider adding simple background elements like water ripples, cattails, or a dock edge to place your fishing pole in context.

Common Drawing Mistakes and How to Avoid Them
Proportion Problems
Mistake: Making the reel too large or the handle too short relative to the rod length.
Solution: Use your pencil as a measuring tool, holding it at arm’s length to check proportions against your reference or mental image.
Stiff, Straight Lines
Mistake: Drawing the rod as a perfectly straight line.
Solution: Add slight curves and natural bends. Real fishing rods have flex and character.
Overcomplicated Details
Mistake: Adding too many small details that make the drawing look cluttered.
Solution: Focus on the essential elements first, then add details sparingly for maximum impact.
Inconsistent Guide Sizes
Mistake: Making all guides the same size or sizing them randomly.
Solution: Start large near the reel and gradually decrease size toward the tip, maintaining consistent spacing.
Drawing Variations and Styles
Cartoon Style
For a fun, cartoon approach, exaggerate proportions – make the reel oversized, add personality to the rod’s curve, and perhaps include a surprised-looking fish on the hook.
Realistic Style
Focus on accurate proportions, subtle shading, and precise details. Study reference photos of actual fishing rods to improve accuracy.
Action Scenes
Show your fishing pole in use – bent with the tension of a fighting fish, or relaxed in a peaceful fishing scene. This adds narrative to your drawing.
Different Rod Types
Try drawing different fishing rod styles:
- Fly rods: Longer and more flexible-looking
- Spinning rods: Medium length with a prominent spinning reel
- Baitcasting rods: Shorter with the reel mounted on top
Coloring Your Fishing Pole
Traditional Colors
Rod: Browns, greens, or blues for the blank
Handle: Cork colors (light brown/tan) or black foam
Reel: Metallic grays and blacks with some blue or green accents
Line: Very light gray or leave uncolored
Guides: Metallic gray or black
Creative Color Schemes
Don’t feel limited to realistic colors. Bright, fun colors work great for cartoon-style drawings or children’s illustrations.
Shading Techniques
Use colored pencils to add subtle shading that gives your fishing pole dimension. Keep the light source consistent throughout your drawing.
Teaching Kids to Draw Fishing Poles
Simplification Strategies
When teaching children, focus on basic shapes first:
- Start with a simple line for the rod
- Add a circle for the reel.
- Include basic fishing line and a hook
- Add details gradually as confidence builds
Making It Fun
Encourage kids to add their own creative elements – maybe a fish on the line, a fishing boat in the background, or their favorite fishing buddy. Personal touches make the learning process more engaging.
Building Confidence
Celebrate effort over perfection. Every fishing pole drawing teaches valuable skills about observation, proportion, and hand-eye coordination.
If you’re planning to combine your artistic interests with actual fishing adventures, consider exploring some best hiking trails in Texas that offer excellent fishing opportunities.
Advanced Techniques
Perspective Drawing
Try drawing fishing poles from different angles – from above, below, or at various side angles. This challenges your understanding of three-dimensional form.
Multiple Poles
Draw several fishing poles together, perhaps propped against a fence or stored in a rod holder. This creates more complex compositions and storytelling opportunities.
Environmental Context
Place your fishing pole in complete scenes – on a dock, by a lake, or in a boat. This context makes your drawing more interesting and narrative.
Digital Drawing Considerations
Software Options
Popular digital drawing programs like Procreate, Adobe Illustrator, or even free options like GIMP work well for fishing pole illustrations.
Layer Management
Use separate layers for different components (rod, reel, line, background) to make editing and adjustments easier.
Brush Selection
Choose brushes that mimic pencil or pen strokes for authentic-looking line work. Vary brush sizes for different elements – thicker for the rod, very thin for the fishing line.
Practice Exercises
Daily Sketching
Spend 10-15 minutes daily sketching fishing poles from different angles or in different styles. Regular practice builds muscle memory and confidence.
Reference Study
Collect photos of real fishing poles and practice drawing from these references. Notice details you might have missed in imagination-based drawings.
Style Exploration
Try drawing the same fishing pole in different artistic styles – realistic, cartoon, abstract, or minimalist. This expands your artistic vocabulary.
Troubleshooting Common Issues
“My Rod Looks Too Stiff”
Add subtle curves and slight irregularities. Real fishing rods have natural flex and character.
“The Proportions Look Wrong”
Step back from your drawing or view it in a mirror. Fresh perspective often reveals proportion issues that are hard to see up close.
“It Doesn’t Look Like a Fishing Pole”
Ensure you’ve included all essential elements: rod, reel, guides, line, and hook. Missing components make identification difficult.
“The Details Are Overwhelming”
Simplify. Good drawings often succeed through effective simplification rather than exhaustive detail.
Learning to draw a fishing pole opens doors to creating entire outdoor scenes and nature illustrations. Whether you’re sketching for relaxation, teaching others, or working on larger artistic projects, these foundational skills serve you well.
Remember that every artist develops their own style through practice and experimentation. Don’t be discouraged if your first attempts don’t match your expectations – even experienced artists need time to develop their skills.
The key to success lies in patient practice, careful observation, and gradually building complexity. Start with simple versions and add details as your confidence grows. Before long, you’ll be creating fishing pole drawings that capture both the functional beauty of the equipment and the peaceful spirit of fishing itself.
For those interested in the actual fishing techniques that accompany your artistic subjects, explore our guide on fly fishing vs regular fishing to understand different approaches to this beloved outdoor activity.
Frequently Asked Questions
What’s the easiest way to get fishing pole proportions right?
Use the “head-to-body” ratio method – make your fishing rod about 6-8 times longer than the reel diameter. This creates natural-looking proportions that work for most fishing pole drawings. You can also use your pencil as a measuring tool, holding it at arm’s length to check relative sizes.
Should I draw the fishing line first or last?
Draw the fishing line after completing the rod, reel, and guides. This allows you to thread the line properly through each guide and ensures it follows a natural path. The line should be drawn lightly since real fishing line is nearly invisible.
How do I make my fishing pole drawing look three-dimensional?
Add subtle shading along the bottom edge of the rod and under the reel to create depth. Use slightly curved lines instead of perfectly straight ones, and make sure your guides decrease in size toward the tip to show perspective. Light shadows and highlights on metallic parts like the reel also add dimension.
What’s the best way to draw different types of fishing reels?
Spinning reels (most common) are drawn as circles with an open face and bail arm. Baitcasting reels sit on top of the rod and look more cylindrical. Fly fishing reels are simpler and more circular. Start with basic shapes and add details gradually based on the reel type you’re depicting.
How can I make my fishing pole drawing look more dynamic?
Add a curve to the rod as if it’s under tension from a fish, show the line at an angle rather than hanging straight down, or include motion lines and water splashes. You can also draw the pole in someone’s hands or show it bent during action rather than at rest.