
Last Tuesday morning, I poured what should have been my perfect cup of coffee, took that first eager sip, and immediately made a face that could sour milk. My coffee tasted like it had been filtered through an old gym sock. After three years of faithful daily brewing, my trusty coffee maker was crying for help—and I had been ignoring all the signs.
That bitter wake-up call taught me something every coffee lover needs to know: a dirty coffee maker doesn’t just make bad coffee, it can harbor mold, bacteria, and mineral buildup that affects both taste and your health. The good news? Cleaning your coffee maker is easier than you think, and the difference in your morning brew is absolutely worth the 20 minutes it takes.

Why Your Coffee Maker Desperately Needs Regular Cleaning
Your coffee maker works harder than you might realize. Every time you brew, coffee oils, mineral deposits from water, and tiny grounds create a perfect storm of buildup inside the machine. These deposits don’t just sit there quietly—they actively change how your coffee tastes and how well your machine functions.
Water reservoirs, tubes, and other hidden components become breeding grounds for yeast, mold, and bacteria when left uncleaned. That’s not just gross—it’s a health concern that most coffee drinkers never consider until they taste the consequences. According to the National Sanitation Foundation, coffee makers rank among the top appliances harboring harmful bacteria in home kitchens.
The frequency depends on your brewing habits, but if you’re a daily coffee drinker like me, monthly cleaning prevents serious buildup. Occasional brewers can stretch to every three months, though visible buildup should trigger an immediate cleaning session. Hard water areas may require more frequent attention due to accelerated mineral accumulation.
Beyond health concerns, dirty coffee makers simply don’t work as well. Mineral deposits clog internal passages, slow brewing times, and prevent optimal water temperature. Your expensive coffee beans deserve better than a machine that can’t extract their full flavor potential.
Essential Supplies for Coffee Maker Cleaning
Before diving in, gather these simple supplies that you probably already have in your kitchen:
- White distilled vinegar (the cleaning MVP)
- Fresh filtered water
- Mild dish soap
- Soft microfiber cloths or non-abrasive sponges
- Small brush (an old toothbrush works perfectly)
- Paper coffee filters
- Large measuring cup
- Baking soda for stubborn stains
Commercial coffee maker cleaners like Affresh tablets work well, but vinegar remains the most accessible and effective option for most home brewers. The American Cleaning Institute recommends white vinegar for appliance descaling due to its natural acidity and safety profile.
Skip harsh chemicals, bleach, or abrasive scrubbers that could damage delicate components. Your coffee maker’s internal parts weren’t designed to handle industrial-strength cleaners, and residue from these products could contaminate your morning brew.

Daily Coffee Maker Maintenance That Makes a Difference
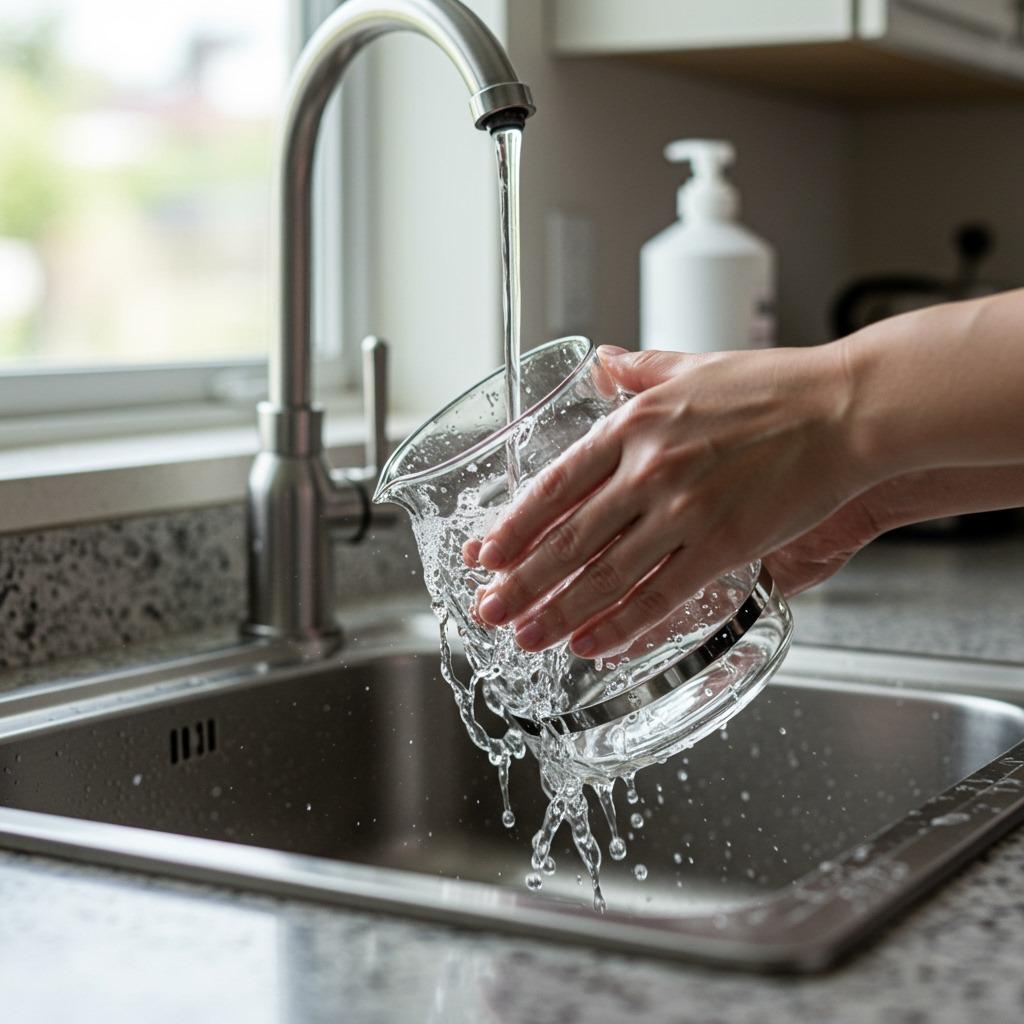
Your coffee maker cleaning routine should start with daily habits that prevent major buildup. After each use, rinse the carafe with warm water and remove used grounds immediately. Coffee grounds left sitting become acidic and create staining that gets progressively harder to remove over time.
Wipe down the exterior with a damp cloth, paying special attention to the control panel and warming plate where coffee splatters accumulate. These areas see the most action and can become sticky breeding grounds for bacteria if neglected.
For single-serve machines, clean around the water reservoir and pod receptacle where grounds tend to collect. These compact spaces trap moisture and debris, creating perfect conditions for unwanted growth.
Leave the reservoir lid and filter basket open between uses to air-dry completely. This simple step prevents moisture from creating the perfect environment for bacterial growth that could affect your next cup. Proper ventilation is your first line of defense against microbial contamination.
The Complete Monthly Deep Clean Process
Step 1: Disassemble and Prepare Your Workspace
Start by turning off your coffee maker and letting it cool completely. Safety first—hot surfaces and cleaning solutions don’t mix well. Remove all detachable parts: carafe, filter basket, water reservoir, and any reusable filters. This gives you access to clean every surface that touches your coffee or water.
Clear your workspace and lay out clean towels for drying components. Having everything organized makes the process smoother and ensures you don’t miss any critical parts during reassembly.
Step 2: Clean All Removable Components Thoroughly
Soak the carafe, filter basket, and other removable components in warm, soapy water for at least 10 minutes. This soaking time allows dish soap to break down coffee oils that have built up over weeks of brewing. Use a soft sponge to gently clean away residue without scratching surfaces.
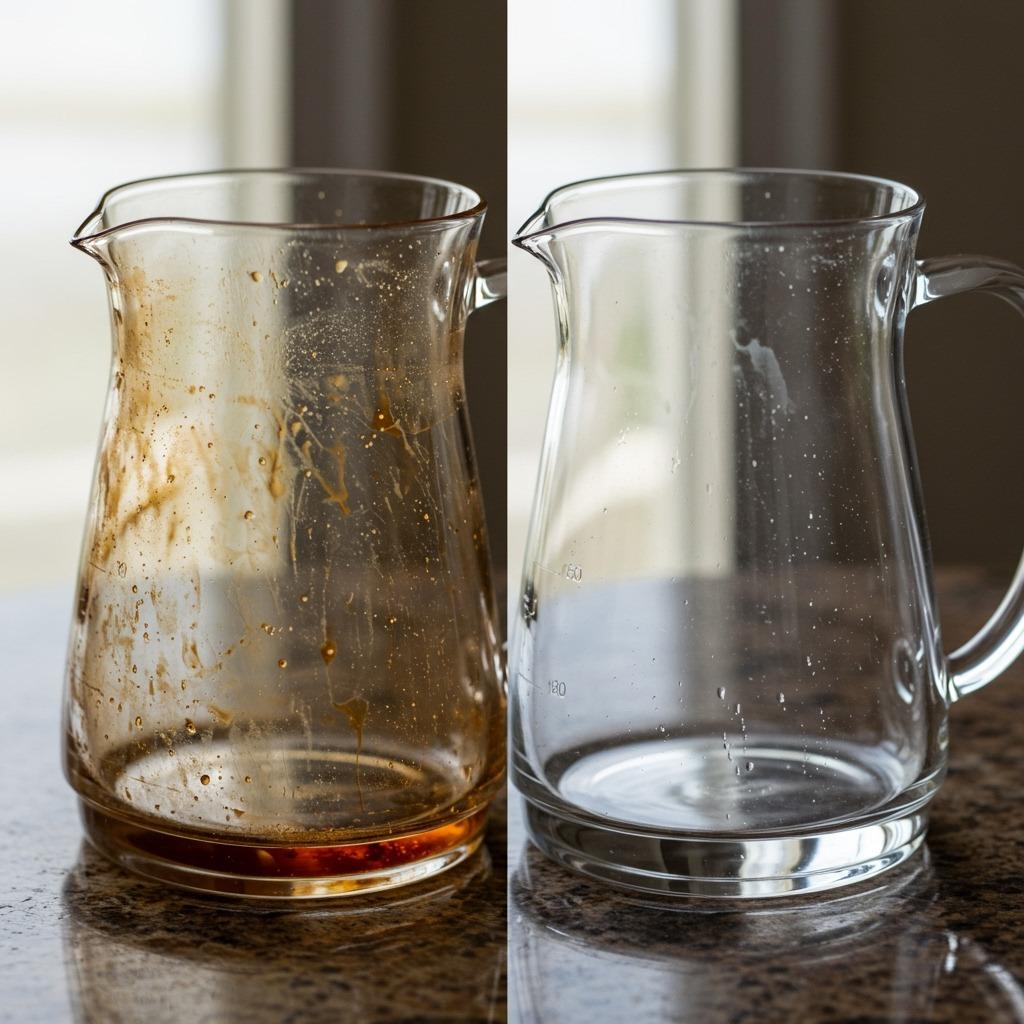
For stubborn stains in glass carafes, try the rice trick: add warm soapy water and a handful of dry white rice, then swirl the mixture around to gently scrub away tannin stains. The rice acts as a gentle abrasive that won’t scratch glass but effectively removes discoloration.
Reusable filters need special attention since grounds can get embedded in the mesh. Use a soft brush to work out any trapped particles, then rinse thoroughly under warm running water. Hold the filter up to the light to ensure all holes are clear and water flows freely through the mesh.
Step 3: The Descaling Process That Actually Works
Here’s where the magic happens. Fill your water reservoir with equal parts white vinegar and water. The vinegar dissolves mineral deposits that plain water can’t touch, restoring your machine’s brewing efficiency and preventing long-term damage to heating elements.
Start a brew cycle without coffee grounds, letting the vinegar solution run through completely. Halfway through the cycle, turn off the machine and let it sit for 30 minutes. This pause allows the vinegar to work on stubborn mineral buildup in places you can’t reach—internal tubes, heating chambers, and valve mechanisms.
Complete the brewing cycle, then discard the vinegar-water mixture. The smell might be strong, but that’s the vinegar doing its job on accumulated deposits that have been affecting your coffee’s taste for weeks.
Step 4: Thorough Rinse Cycles Are Non-Negotiable
Never skip this crucial step. Run two complete brewing cycles with fresh water to flush out all traces of vinegar. The first rinse removes most of the vinegar, while the second ensures no residual taste affects your next pot of coffee.
After rinsing, taste a small amount of the final rinse water. If you detect any vinegar flavor, run additional rinse cycles until the water tastes neutral. Some coffee makers with complex internal designs may require three or four rinse cycles for complete cleaning.
Wash the carafe and filter basket once more in hot, soapy water to eliminate any lingering vinegar odor that could transfer to your coffee.
Cleaning Different Types of Coffee Makers
Standard Drip Coffee Makers
Traditional drip machines follow the basic cleaning process outlined above, but pay special attention to the showerhead, where coffee oils concentrate. Some models feature a dedicated cleaning cycle that automates timing—check your manual for specific manufacturer instructions.
The Specialty Coffee Association recommends monthly descaling for home drip machines used daily, with more frequent cleaning in hard water areas where mineral buildup accelerates.
Single-Serve Pod Machines
These compact brewers need similar care but with adjusted quantities. Use the largest cup setting and run two cleaning cycles instead of one to ensure thorough coverage of internal components. Clean the pod receptacle area thoroughly, as grounds accumulate in the mechanisms that puncture pods.
Pay attention to the water reservoir’s interior surfaces, where biofilm can develop if moisture lingers. These machines often have more plastic components that require gentler cleaning approaches.
Espresso Machines and High-End Equipment
Premium machines often require specialized descaling solutions and have built-in cleaning programs. While vinegar works for basic maintenance, commercial descalers may be safer for expensive equipment with complex internal components and sensitive heating elements.
Consult your manufacturer’s guidelines before using any cleaning solution, as some warranties require specific products for maintenance compliance.
For those interested in expanding their coffee knowledge beyond machine maintenance, learning how to make French press coffee can provide brewing alternatives when your machine is undergoing deep cleaning.
Troubleshooting Persistent Cleaning Challenges
Dealing with Stubborn Mineral Buildup
If monthly cleaning isn’t removing white, chalky deposits, your water has high mineral content. Consider using filtered water for brewing and increasing cleaning frequency to every two weeks. The Water Quality Association provides resources for understanding your local water quality and its impact on appliances.
For severe buildup, use straight white vinegar instead of the diluted solution, but check your manufacturer’s recommendations first. Some machines have specific limitations on cleaning solution strength to protect internal components.
Conquering Stubborn Coffee Stains
Glass carafes can develop brown tannin stains that resist normal washing. Create a paste with baking soda and water, let it sit for 15 minutes, then scrub gently with a soft brush. The mild abrasive action, combined with baking soda’s alkaline properties, breaks down stubborn organic deposits.
For thermal carafes with narrow openings, denture cleaning tablets dissolved in warm water work surprisingly well. Let the solution sit overnight, then rinse thoroughly. These tablets are designed to remove organic stains without damaging materials.
Addressing Slow Brewing Issues
If your coffee maker takes longer than usual to complete a brew cycle, mineral deposits likely clog internal passages. The descaling process should restore normal flow, but severely neglected machines might need multiple cleaning sessions or professional service.
Document your machine’s normal brewing time when clean, so you can recognize when performance degrades and cleaning becomes necessary.
Warning Signs Your Coffee Maker Needs Immediate Attention
Don’t wait for your monthly cleaning schedule if you notice these critical warning signs. Slow brewing, unusual gurgling noises during operation, or visible white mineral deposits around water reservoirs indicate immediate cleaning needs that shouldn’t be delayed.
Coffee that tastes bitter, sour, or generally off-flavor often results from oil buildup or bacterial growth in uncleaned machines. These taste changes can happen gradually, making them easy to ignore until they become severe.
Strange odors when the machine heats up suggest the presence of mold or bacteria that require thorough cleaning before health issues develop. Trust your nose—if something smells wrong, it probably is.
Water backing up into the reservoir during brewing or coffee grounds appearing in your cup typically mean that the filter basket clogs need immediate attention before your next brewing session.
Extending Your Coffee Maker’s Lifespan Through Proper Care
Regular cleaning does more than improve taste—it extends equipment life by preventing mineral deposits from damaging internal components. Machines that receive consistent care can brew great coffee for years longer than neglected counterparts, making maintenance a smart financial investment.
Using filtered water reduces mineral buildup significantly, especially in areas with hard water. While not essential, this simple change can reduce cleaning frequency and prevent premature component wear that leads to expensive repairs.
Replace water filters according to manufacturer schedules, typically every two months or after a specific number of brew cycles. Old filters become ineffective and can introduce contaminants into your brewing water, defeating the purpose of filtration.
Consider investing in a water testing kit to understand your local water quality. The Environmental Protection Agency provides resources for water quality testing and understanding how minerals affect appliances.
Learning what drip coffee is can help you understand how water temperature and quality affect your final cup, making you a more informed coffee maker owner.
Professional Cleaning Solutions vs. DIY Methods
While white vinegar handles most cleaning needs effectively and safely, commercial cleaners offer convenience for busy schedules. Products like Affresh tablets dissolve completely and eliminate measuring, though they cost significantly more than household vinegar.
Commercial descaling solutions often work faster than vinegar and may be gentler on sensitive machine components. However, they’re not necessarily more effective for routine maintenance cleaning.
Avoid using harsh chemicals, bleach, or abrasive cleaners that can damage seals, heating elements, or plastic components. Stick with food-safe solutions that won’t leave harmful residues in your brewing system.
For expensive espresso machines or commercial equipment, manufacturer-recommended descaling solutions may preserve warranties and ensure optimal performance. The investment protects your equipment while maintaining brewing quality standards.
Creating a Sustainable Coffee Maker Maintenance Schedule
Successful coffee maker care requires consistency rather than perfection. Create a simple monthly reminder in your phone or mark calendar dates for deep cleaning sessions. Link the cleaning to other monthly tasks, like changing air filters or paying bills, to build a routine.
Daily maintenance takes less than two minutes but prevents most serious buildup issues. Make rinsing the carafe and wiping the exterior part of your post-coffee routine, just like washing your favorite mug.
Keep cleaning supplies organized in one location for quick access when cleaning time arrives. A dedicated caddy under the sink with vinegar, cloths, and brushes makes the process smoother and more likely to happen on schedule.
Track your cleaning sessions and note any changes in coffee taste or machine performance. This documentation helps identify patterns and optimize your maintenance schedule for your specific usage and water conditions.
For outdoor enthusiasts who enjoy coffee beyond the kitchen, learning how to make cowboy coffee provides brewing options when electrical machines aren’t available during camping trips.
The Bottom Line on Coffee Maker Cleanliness
A clean coffee maker is the foundation of great-tasting coffee, regardless of how expensive your beans are or how precise your brewing technique. Neglecting this simple maintenance task wastes money on premium coffee that can’t reach its full potential through a dirty machine.
The 20 minutes you invest monthly in deep cleaning pays dividends in better-tasting coffee, extended equipment life, and peace of mind about hygiene. Your morning routine deserves this small investment in quality and safety.
Remember, coffee maker cleaning isn’t just about removing visible stains—it’s about maintaining the internal systems that extract flavor from your beans. A well-maintained machine is your partner in creating consistently excellent coffee that starts your day right.
FAQ: Coffee Maker Cleaning Essentials
How often should I clean my coffee maker if I use it every day?
Daily users should deep clean monthly with vinegar and water, plus daily maintenance like rinsing the carafe and wiping exterior surfaces. High mineral content water may require bi-weekly cleaning to prevent buildup that affects taste and performance.
Can I use apple cider vinegar instead of white vinegar to clean my coffee maker?
White distilled vinegar works best because it’s more acidic and leaves less residual flavor than apple cider vinegar. Apple cider vinegar can work in emergencies, but requires extra rinse cycles to remove the stronger taste and potential discoloration.
Is it safe to put coffee maker parts in the dishwasher?
Check your owner’s manual first, but most glass carafes, filter baskets, and some water reservoirs are top-rack dishwasher safe. Never submerge the main unit or put heating plates in the dishwasher, as water damage can destroy electrical components.
What should I do if my coffee still tastes bad after cleaning?
Run additional rinse cycles with fresh water to remove any remaining vinegar taste. If problems persist, the issue might be old coffee grounds, stale beans, or mineral buildup requiring professional service or equipment replacement.
How do I know if my coffee maker is too dirty to salvage?
If deep cleaning doesn’t restore normal brewing speed or eliminate off-tastes, and you see visible mold or severe mineral deposits that resist multiple cleaning attempts, replacement might be more cost-effective than professional cleaning services.