
Three miles into what was supposed to be a leisurely day hike in the Cascades, I knew I had made a terrible mistake. My brand-new hiking boots, which felt fine during the five-minute test walk around the store, were now creating hot spots on both heels and cramping my toes with every downhill step. By the time I limped back to the trailhead, I had learned one of hiking’s most painful lessons: knowing how hiking boots should fit isn’t just about comfort—it’s essential for safety and enjoying your time on the trail.
Whether you’re shopping for your first pair of hiking boots or replacing worn-out favorites, understanding proper fit can mean the difference between blissful trail adventures and miserable foot pain. This comprehensive guide will help you get the fit right the first time, avoiding the mistakes that turn promising hikes into painful ordeals.
Why Proper Boot Fit Matters More Than You Think
Ill-fitting hiking boots create problems that extend far beyond simple discomfort. Boots that are too small cause immediate pain, bruised toenails, and potential circulation issues during long hikes. Boots that are too large allow your feet to slide around, creating friction that leads to blisters and increasing your risk of ankle injuries on uneven terrain.
The stakes become even higher on challenging trails where precise foot placement matters for safety. Loose boots reduce your ability to feel the ground beneath your feet, making it harder to navigate technical terrain confidently. Meanwhile, tight boots can cause numbness that affects your balance and judgment.
Poor boot fit also accelerates foot fatigue, forcing you to work harder with every step and potentially cutting your hiking adventures short. When your feet hurt, everything else about hiking becomes less enjoyable, from scenic viewpoints to campfire conversations.
The Golden Rules of Hiking Boot Fit
Understanding how hiking boots should fit starts with three fundamental principles that apply regardless of boot style, brand, or intended use. These rules form the foundation for evaluating any pair of hiking footwear.
Rule 1: Snug Everywhere, Tight Nowhere
Your hiking boots should feel comfortably snug around your entire foot without creating pressure points anywhere. This means no pinching across the forefoot, no crushing of your toes, and no painful pressure on your instep or ankle bones.
The boot should hold your foot securely in place without feeling restrictive. You should be able to wiggle your toes freely, but your foot shouldn’t slide around inside the boot when you walk or change direction.
Think of the ideal fit as similar to a firm handshake—secure and confident without being painful or constricting. This snug-but-not-tight fit ensures your boots can support your feet through long days on varied terrain.
Rule 2: Thumb’s Width at the Toe
Leave approximately a thumb’s width of space (roughly half an inch) between your longest toe and the front of the boot. This space accommodates foot swelling during long hikes and prevents your toes from jamming against the front of the boot during steep descents.
To check this space accurately, remove the insole from the boot and stand on it while wearing your hiking socks. There should be about a thumb’s width between your longest toe and the end of the insole. This method eliminates guesswork and gives you a precise measurement.
Remember that your longest toe isn’t necessarily your big toe—for many people, the second toe extends furthest forward. Always measure from whichever toe extends the farthest.
Rule 3: Secure Heel with Minimal Lift
Your heel should sit securely in the heel cup with minimal lifting when you walk. Some slight heel movement is normal, but excessive heel lift (more than a quarter inch) indicates boots that are too large or the wrong shape for your foot.
When properly fitted, your heel should feel locked in place without being compressed uncomfortably. The boot’s heel cup should cradle your heel snugly, preventing sliding that can cause blisters and reduce stability on uneven terrain.
For comprehensive outdoor footwear guidance, understanding how hiking boots fit provides additional insights into selecting appropriate footwear for different hiking conditions.
The Professional Fitting Process
Getting properly fitted for hiking boots involves several steps that ensure you find the right size and shape for your specific feet. Many outdoor retailers offer professional fitting services that can save you from costly mistakes and uncomfortable hiking experiences.
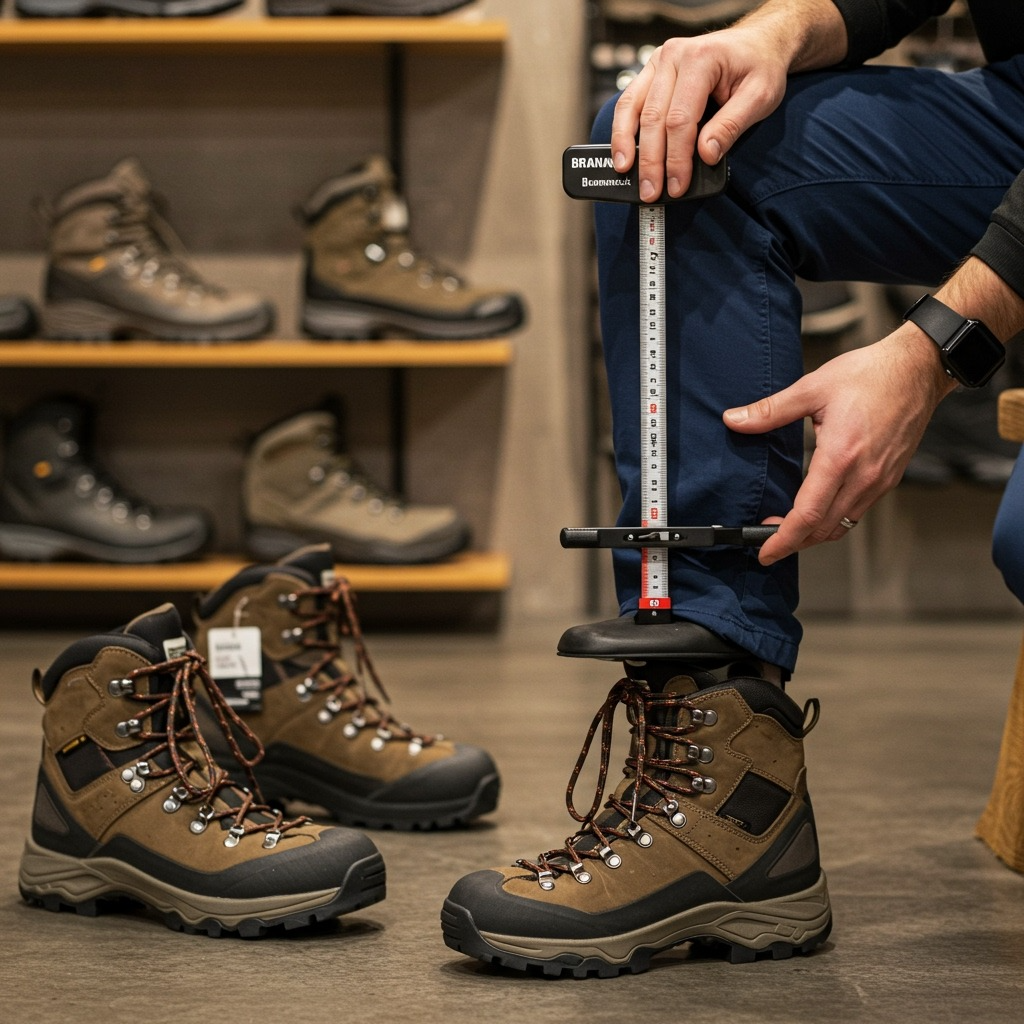
Measuring Your Feet Properly
Start by having both feet measured on a Brannock device or similar calibrated measuring tool. This process measures not just length and width, but also arch length, which affects how boots fit and feel during extended wear.
Most people have feet of slightly different sizes, so always fit boots to your larger foot. The difference is usually minor, but fitting to the smaller foot virtually guarantees problems with the larger one during long hikes.
Measure your feet later in the day when they’ve swollen to their largest size. Feet naturally expand during daily activities, and this expansion is even more pronounced during hiking when you’re carrying weight and walking for extended periods.
Testing Multiple Sizes and Widths
Don’t assume you know your hiking boot size based on your dress shoe or athletic shoe size. Different manufacturers use different lasts (foot-shaped forms used in boot construction), and hiking boots often fit differently than other footwear styles.
Try on multiple sizes around your measured size, including half sizes above and below. Also consider different width options if available—many foot problems stem from width issues rather than length problems.
Width is particularly important for comfort and performance. Boots that are too narrow cause pain and reduce circulation, while excessively wide boots allow too much foot movement and create instability.
Timing Your Boot Shopping
When you shop for hiking boots significantly affects how well they’ll fit during actual hiking conditions. Understanding these timing considerations helps ensure your boots will feel comfortable throughout long days on the trail.
Shop in the Afternoon or Evening
Your feet naturally swell throughout the day due to activity, gravity, and fluid retention. Shopping for boots when your feet are at their largest prevents buying boots that feel comfortable in the morning but become painfully tight during afternoon hiking.
If you typically hike in the morning, your feet will still swell during the hike due to increased activity and the weight of your pack. Afternoon shopping accounts for this expansion and ensures adequate room throughout your hiking day.
Some hikers prefer to shop after a workout or long walk to further simulate the foot swelling that occurs during hiking. This approach works well if you can maintain the swelling long enough to complete your boot shopping.
Bring Your Hiking Socks
Always try on hiking boots while wearing the same socks you plan to use on the trail. Sock thickness significantly affects boot fit, and different sock materials have varying bulk and cushioning properties.
Hiking socks are typically thicker than everyday socks, with additional cushioning in high-wear areas. Trying on boots with thin dress socks or no socks at all gives you a completely inaccurate sense of how the boots will fit during actual hiking.
If you’re unsure what hiking socks to use, ask the retailer for recommendations based on your hiking style and climate conditions. Many outdoor stores sell sock and boot combinations to ensure optimal fit and performance.
Understanding Width and Volume Issues
Boot width and internal volume cause more fitting problems than length for most hikers. Understanding these often-overlooked aspects of boot fit helps you avoid common problems that can’t be solved with different sizes.
Width Categories and What They Mean
Most hiking boots come in standard (medium) width, with some manufacturers offering narrow and wide options. Width is measured at the ball of your foot, the widest part of your forefoot.
Signs that your boots are too narrow include: a pinching sensation across the ball of your foot, numbness in your toes during or after hiking, and visible bulging of the boot material over the sides of your feet.
Boots that are too wide allow excessive foot movement side-to-side, creating friction that leads to blisters on the sides and bottom of your feet. You may also notice your foot sliding forward and backward within the boot.
Volume Considerations
Boot volume refers to the total internal space, particularly over the top of your foot (instep area). Some people have high-volume feet with pronounced insteps, while others have low-volume feet with flatter profiles.
High-volume feet require boots with more internal space over the instep. If you have high-volume feet in regular boots, you’ll feel pressure on top of your foot even when the length and width are correct.
Low-volume feet can feel loose in standard boots even when properly sized for length and width. These feet often benefit from aftermarket insoles or boots specifically designed for lower-volume feet.
Understanding different types of camping can help you choose appropriate footwear for various outdoor adventures that might require different boot features.
Testing Your Boots at Home
Once you’ve purchased hiking boots, thorough testing at home helps identify fit issues before you’re committed to keeping them. Most retailers have return policies that allow exchanges within reasonable timeframes if boots haven’t been worn outdoors.
The Incline Test
Find a sloped surface in your home or use a sturdy book or board to create an incline. Walk up and down this incline while wearing your new boots to simulate uphill and downhill hiking conditions.
During uphill simulation, your toes shouldn’t slide backward and jam against the back of the toe box. During downhill simulation, your toes shouldn’t slide forward and hit the front of the boot. Either condition indicates sizing problems that will cause pain during real hiking.
Pay attention to how your heel behaves during incline testing. Excessive heel lift during the uphill simulation suggests boots that are too large or the wrong shape for your heel.
Extended Wear Testing
Wear your new boots around your house for extended periods, gradually increasing the time to simulate long hiking days. Start with 30 minutes and work up to several hours if the boots remain comfortable.
This extended testing reveals pressure points, chafing areas, and other fit issues that aren’t apparent during brief try-on sessions. It also begins the break-in process for boots that require initial conditioning.
Walk on different surfaces during home testing—carpet, hardwood, stairs, and any other surfaces available. Different surfaces stress your feet differently and can reveal fit problems that might not appear on uniform surfaces.
The Paper Test
Place a piece of paper under your foot while wearing the boot with your hiking socks. You should be able to easily slide the paper out from under your arch area, indicating proper arch support without excessive pressure.
If the paper is difficult to remove or tears during removal, the boot may be applying too much pressure to your arch. Conversely, if the paper slides out too easily, you may need better arch support from insoles or different boots.
This test works best with boots that are laced properly but not overtightened. The goal is to assess the boot’s natural arch support rather than the pressure created by excessive lacing tension.
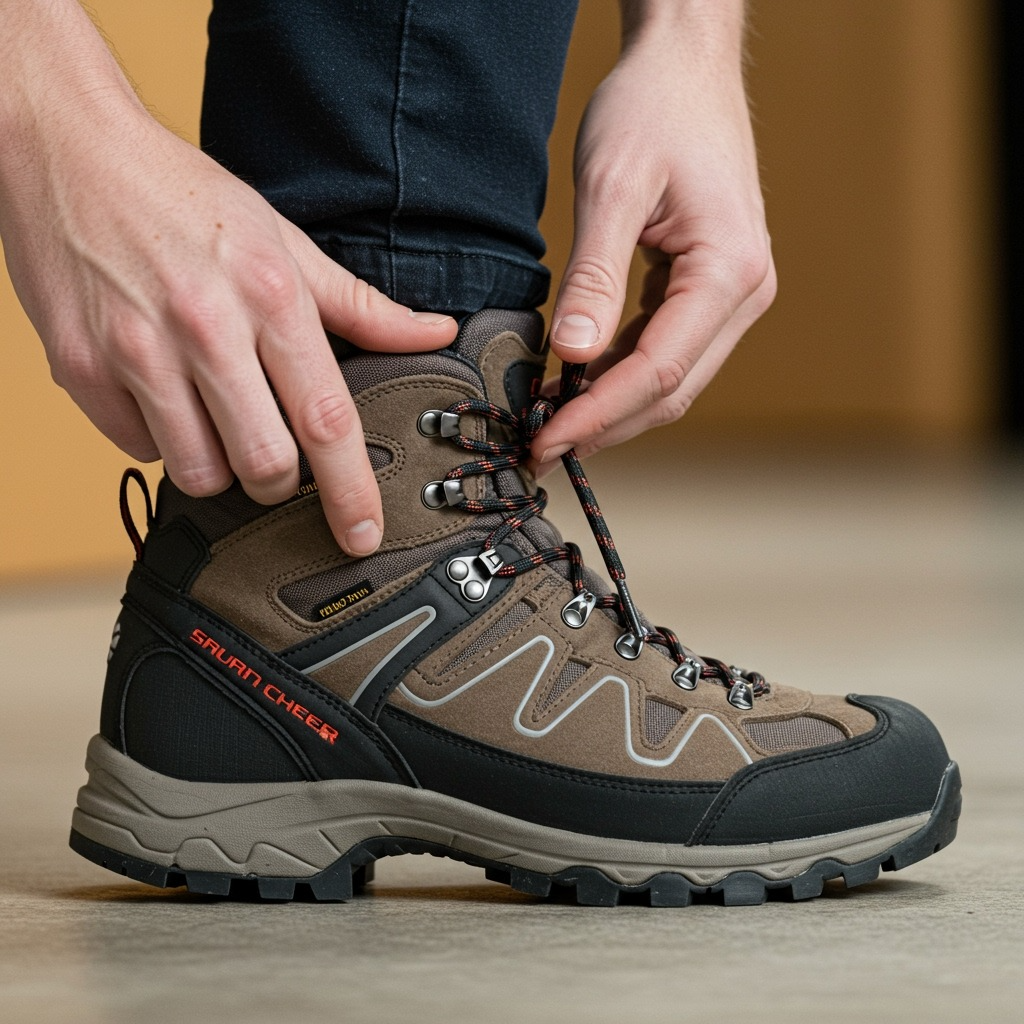
Lacing Techniques for Better Fit
Proper lacing can significantly improve boot fit and address minor sizing issues. Understanding different lacing techniques helps you optimize comfort and performance even with boots that aren’t perfectly sized.
Standard Lacing for General Use
Start with even tension throughout the lacing system, pulling each eyelet snugly but not aggressively tight. The goal is to secure foot retention without creating pressure points or restricting circulation.
Many hikers make the mistake of lacing their boots too tightly, thinking this provides better support. Overly tight lacing actually reduces circulation and can cause numbness, while also preventing the boot’s natural flex during walking.
Leave the top eyelet or two slightly looser than the rest of the boot to allow ankle movement. Your ankle needs to flex naturally during hiking, and excessively tight upper lacing restricts this essential movement.
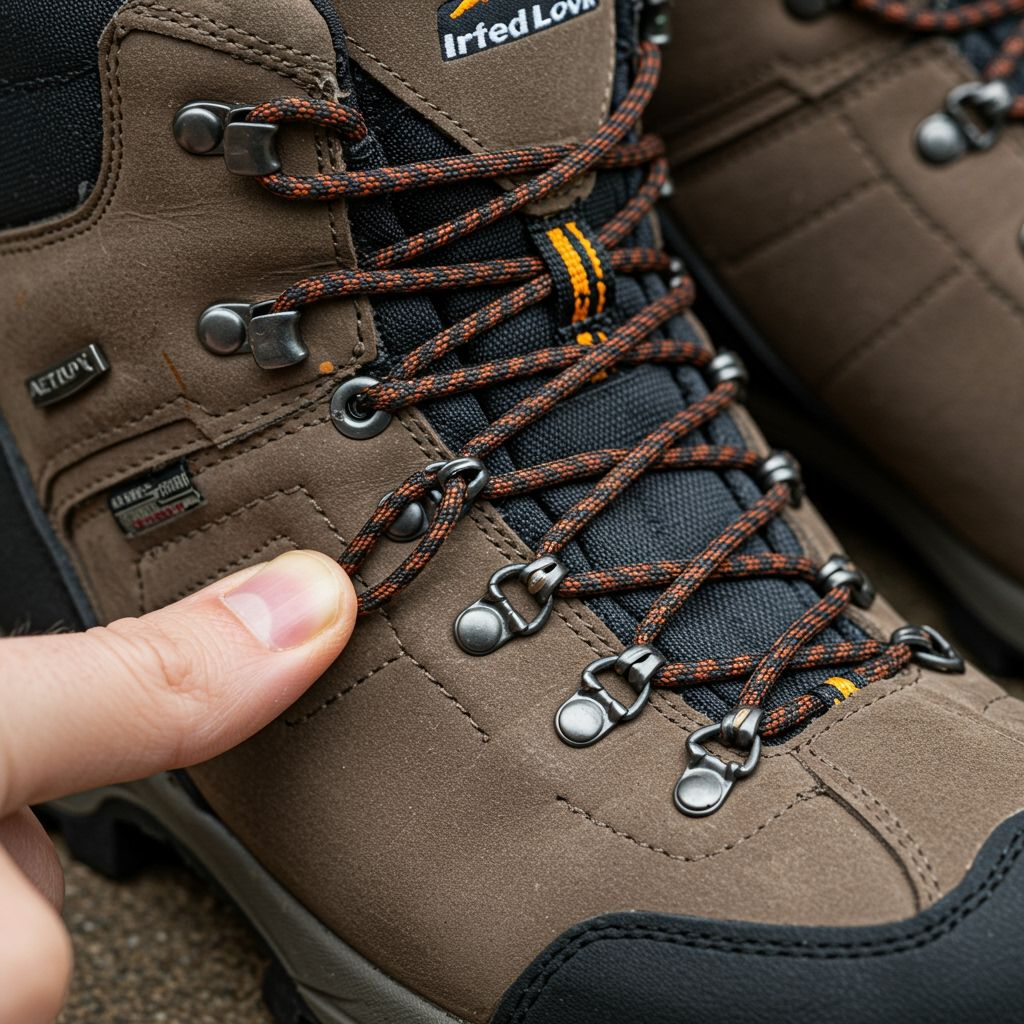
Heel Lock Lacing
If you experience heel lift despite proper boot sizing, try heel lock lacing to secure your heel more effectively. This technique uses the second-to-last eyelet to create a locking mechanism that prevents heel movement.
Thread your laces through the second-to-last eyelet from the inside, creating a small loop on each side. Pass each lace through the opposite loop before continuing to the final eyelet. Pull tight to engage the heel lock.
This technique is particularly helpful for boots that are slightly large or for feet that tend to lift during hiking. The heel lock prevents the sliding that causes blisters and reduces boot performance.
Pressure Point Relief
If you experience pressure points across the top of your foot, try skipping the eyelet closest to the pressure area. This creates a window of reduced pressure while maintaining overall foot security.
For pressure points on the sides of your feet, experiment with different lacing tensions in specific areas. You can lace some sections tighter or looser than others to customize the fit around problem areas.
Remember that lacing adjustments have limits—they can fine-tune properly sized boots, but can’t fix fundamental sizing problems. If lacing modifications don’t solve your comfort issues, you likely need different boots.
For those planning extended hiking adventures, understanding what to pack for hiking helps you prepare comprehensively for trail success.
Common Fit Problems and Solutions
Even with careful fitting, some boot problems only become apparent during actual hiking use. Understanding common issues and their solutions helps you address problems before they ruin hiking adventures.
Hot Spots and Blister Prevention
Hot spots—areas of irritation that precede blister formation—often indicate fit problems that can be addressed with adjustments or modifications. Common hot spot locations include heels, sides of feet, and over bony prominences.
Heel hot spots usually result from boots that are too large, allowing excessive heel movement. Try heel lock lacing, thicker socks, or heel grips before considering boot replacement.
Side-of-foot hot spots often indicate width problems or seam placement issues. Moleskin applied to the inside of the boot can provide relief, but persistent problems may require different boots.
Toe Jamming on Descents
If your toes repeatedly hit the front of your boots during downhill hiking, your boots are likely too small or improperly laced. This problem causes severe discomfort and can lead to bruised or lost toenails.
Check your toe space using the insole method—there should be a thumb’s width between your longest toe and the insole end. If space is adequate, experiment with different lacing techniques to prevent forward foot sliding.
Consider whether you’re carrying more weight than usual, as heavy packs can cause feet to slide forward more than normal. You may need larger boots for expeditions with heavy loads compared to day hiking.
Pressure Points and Hot Spots
Persistent pressure points that cause pain or numbness indicate fundamental fit problems that usually require different boots. However, minor pressure points can sometimes be addressed with modifications.
Aftermarket insoles can change boot volume and pressure distribution, potentially eliminating pressure points while improving comfort and support. Consider professional fitting for insoles if standard options don’t solve your problems.
Boot stretching services can address minor width or specific pressure point issues, but this option works better with leather boots than synthetic materials. Consult a professional cobbler for advice on whether stretching is appropriate for your specific boots and problems.
Break-In Strategies for New Boots
Even properly fitted boots typically require a break-in period to achieve optimal comfort and performance. Understanding effective break-in strategies prevents pain and extends boot life.
Gradual Conditioning Process
Start wearing new boots for short periods around your house, gradually increasing duration as comfort improves. This gradual approach allows both your feet and the boots to adapt to each other without causing pain or damage.
Progress to short walks on smooth surfaces, then gradually introduce uneven terrain and longer distances. This progression allows boot materials to flex and conform while building up your feet’s tolerance for the new footwear.
Avoid wearing new boots on important hikes until you’ve confirmed their comfort through extensive testing. Nothing ruins a special hiking trip like painful, inadequately broken-in footwear.
Accelerating the Break-In Process
Thick hiking socks can accelerate break-in by providing more pressure and encouraging boot materials to stretch and conform. Wear your thickest comfortable hiking socks during initial break-in periods.
Heat can help soften boot materials for faster break-in, but use caution to avoid damage. Wearing boots in warm environments or using a hair dryer on cool settings can help, but excessive heat can damage adhesives and synthetic materials.
Boot conditioning products designed for your specific boot materials can soften leather and accelerate the break-in process. Follow manufacturer recommendations and test products on inconspicuous areas first.
For comprehensive hiking preparation, learning about hiking vs walking helps you understand different footwear requirements for various outdoor activities.
Special Considerations for Different Foot Types
Individual foot characteristics significantly affect how boots fit and perform. Understanding your specific foot type helps you choose boots that work well for your anatomy and hiking style.
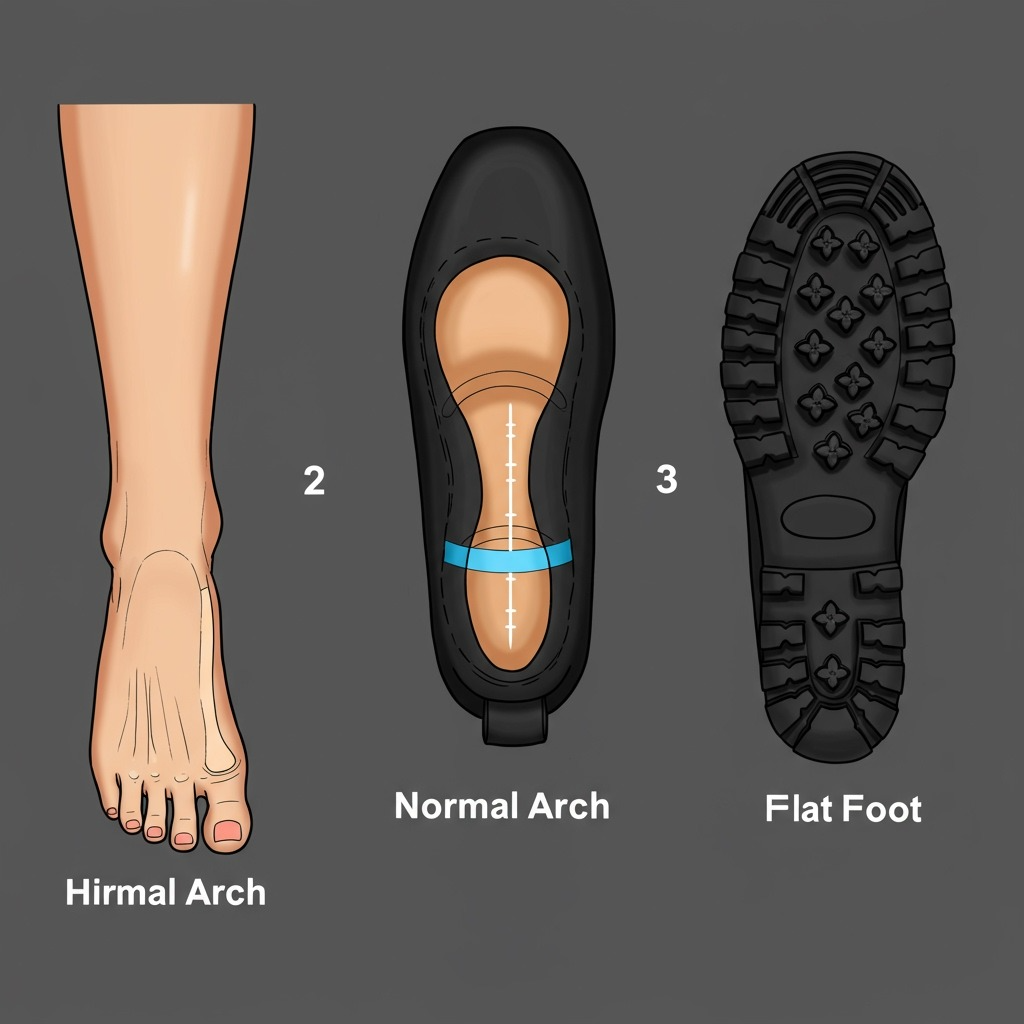
High Arches vs. Flat Feet
High-arched feet often need boots with more arch support and may experience pressure points under the arch with standard insoles. Consider boots designed for high arches or aftermarket insoles with enhanced arch support.
Flat feet typically need motion control features and may overpronate during hiking. Look for boots with firm midsoles and consider stability-enhancing insoles to prevent excessive foot motion.
Both foot types benefit from professional gait analysis to understand how their feet move during walking and hiking. This analysis can guide boot selection and insole choices for optimal comfort and performance.
Wide vs. Narrow Feet
Wide feet need boots specifically designed for broader dimensions rather than simply sizing up in length. Lengthening boots to accommodate width creates excessive toe space and poor heel fit.
Narrow feet often benefit from narrower boot lasts or volume-reducing insoles. Some manufacturers offer specific narrow-width options that provide better overall fit than standard-width boots.
Don’t assume that wide or narrow athletic shoes mean you need wide or narrow hiking boots. Different manufacturers use different sizing standards, and boot construction differs significantly from athletic shoe construction.
Foot Conditions and Modifications
Common foot conditions like bunions, hammertoes, or plantar fasciitis may require specific boot features or modifications for comfortable hiking. Consult with medical professionals and experienced boot fitters for guidance.
Orthotic devices prescribed by medical professionals significantly affect boot fit and may require larger sizes or specific boot designs. Always bring orthotics when trying on new boots if you plan to use them for hiking.
Consider boots with removable insoles if you use custom orthotics, as this feature provides more space for insole thickness and customization options.
When to Seek Professional Help
Some boot fitting challenges require expertise beyond what you can accomplish through self-fitting and online research. Recognizing when to seek professional help can save time, money, and hiking discomfort.
Complex Fit Issues
If you’ve tried multiple sizes and brands without finding comfortable boots, consider professional fitting services at specialty outdoor retailers. The comprehensive REI boot fitting guide emphasizes the importance of professional assessment for foot volume and arch length measurements that affect overall boot performance.
Experienced fitters understand how different boot designs work with various foot types and can recommend specific brands or models that work well for your foot shape and hiking style.
Persistent pain or discomfort that doesn’t resolve with a break-in may indicate foot health issues that require medical attention. Don’t assume all foot pain is due to poor boot fit—underlying conditions may need treatment.
Custom Solutions
Some hikers benefit from custom-made boots, particularly those with unusual foot dimensions or specific medical requirements. While expensive, custom boots can provide unmatched fit and comfort for serious hikers.
Professional boot modifications can address specific fit problems in otherwise suitable boots. Services include stretching, padding additions, and hardware modifications to improve comfort and performance.
The detailed Outdoor Gear Lab hiking boot guide provides additional resources for understanding when professional services become necessary and what to expect from custom-fitting solutions.
Consider professional services if you hike frequently or in challenging conditions where boot performance significantly affects safety and enjoyment.
FAQ: Hiking Boot Fit Essentials
Should hiking boots be tight or loose?
Hiking boots should fit snug but not tight, with no pressure points anywhere on your foot. They should feel secure without being constricting, allowing toes wiggle room while preventing foot sliding inside the boot.
How much room should be in the toe of a hiking boot?
Leave approximately a thumb’s width (about half an inch) between your longest toe and the front of the boot. This space accommodates foot swelling and prevents toe jamming during downhill hiking.
Should I buy hiking boots a half size bigger?
Not necessarily. Focus on proper fit rather than arbitrary sizing rules. The correct size provides appropriate toe space, secure heel fit, and comfortable width regardless of how it compares to your regular shoe size.
How do I know if my hiking boots are too big?
Signs include: excessive heel lift when walking, foot sliding side-to-side or forward/backward inside the boot, difficulty controlling foot placement on uneven terrain, and the need to overtighten laces for security.
Can I fix hiking boots that are too big?
Minor sizing issues can sometimes be addressed with thicker socks, volume-reducing insoles, or heel grips. However, boots that are significantly too large should be exchanged for properly fitting alternatives.
Proper hiking boot fit forms the foundation for comfortable, safe, and enjoyable trail experiences. While the fitting process requires patience and attention to detail, getting it right prevents countless problems and enhances every hiking adventure.
Take time to understand your feet, shop at appropriate times with proper socks, and test boots thoroughly before committing to them for trail use. Remember that even expensive boots are worthless if they don’t fit your feet properly, while well-fitted budget boots can provide years of comfortable hiking.
Don’t hesitate to seek professional fitting help if you encounter persistent problems or have complex foot requirements. The investment in proper fitting pays dividends in comfort, performance, and hiking enjoyment for years to come.