
I’ll never forget the night I ran out of fresh basil at my favorite dispersed camping spot in Colorado. I was making trail pasta—my signature dish—and realized I’d forgotten the one ingredient that makes it actually taste good. As I sat there eating bland noodles, staring at my truck bed full of gear, a thought hit me: what if I could bring my garden with me?
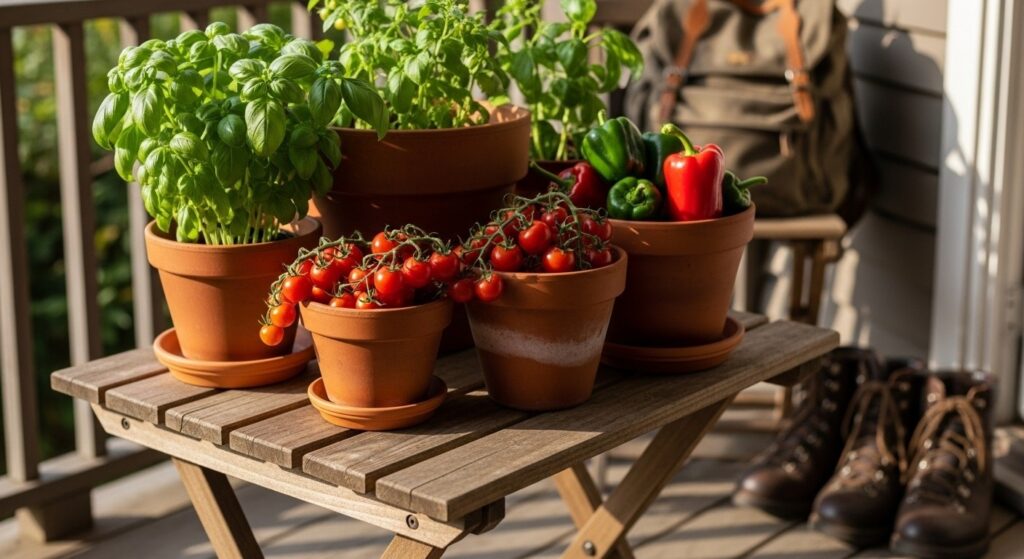
That’s when I discovered container gardening, and it completely changed how I prep for outdoor adventures. Now, whether I’m setting up base camp for a long weekend or just spending time on my balcony between trips, I’ve got fresh herbs, cherry tomatoes, and peppers growing in portable containers. No sprawling backyard needed—just some pots, good soil, and a sunny spot.
If you’re an outdoor enthusiast who loves fresh ingredients on the trail, or you just want to grow your own food without committing to a traditional garden, container gardening is your answer. It’s mobile, manageable, and perfect for anyone who spends more time planning their next hike than tending flowerbeds.
What Is Container Gardening? (And Why Outdoor Enthusiasts Love It)
Container gardening is exactly what it sounds like: growing plants in pots, buckets, or any vessel that holds soil instead of planting them in the ground. It’s been used for centuries, but it’s having a moment right now, especially among people who live in apartments, travel frequently, or just don’t have access to a traditional garden plot.
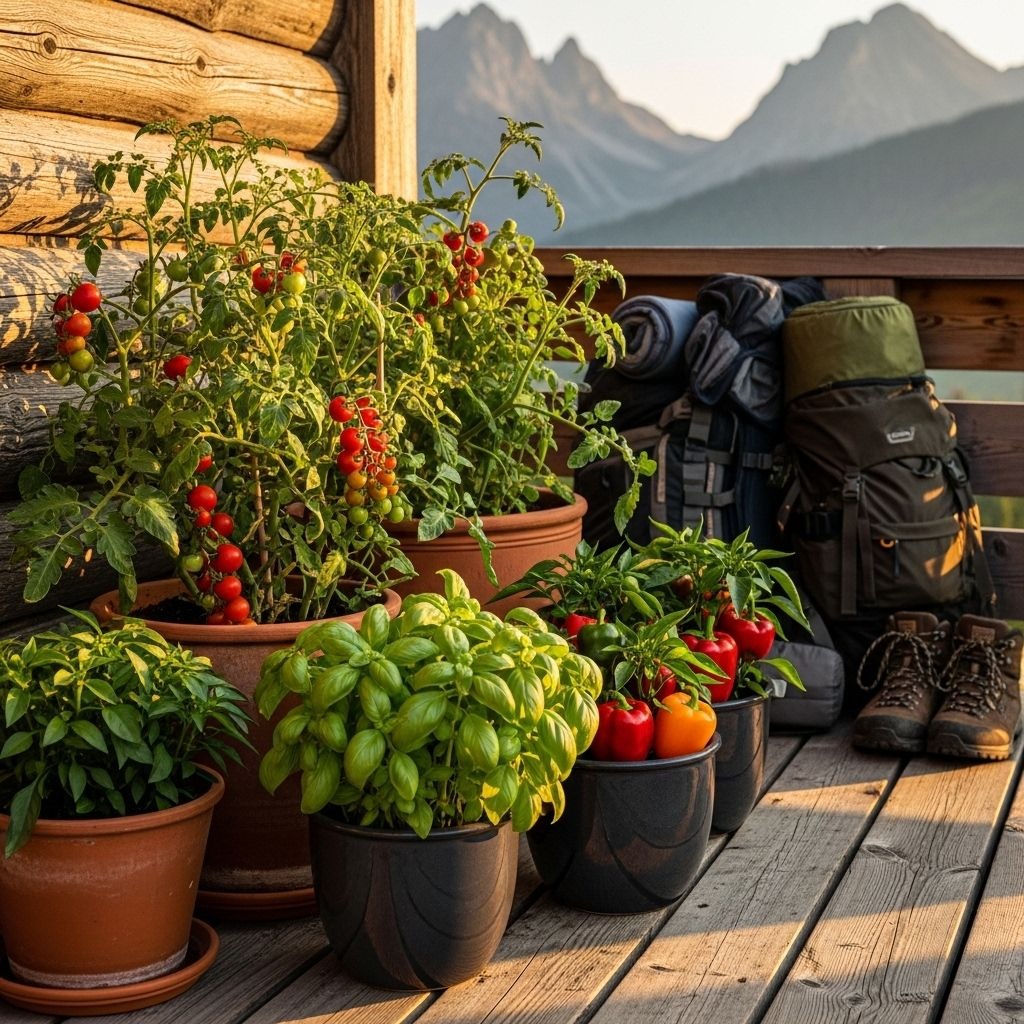
For those of us who spend weekends camping, fishing, or hiking, container gardening offers something traditional gardens can’t: mobility. You can move your containers to follow the sun, protect them from harsh weather, or even load them into your truck when you’re heading to a favorite campsite for an extended stay. I’ve seen campers bring their herb gardens to base camp, and it’s genius—fresh oregano for your campfire chili beats dried spices any day.
The beauty of this method is its versatility. You’re not limited by poor soil quality or lack of yard space. A sunny balcony, a patio, your RV setup, or even a tailgate can become a productive growing area. Plus, container gardens require way less maintenance than traditional plots. No tilling, minimal weeding, and you control exactly what goes into your soil.
Choosing the Right Containers for Your Adventure Garden
Here’s where most beginners mess up: they grab any old pot and wonder why their plants fail. Container choice matters more than you’d think, and matching the right vessel to your plants is half the battle.
Size Matters More Than You Think
Different plants need different root space. Tomatoes, for example, need deep containers—at least 5 gallons—to develop a strong root system and produce fruit. Carrots need depth too, around 18-24 inches depending on the variety. Leafy greens like lettuce and spinach, on the other hand, need width more than depth since their roots spread horizontally.
A good rule: go bigger than you think you need. Larger containers hold more soil, which means they retain moisture longer and provide more nutrients. This is especially helpful if you’re not around every day to water, like when you’re out on a multi-day backpacking trip. I use self-watering planters for my longer trips—they’ve got built-in reservoirs that keep plants hydrated for days.
Material: Plastic, Terracotta, or Get Creative
Containers come in all materials, and each has trade-offs. Plastic pots are lightweight, affordable, and hold moisture well—perfect if you’re moving them around frequently. Terracotta looks great and provides excellent airflow to roots, but it dries out fast, especially in hot climates.
Then there’s the DIY route. I’ve used everything from 5-gallon Home Depot buckets to old coolers with drainage holes drilled in the bottom. The key is making sure whatever you use has proper drainage—more on that in a second. For a cleaner look on your patio, check out decorative ceramic plant pots that combine function with style.
Drainage Is Non-Negotiable
This is the mistake that kills more container plants than anything else: no drainage holes. Without them, water pools at the bottom, roots sit in soggy soil, and root rot sets in fast. Every container needs holes in the bottom—period.
If you’re repurposing something that doesn’t have holes, drill them yourself. Use a drill bit appropriate for your container material, and add at least 3-5 holes spread across the bottom. This simple step is the difference between thriving plants and a container full of mush. You can also use grow bags, which are fabric containers that provide excellent drainage and air circulation naturally.

The Perfect Potting Mix: Don’t Use Regular Dirt
Let me save you from my biggest early mistake: I used dirt from my backyard to fill my first containers. It compacted like concrete, drained poorly, and my seedlings barely survived. Regular garden soil is too dense for containers—it doesn’t allow for proper drainage or root aeration.
Why Potting Mix Is Different
Quality potting mix is specifically designed for container growing. It’s lighter, fluffier, and engineered to retain moisture while still draining excess water. It typically contains a blend of peat moss (or coconut coir), perlite or vermiculite for aeration, and compost for nutrients.
DIY Potting Mix Recipe
Want to make your own? Here’s a basic recipe that works great for most vegetables and herbs:
- 2 parts peat moss or coconut coir
- 1 part perlite or vermiculite
- 1 part compost or vermicompost
- Optional: a handful of organic fertilizer
Mix these components thoroughly in a large bucket or wheelbarrow before filling your containers. I prep a big batch at the start of the season and store the extra in sealed bins for later plantings.
Store-Bought Options
Not interested in mixing your own? Buy a quality potting mix from your local garden center or home improvement store. Look for mixes labeled specifically for vegetables if you’re growing edibles. They’ll have the right nutrient balance to support fruiting plants. Just remember: container gardens need more nutrients than in-ground gardens because plants can’t spread their roots to find food. Plan to fertilize regularly with organic fertilizer throughout the growing season.
Best Plants for Container Gardens (That Actually Thrive)
Not every plant does well in containers, so choosing the right varieties is crucial for success. Focus on compact, bush-type plants rather than sprawling vine varieties (unless you’ve got a trellis setup).
Herbs: The Trail Cook’s Best Friend
Herbs are the gateway drug to container gardening. They’re low-maintenance, grow fast, and transform camp meals from bland to brilliant. Basil, parsley, cilantro, thyme, oregano, and mint all thrive in containers. Most herbs only need a 1-2 gallon pot and can even share space with each other.
I keep a dedicated herb container garden at home and grab fresh cuttings before every camping trip. Nothing beats fresh cilantro on fish tacos cooked over a camping grill or fresh basil in your morning eggs.
Compact Vegetables Worth Growing
Cherry tomatoes are the MVP of container gardening. They’re productive, delicious, and varieties like ‘Patio’ or ‘Tiny Tim’ are specifically bred for pots. Use a 5-gallon container per plant and provide support with a plant stake as they grow.
Peppers—both sweet and hot varieties—also excel in containers. They need similar-sized pots as tomatoes and produce all season long. Leafy greens like lettuce, spinach, and arugula are perfect for wider, shallower containers and can be harvested repeatedly. Radishes, green onions, and compact cucumber varieties also work well.
Flowers for Beauty and Pollinators
Don’t overlook flowers. Marigolds, petunias, and nasturtiums add color, attract pollinators, and some are even edible. Plus, they make your patio setup Instagram-worthy. For evening ambiance, add solar decorative lights around your containers.
Step-by-Step: Setting Up Your First Container Garden
Ready to get your hands dirty? Here’s the straightforward process I use for every new container.
1. Gather Your Supplies
- Containers with drainage holes
- Quality potting mix
- Seeds or seedlings
- Garden tool set (trowel, gloves, pruners)
- Fertilizer
2. Prepare Your Containers
If using repurposed containers, drill drainage holes if they don’t already have them. Clean any used pots with soap and water to remove old soil and potential pathogens.
3. Fill Containers Properly
Fill your container about two-thirds full with potting mix. Don’t pack it down—keep it loose and fluffy. This ensures good drainage and root penetration. Leave about 1-2 inches of space at the top to prevent water from overflowing when you water.
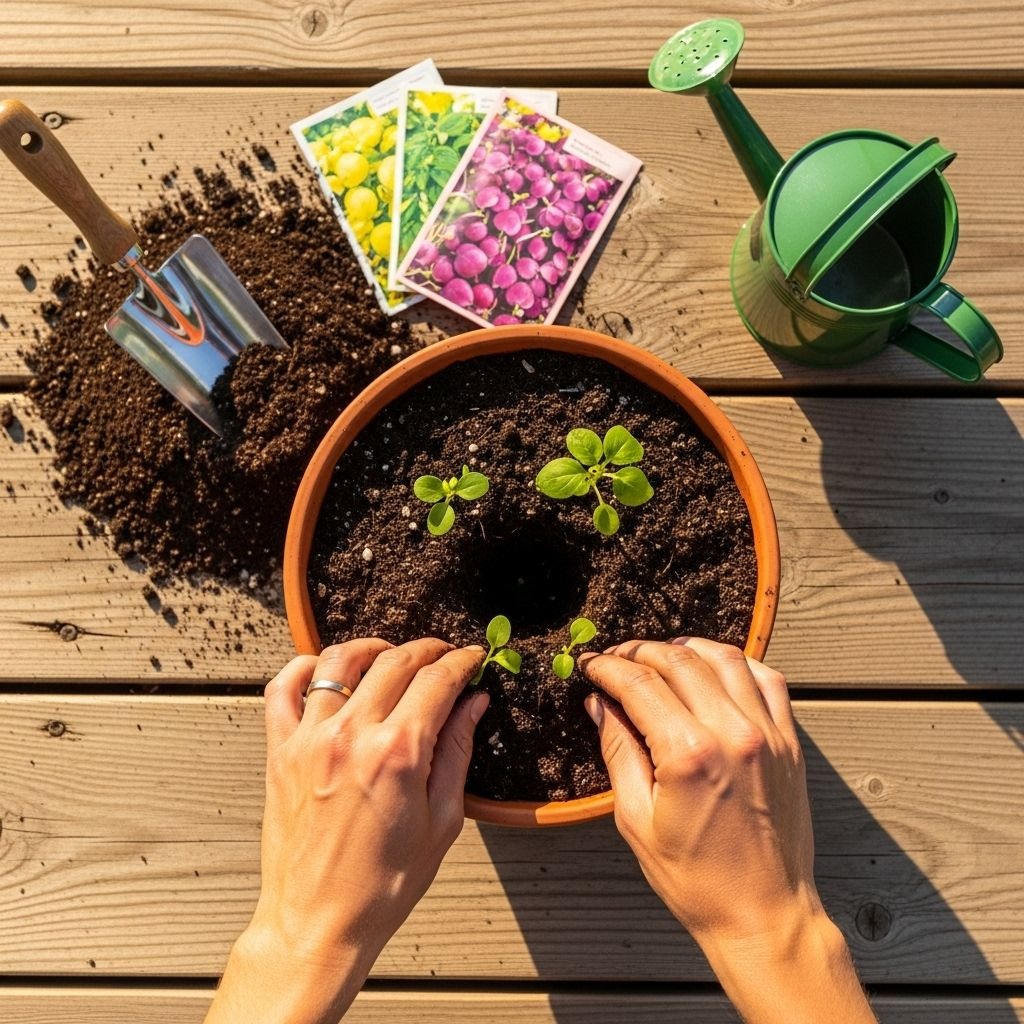
4. Plant Your Seeds or Seedlings
Follow spacing recommendations on seed packets. For seedlings, dig a hole slightly larger than the root ball, place the plant, and gently firm soil around it. Water immediately after planting to help settle the soil and eliminate air pockets.
5. Position for Success
Most vegetables and herbs need at least 6-8 hours of direct sunlight daily. Place your containers where they’ll get maximum sun exposure. If you’re setting up an indoor garden or starting seeds early, consider an indoor-plant LED grow light to supplement natural light.
6. Establish a Watering Routine
This is where many people fail. Container plants dry out faster than in-ground plants, especially in hot weather. Check soil moisture daily by sticking your finger an inch deep—if it’s dry, water thoroughly until it drains from the bottom holes.
Watering and Maintenance: Keep Your Garden Thriving
Container gardens need more attention than traditional gardens, but the maintenance is still pretty minimal if you set up good routines.
Watering: The Most Important Task
In hot climates or during summer, you might need to water daily—sometimes twice a day for smaller pots. Larger containers hold moisture longer and require less frequent watering. The best time to water is early morning, which gives plants time to absorb moisture before the day’s heat.
A soil pH/moisture meter takes the guesswork out of watering. Stick it in the soil, and it’ll tell you exactly when your plants need a drink. For consistent moisture, drip irrigation or self-watering containers are game-changers, especially if you’re frequently away on trips.
Fertilizing for Continuous Production
Because container soil is limited, nutrients get depleted faster than in-ground gardens. Most potting mixes come with some initial fertilizer, but it only lasts a few weeks. After that, you’ll need to feed your plants regularly.
I use a balanced liquid fertilizer every 2-3 weeks during the growing season. Follow package directions—more isn’t better, and over-fertilizing can damage plants. Organic options like compost tea or fish emulsion work great and won’t harm beneficial soil organisms. Keep a small compost bin going to create your own nutrient-rich compost for future plantings.
Pruning and Pest Management
Check your plants regularly for pests like aphids, spider mites, or whiteflies. Catching problems early makes them easier to manage. Remove yellowing or dead leaves to improve airflow and prevent disease. For fruiting plants like tomatoes, prune suckers (small shoots between the main stem and branches) to focus energy on fruit production.
If you’re growing herbs, regular harvesting actually promotes bushier, more productive growth. Don’t be shy—snip what you need for your camping meals.
Common Mistakes I Made (So You Don’t Have To)
I’ve killed my share of container plants, and each failure taught me something valuable. Here are the mistakes that cost me the most.
Choosing Containers Too Small
My first tomato plant was in a tiny 2-gallon pot. It never produced more than a handful of sad, small tomatoes. Root-bound plants can’t access enough nutrients or water. When in doubt, go bigger.
Ignoring Drainage
I thought I could get away with fewer drainage holes to keep my deck cleaner. Wrong. Root rot set in fast, and I lost an entire container of peppers. Proper drainage isn’t optional—it’s essential.
Using Garden Soil
As I mentioned earlier, regular dirt compacts and doesn’t drain well in containers. It’s one of the fastest ways to fail. Always use potting mix designed for containers.
Inconsistent Watering
I’d water sporadically—sometimes daily, sometimes forgetting for days. Container plants need consistency. Establish a routine or invest in self-watering systems if you travel often. Balcony railing planters with built-in water reservoirs have saved my herbs during busy camping seasons.
Overcrowding
I tried cramming three tomato plants in one 10-gallon container because I was impatient and wanted more tomatoes faster. They competed for resources, and all three suffered. Give plants room to breathe and follow spacing guidelines.
Troubleshooting Guide
- Yellowing leaves: Usually indicates overwatering or nitrogen deficiency. Check drainage and fertilize.
- Wilting despite moist soil: Could be root rot from poor drainage or disease. Check roots—healthy roots are white; rotted roots are brown and mushy.
- Slow growth: Insufficient sunlight, poor soil, or lack of nutrients. Move to a sunnier spot and fertilize.
- Flowers but no fruit: Some plants need pollination. For container gardens in enclosed spaces, you may need to hand-pollinate with a small brush.
Growing Beyond the Basics
Once you’ve mastered basic container gardening, there’s a whole world of advanced techniques to explore. Compact hydroponic kits allow you to grow plants without soil, using nutrient-rich water instead—perfect for indoor setups or small spaces.
Seed starter kits help you get a jump on the growing season by starting plants indoors weeks before the last frost. This extends your harvest window significantly. For year-round growing in colder climates, a mini greenhouse or grow tent creates a controlled environment where you can grow regardless of outdoor weather.
Hanging plant baskets maximize vertical space—perfect for trailing plants like strawberries or cherry tomatoes. Indoor plant stands create tiered displays that fit more containers in limited space while ensuring all plants get adequate light.
For serious container gardeners, an indoor plant care kit bundles essential tools like moisture meters, pruners, and spray misters in one package. And a watering spray mister is perfect for delicate seedlings or humidity-loving herbs.
The possibilities are endless. I’ve met campers who’ve built elaborate mobile gardens in their RV setups, and apartment dwellers who’ve transformed tiny balconies into productive vegetable gardens. The key is starting simple, learning as you go, and gradually expanding as you gain confidence.
Container gardening fits perfectly into the outdoor lifestyle because it teaches the same lessons as camping and hiking: patience, observation, and working with nature instead of against it. Just like learning to read a topographic map or perfecting your camp cooking technique, container gardening is a skill that rewards practice.
Whether you’re growing herbs for your next trail dinner, vegetables to supplement your camping food stores, or just enjoying the meditative process of nurturing plants, container gardening offers a satisfying way to connect with the growing process without needing acres of land.
FAQs
Q: Can I really grow vegetables in containers, or is it just for flowers?
Absolutely—container gardening is fantastic for vegetables! Many varieties are specifically bred for container growing, including tomatoes, peppers, lettuce, herbs, carrots, radishes, and even compact versions of cucumbers and squash. The key is choosing bush or dwarf varieties rather than sprawling vining types, and using containers large enough for proper root development. I’ve grown more food in containers on my small patio than some people grow in sprawling backyard gardens.
Q: How often do I need to water container plants?
Container plants typically need water more frequently than in-ground plants because soil in pots dries out faster. In hot weather, small containers may need daily watering—sometimes even twice daily. Larger containers hold moisture longer and might only need watering every 2-3 days. The best test is sticking your finger about an inch into the soil—if it’s dry, it’s time to water. Self-watering containers or drip irrigation systems can help maintain consistent moisture if you travel frequently.
Q: What’s the best container size for tomatoes and peppers?
For productive tomato plants, use at least a 5-gallon container per plant—bigger is even better. Tomatoes have deep root systems and need room to establish. Peppers also do best in 5-gallon containers, though they can tolerate slightly smaller pots than tomatoes. Using undersized containers limits root growth, which directly impacts how much fruit your plants produce. Don’t skimp on container size for fruiting vegetables.
Q: Can I reuse potting soil from last season?
You can reuse potting soil, but it needs refreshing first. Old soil loses nutrients and structure over time, and may harbor pests or disease. Remove dead plant material and roots, then mix in fresh compost and a balanced fertilizer to replenish nutrients. Some gardeners prefer starting fresh each season for disease prevention, especially if plants struggled the previous year. At minimum, replace at least 30-50% with fresh potting mix.
Q: Do container gardens work for people who camp or travel often?
Definitely—you just need to set up systems that keep plants alive while you’re gone. Self-watering containers with built-in reservoirs can sustain plants for several days without attention. Grouping containers together in a shaded area reduces water loss. You can also use drip irrigation on timers for automatic watering. For extended trips, ask a neighbor to check on your plants, or bring portable containers with you if you’re camping long-term in one spot. I’ve taken herbs camping in small pots for weeks at a time.
Container gardening isn’t just a hobby—it’s a lifestyle that complements outdoor adventure perfectly. It teaches patience and observation, provides fresh ingredients for your camp meals, and lets you stay connected to growing things even when you don’t have traditional garden space.
Start small. Pick a few easy herbs or a tomato plant. Get your hands in the soil, make mistakes, and learn as you go. Before you know it, you’ll be that person showing up to the campsite with fresh basil for everyone’s dinner and bragging about the peppers you grew yourself.
The best time to start was last season. The second-best time is right now. Grab some containers, quality potting mix, and seeds—your adventure garden is waiting.