
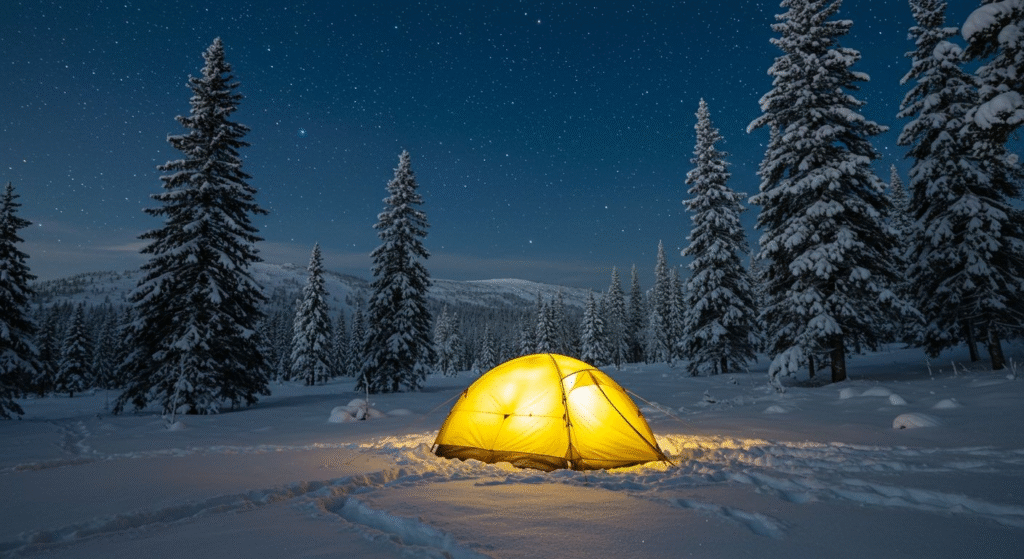
The first time I pitched my tent on snow-covered ground in the Colorado Rockies, I learned the hard way that winter camping is an entirely different beast from summer camping. As the temperature dropped to -15°F that night, I discovered every mistake possible: inadequate insulation underneath my sleeping pad, frozen water bottles, and a tent door that turned into an ice fortress by morning. That brutal but educational experience taught me everything I needed to know about what separates successful snow camping from miserable survival.
Winter camping offers some of the most rewarding outdoor experiences possible—pristine landscapes, complete solitude, and a profound sense of accomplishment that comes from thriving in nature’s most challenging conditions. But it demands respect, preparation, and specialized knowledge that goes far beyond regular camping skills.
Whether you’re planning your first snow camping adventure or looking to improve your cold-weather camping game, this comprehensive guide covers everything from essential gear selection to advanced survival techniques that will keep you warm, safe, and comfortable in winter’s wilderness.
Essential Snow Camping Gear
Successful snow camping begins with equipment specifically designed for extreme cold and winter conditions. Standard three-season gear simply won’t cut it when temperatures plummet and snow becomes your floor, wall, and sometimes roof.
Four-Season Tent Requirements
A four-season tent forms your primary defense against winter’s harshest elements. Unlike lightweight summer tents, four-season shelters feature reinforced poles, robust fabrics, and designs that shed snow and resist strong winds. Look for tents with steep-angled walls that prevent snow accumulation and vestibules large enough for gear storage and cooking during storms.
Key features include aluminum poles that won’t shatter in extreme cold, full-coverage rainflies that extend to ground level, and multiple guy-out points for maximum stability. The tent should comfortably accommodate your group with extra space for bulky winter gear and extended indoor time during weather delays.
Consider the tent’s ventilation system carefully. While you need weather protection, adequate airflow prevents dangerous condensation buildup that can soak sleeping bags and create hypothermia risks. Many experienced winter campers prefer single-wall tents with breathable fabrics over double-wall designs that can accumulate frost.
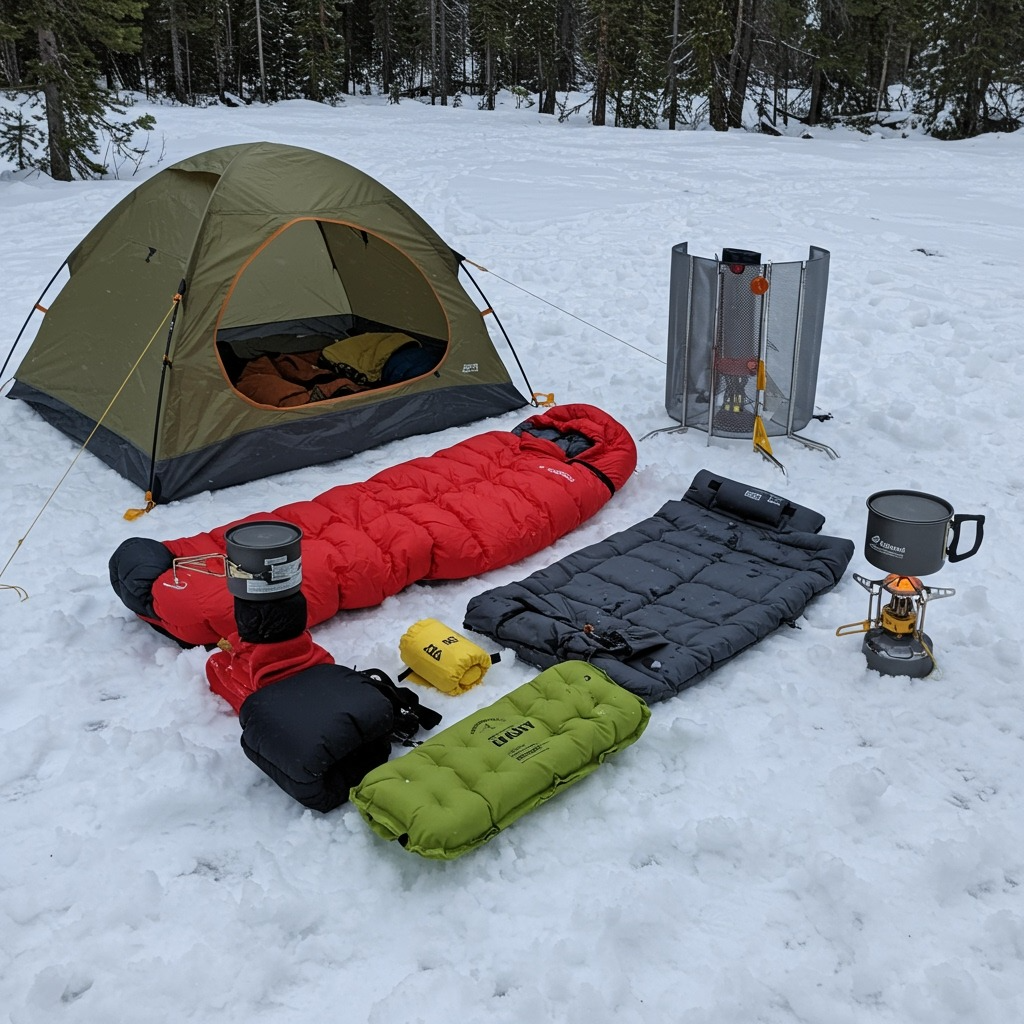
Sleep System for Sub-Zero Conditions
Your sleep system becomes critical for survival when ambient temperatures drop below freezing. A sleeping bag rated 10-15 degrees below your expected low temperature provides an essential safety margin, as comfort ratings assume ideal conditions that rarely exist in real winter camping.
Down sleeping bags offer superior warmth-to-weight ratios and compress smaller than synthetic alternatives, but they lose insulation completely when wet. Synthetic fills maintain warmth when damp but are bulkier and heavier. Consider your local climate and moisture conditions when choosing between materials.
Two sleeping pads provide essential ground insulation—one closed-cell foam pad that can’t puncture or deflate, topped by an inflatable pad with high R-value (6.0 or higher). This combination prevents potentially lethal heat loss to the snow beneath you, which can drain body warmth faster than cold air above.
A sleeping bag liner adds 5-15 degrees of warmth while protecting your bag’s interior from moisture and body oils. Vapor barrier liners, while uncomfortable, trap body heat and prevent moisture loss that can freeze in extreme cold.
Cold-Weather Cooking Equipment
Winter camping demands reliable cooking systems that function in sub-freezing temperatures when liquid fuel may gel and gas canisters lose pressure. Liquid fuel stoves (white gas/naphtha) perform most reliably in extreme cold, though they require more maintenance and skill to operate safely.
If using canister stoves, keep fuel cartridges warm inside your jacket and consider inverted canister systems designed for cold-weather operation. Remote canister stoves allow you to warm the fuel cartridge while cooking, maintaining consistent performance.
Insulated pot cozies and windscreens become essential for efficient cooking and fuel conservation. Plan for significantly increased fuel consumption—cold air, wind, and the need to melt snow for water can triple normal fuel requirements.
Bring wide-mouth thermoses for keeping beverages hot throughout the day, and consider insulated food containers that prevent meals from freezing between preparation and consumption.
For comprehensive winter camping preparation, check out our camping for beginners guide that covers fundamental skills.
Layering and Clothing Strategies
Proper clothing systems can mean the difference between comfortable winter camping and dangerous exposure. The key lies in sophisticated layering that manages moisture while providing insulation and weather protection.
Base Layer Fundamentals
Merino wool or synthetic base layers provide the foundation of winter camping comfort. These materials wick moisture away from skin while retaining insulation properties even when damp. Avoid cotton completely—it loses insulation when wet and dries slowly in cold conditions.
Choose base layers based on activity levels and personal heat generation. Lightweight bases work for high-output activities like skiing or snowshoeing, while expedition-weight bases provide extra warmth during rest periods or in extreme cold.
Consider bringing multiple base layer sets for longer trips. Fresh, dry base layers dramatically improve comfort and warmth, especially if your primary set becomes damp from exertion or condensation.
Insulation Layer Selection
Mid-layers trap warm air and provide the bulk of your insulation system. Down jackets offer exceptional warmth-to-weight ratios and compress small for packing, but they must stay dry to maintain loft. Synthetic insulation maintains warmth when damp and dries faster than down.
Bring multiple insulation options—a lightweight fleece or synthetic jacket for active use, and a heavy down or synthetic jacket for camp wear and extreme cold. This system allows fine-tuning your warmth level as conditions and activity levels change.
Insulated pants become essential for extended stationary periods or extreme cold. Down or synthetic-filled pants worn over base layers provide crucial warmth during cooking, tent time, or when weather delays require extended periods without movement.
Shell Layer Protection
Your outer shell protects against wind, snow, and precipitation while allowing moisture vapor to escape. Hard shells offer maximum protection but can trap moisture during high-output activities. Soft shells breathe better but provide less weather protection.
Choose shells with full-zip construction for easy ventilation management and pit zips that allow cooling without removing layers. Generous cut accommodates bulky insulation layers underneath without restricting movement.
Waterproof-breathable fabrics work well for snow camping since precipitation is usually dry, and wind resistance becomes more important than rain protection. Look for fabrics that remain flexible in extreme cold rather than becoming stiff and brittle.
Extremities and Critical Areas
Hands, feet, and head lose heat rapidly and require specialized protection. Bring multiple glove systems—liner gloves for dexterity, insulated gloves for general use, and heavy mitts for extreme cold or extended stationary periods.
Warm, dry feet are essential for safety and comfort. Insulated, waterproof boots sized to accommodate thick socks and possible liner socks prevent frostbite. Bring extra socks and consider vapor barrier socks for extreme conditions.
Head protection includes warm beanies, balaclavas for wind protection, and sun hats for bright snow conditions. A significant portion of body heat is lost through the head, making proper coverage critical for warmth management.
For detailed clothing strategies, explore our types of camping guide that covers various camping environments.
Site Selection and Setup Techniques
Choosing the right location and properly preparing your campsite can make the difference between a comfortable night and a survival situation in winter conditions.
Choosing Safe Locations
Avalanche awareness becomes critical when camping in mountainous snow country. Avoid camping on or below slopes steeper than 30 degrees, especially in areas with recent avalanche activity or unstable snow conditions. Learn to read terrain and snow conditions, or stick to areas with established avalanche safety records.
Wind protection dramatically improves camping comfort and safety. Look for natural windbreaks like dense forest, rock formations, or terrain features that block prevailing winds. However, avoid areas prone to snow drifting that could bury your tent or create unstable conditions.
Water access requires planning in winter conditions. Locate camps near flowing water sources that won’t freeze completely, but stay far enough from water to avoid flooding risks if temperatures rise or rain occurs. Fast-moving streams typically stay open longer than still water.
Consider sun exposure when selecting sites. Eastern or southern exposures that catch morning sun help warm your camp and dry condensation, but avoid areas that could experience rapid snow melt or avalanche risk from solar warming.
Avoid camping under snow-loaded trees or unstable branches that could fall from wind or temperature changes. Dead or damaged trees pose particular risks during winter storms when wind loads combine with snow weight.
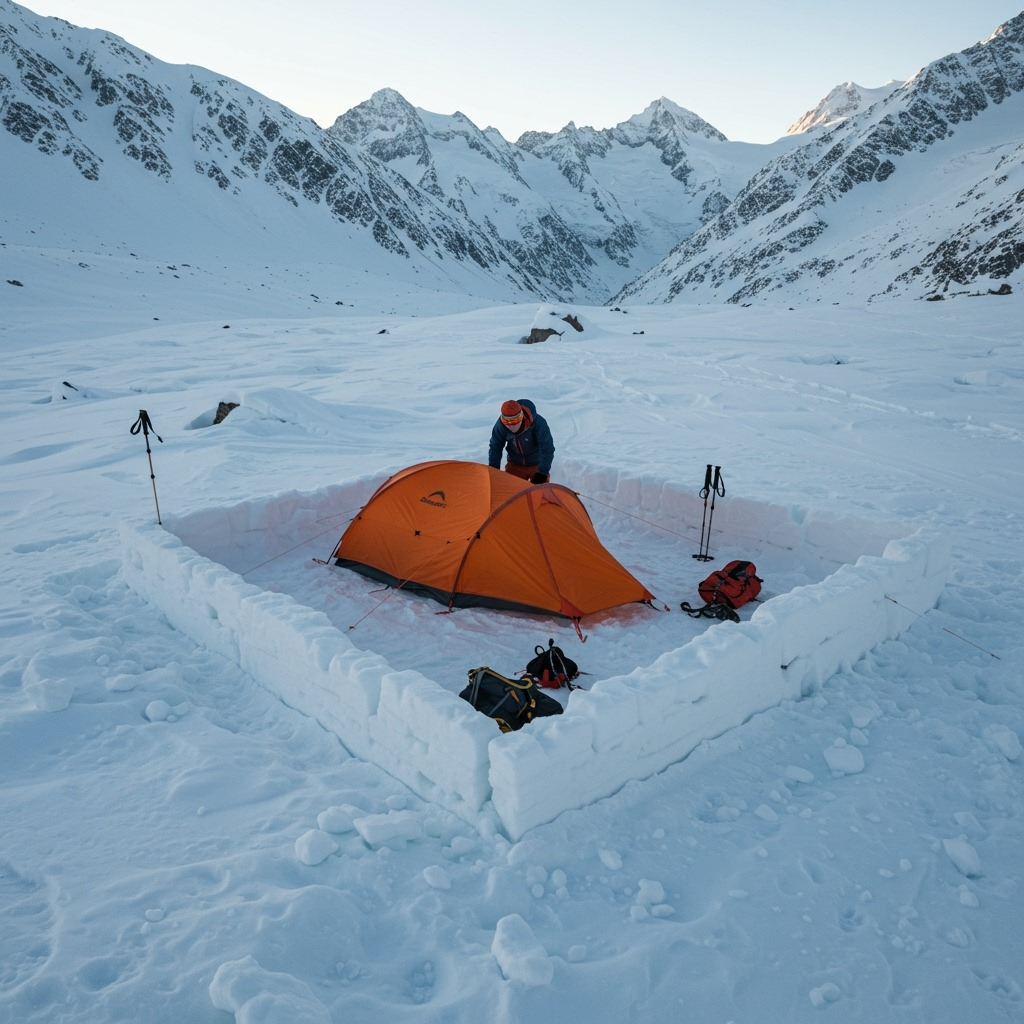
Snow Preparation Techniques
Proper site preparation prevents discomfort and potential safety issues. Compact the snow thoroughly by walking or skiing over your tent area wearing snowshoes or skis. Allow the snow to set for 30 minutes if possible—this creates a firm platform that won’t post-hole under your weight.
Dig kitchen areas and vestibule spaces to create wind protection and an organized living space. A kitchen pit 6 feet in diameter and 2-3 feet deep provides wind shelter for cooking and social activities. Use excavated snow to build walls around the perimeter for additional wind protection.
Level your sleeping area carefully—even small slopes become noticeable during long winter nights. Use your shovel to create a flat platform, filling low spots with packed snow rather than creating hills that will create pressure points.
Tent Anchoring Systems
Standard tent stakes are useless in snow conditions. Use snow stakes, deadman anchors (buried objects with guy lines attached), or stuff sacks filled with snow and buried as anchors. Ice axes or skis can serve as emergency deadman anchors if needed.
Pack snow around tent stakes and guy lines, then pour water over the snow to create ice anchors in extreme conditions. This technique creates bombproof anchoring but requires careful planning and adequate water supplies.
Build snow walls on the windward side of your tent for additional protection. These walls also help insulate your shelter and create warmer microclimates. Ensure adequate ventilation by not completely sealing your tent area.
Staying Warm and Safe
Maintaining body heat and preventing cold injuries requires constant attention to detail and proactive warmth management throughout your winter camping experience.
Heat Generation Strategies
Your body generates heat through metabolism, muscle activity, and food digestion. Eat calorie-dense foods regularly throughout the day, increasing intake by 20-30% over normal consumption to fuel your body’s heating system. Hot foods and beverages provide immediate warmth and psychological comfort.
Exercise generates internal heat quickly. Do jumping jacks, push-ups, or other exercises inside your tent before sleep to warm your sleeping bag. However, avoid overheating and sweating, which can lead to dangerous cooling later.
Hot water bottles provide external heat sources for warming sleeping bags or targeting specific body areas. Fill bottles with near-boiling water before bed, wrap in clothing to prevent burns, and place at feet or core areas for warmth throughout the night.
Share body heat when possible. Sleeping close together in larger tents or sharing sleeping systems provides mutual warmth. Emergency situations may require skin-to-skin contact in sleeping bags to prevent hypothermia.
Moisture Management
Staying dry is essential for staying warm. Moisture from sweat, respiration, and cooking condenses in cold air and can freeze, creating dangerous conditions. Ventilate your tent adequately, even in extreme cold, to prevent condensation buildup.
Change out of damp clothes immediately after high-output activities. Carry extra base layers and socks for changeovers, and hang damp clothes inside your tent to dry overnight from body heat.
Vapor barriers worn next to the skin trap body moisture and heat, preventing evaporation that cools your body. While uncomfortable, these systems can be lifesaving in extreme conditions or emergency situations.
Cook outside your tent when possible to prevent moisture buildup and carbon monoxide risks. If you must cook inside due to the weather, ensure maximum ventilation and use appropriate stoves designed for enclosed space operation.
Recognizing Cold Injuries
Hypothermia begins with subtle symptoms like shivering, confusion, and loss of dexterity. Monitor group members for these signs and take immediate action to rewarm affected individuals. Prevention through proper clothing, nutrition, and activity management is far easier than treatment.
Frostbite affects extremities first—fingers, toes, nose, and ears. Early signs include numbness, tingling, and skin color changes. Rewarm affected areas gradually with body heat, never with direct heat sources that can cause burns to numb tissue.
Carbon monoxide poisoning can occur from cooking or heating inside tents with inadequate ventilation. Symptoms include headache, nausea, and confusion. Always maintain adequate ventilation when using fuel-burning devices in enclosed spaces.
Dehydration occurs easily in cold, dry air, even when you don’t feel thirsty. Monitor urine color and drink warm fluids regularly throughout the day. Dehydration reduces blood circulation and increases cold injury risks.
For comprehensive outdoor safety information, explore our camping hacks guide that includes cold-weather strategies.
Water and Food Management
Winter camping dramatically changes how you obtain, store, and prepare water and food due to freezing temperatures and increased caloric needs.
Water Procurement and Storage
Melting snow for water requires significant fuel and time. One pot of snow produces only a small amount of water, and dirty snow must be filtered after melting. Locate running water sources when possible, but always treat water appropriately for safety.
Keep water from freezing by storing bottles upside down (ice forms at the top first), insulating them inside your jacket, or using insulated bottle covers. Fill bottles with hot water before bed to provide warmth and ensure liquid water in the morning.
Designate a “pee bottle” for nighttime use to avoid leaving your warm tent for bathroom breaks. Use wide-mouth bottles with secure lids and mark them clearly to prevent confusion with drinking water. Empty and clean them first thing in the morning.
Add electrolyte supplements to prevent deficiencies from increased fluid losses in cold, dry air. Sports drink mixes also lower the freezing point of water slightly while providing energy and taste improvement.
High-Calorie Nutrition Planning
Winter camping can increase caloric needs by 500-1,000 calories per day due to cold exposure and increased physical demands. Plan accordingly with calorie-dense foods that provide sustained energy and warmth.
Hot foods provide immediate warming and psychological comfort beyond their nutritional value. One-pot meals that cook quickly and clean easily work well in cold conditions where extended food prep becomes uncomfortable.
High-fat foods provide sustained energy and help maintain body heat. Nuts, cheese, chocolate, and oils deliver concentrated calories that fuel your body’s heating system throughout cold nights.
Bring extra food for emergency situations—storms can extend trips by days, and cold weather increases appetite beyond normal planning estimates. Non-perishable foods that don’t freeze solid work best for emergency reserves.
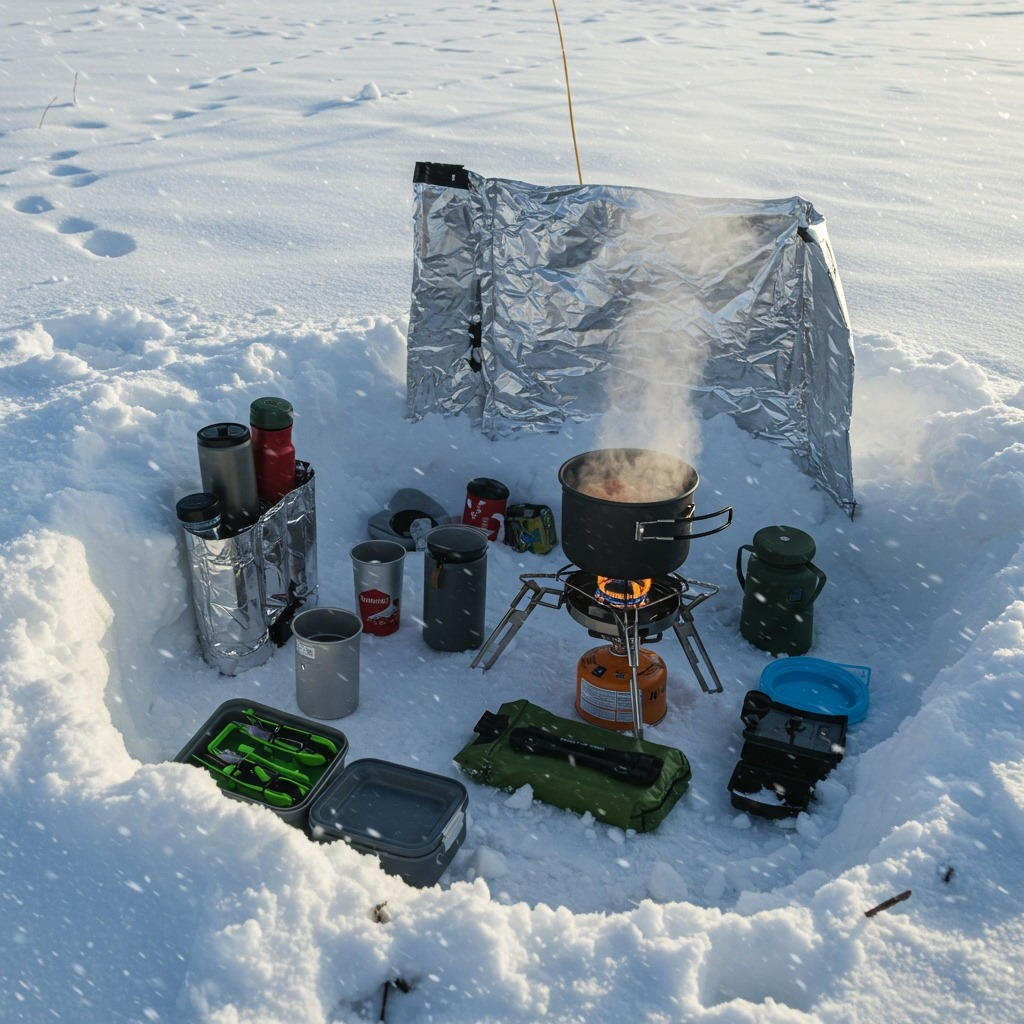
Cold-Weather Cooking Techniques
Pre-warm stoves and fuel before cooking to ensure reliable ignition and operation. Keep spare fuel cartridges warm inside your jacket and allow stoves to warm gradually rather than shocking them with sudden temperature changes.
Use windscreens and ground insulation under stoves to improve efficiency and prevent melting through snow platforms. Reflective surfaces under cooking areas help retain heat and reduce fuel consumption.
Prepare ingredients before starting the stoves to minimize fuel use and cold exposure. Pre-cut vegetables, pre-measure spices, and organize all cooking items before exposing them to cold air during meal preparation.
Plan menus that work with limited cooking capacity and fuel supplies. Simple, one-pot meals reduce cleanup requirements and fuel consumption while providing necessary nutrition and warmth.
Advanced Winter Survival Skills
Beyond basic camping techniques, winter conditions may require specialized survival skills that can save lives when conditions deteriorate unexpectedly.
Emergency Shelter Construction
Snow caves provide emergency shelter when tents fail or in extreme weather conditions. Dig into hillsides or large snow drifts, creating an entrance lower than the sleeping area to trap warm air. The interior should be large enough to lie down but small enough to heat with body warmth.
Quinzhees offer emergency shelter construction on flat ground. Pile snow into a dome shape 6-8 feet high, allow it to sinter (harden) for several hours, then hollow out the interior. This creates an insulated shelter that can be 30-40 degrees warmer than outside air.
Tree wells provide natural shelter around large conifers where snow accumulation is minimal. Improve these natural shelters by adding walls or overhead protection using branches, tarps, or other available materials.
Emergency insulation can be created from natural materials—pine boughs, dry leaves, or even fresh snow when properly used. Layer these materials between yourself and the ground to prevent heat loss in survival situations.
Navigation in Winter Conditions
Whiteout conditions can develop rapidly, making navigation extremely challenging. Practice using a compass and GPS in cold conditions when manual dexterity is reduced, and equipment may behave differently than in warm weather.
Wand marking of routes helps with navigation during storms or when visibility drops. Place wands every 50-100 feet along your route, especially in areas without natural landmarks that could guide your return.
Terrain association becomes critical when landmarks are snow-covered and visibility is limited. Learn to read subtle terrain features that remain visible even in heavy snow conditions.
Emergency signaling techniques include ground-to-air signals stamped in snow, signal mirrors when the sun is available, and whistle signals that carry well in cold air. Plan signaling strategies before entering remote areas.
Cold Weather Repair Techniques
Duct tape becomes brittle in extreme cold and may not adhere properly. Bring multiple types of repair tape designed for cold weather use, and warm tape before application when possible.
Sewing repairs require different techniques in cold weather when manual dexterity is reduced. Practice essential repairs while wearing gloves, and bring larger needles and thicker thread for easier handling.
Equipment maintenance in cold conditions requires special consideration. Lubricants may thicken, metal parts may become brittle, and condensation can freeze mechanisms. Learn cold-weather maintenance for all critical equipment.
Emergency gear repair using natural materials—pine pitch for sealing, branches for splints, and snow for emergency repairs—can keep essential equipment functional until you reach safety.
For additional survival resources, visit comprehensive guides at REI’s winter camping expertise and Princeton’s winter safety protocols.
Frequently Asked Questions
Q: What temperature rating should my sleeping bag have for snow camping?
A: Choose a sleeping bag rated 10-15 degrees below the coldest temperature you expect to encounter. For snow camping, this usually means bags rated to 0°F or below. Remember that comfort ratings assume ideal conditions, so err on the side of caution.
Q: How do I prevent my water from freezing while snow camping?
A: Store water bottles upside down (ice forms at the top first), keep them inside your jacket during the day, use insulated bottle covers, and fill bottles with hot water before bed. Designate a wide-mouth bottle for nighttime needs to avoid leaving your tent.
Q: Is it safe to cook inside my tent during winter camping?
A: Generally, no—cooking inside tents creates carbon monoxide risks and dangerous condensation. Cook in vestibules or outside areas with adequate ventilation. If conditions force indoor cooking, ensure maximum ventilation and use only appropriate stoves designed for such use.
Q: What’s the most important piece of gear for winter camping?
A: Your sleep system (sleeping bag, pads, and shelter) is most critical since it keeps you alive through the night. However, every piece of winter camping gear becomes important—there’s little room for equipment failure in extreme cold.
Q: How much extra food should I bring for winter camping?
A: Plan for 20-30% more calories than normal camping due to cold exposure and increased physical demands. Bring at least one extra day’s worth of food for emergencies, as winter storms can extend trips unexpectedly.
Q: Can beginners safely try snow camping?
A: Yes, but start with car camping in mild winter conditions, take a winter camping course, or go with experienced winter campers. Build skills gradually rather than jumping into extreme conditions. Practice setting up gear in cold conditions before your first trip.