
The summer I lived in a third-floor walkup in Denver, I stared at my tiny balcony and had a revelation. I’d just gotten back from a week-long backpacking trip in Rocky Mountain National Park, and the instant ramen I’d survived on tasted like cardboard compared to the fresh meals I’d been dreaming about on the trail. My balcony was maybe 50 square feet—barely room for a chair and a small table—but it got full sun all afternoon.
That’s when I decided: if I couldn’t have a backyard, I’d grow food where I could.
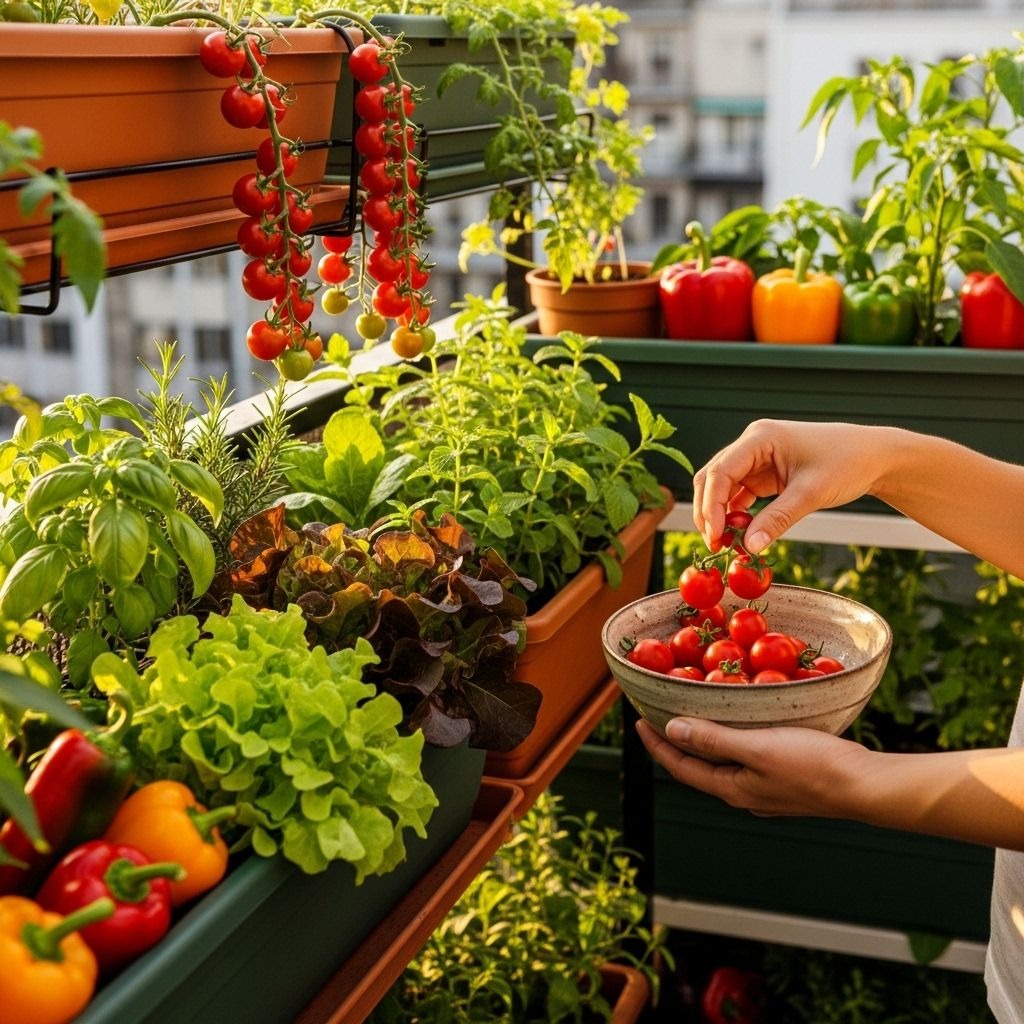
Three months later, that cramped balcony was producing cherry tomatoes, fresh basil, jalapeños, and enough lettuce for salads twice a week. I’d harvested more food than I thought possible from a space smaller than most camping tents. The best part? I’d load up a bag of fresh-picked herbs and veggies before every weekend camping trip, transforming my trail meals from bland to restaurant-quality.
If you’re stuck in an apartment but still want to grow your own food—whether for your kitchen, your next outdoor adventure, or just to feel connected to something green—a balcony vegetable garden is your ticket. No yard required, minimal investment, and you’d be shocked how much food you can produce in a small space.

Why Balcony Vegetable Gardens Work (Even in Tiny Spaces)
Balcony gardens aren’t just for people who can’t get a yard—they’re actually superior in some ways. You control every variable: soil quality, sun exposure, watering schedule, and pest management. Unlike in-ground gardens where you’re stuck with whatever soil and drainage nature gave you, balcony gardens let you create the perfect growing environment from scratch.
For those of us who spend time outdoors, there’s something deeply satisfying about growing your own food. It’s the same self-reliance you feel when you purify water from a stream or cook a meal over a campfire. You’re less dependent on grocery stores, and you know exactly what went into growing your food—no pesticides, no mystery chemicals, just sun, water, and care.
The mental health benefits are real too. After long days stuck inside or sitting in traffic, stepping onto a balcony garden feels like a mini escape. You’re surrounded by living things you’re nurturing, and the act of checking plants, harvesting food, and tending growth is genuinely therapeutic. It’s a daily dose of nature for people who can’t always get to the mountains or trails.
Plus, the cost savings add up fast. A packet of tomato seeds costs two bucks and can produce 20+ pounds of tomatoes over a season. Fresh basil from the store is expensive and wilts in days—grow it yourself and snip what you need whenever you want. Over a summer, a modest balcony garden can save you hundreds of dollars in produce costs.
Assessing Your Balcony: Sunlight, Space, and Weight
Not all balconies are created equal, and understanding yours is the first step to success.
Sunlight: The Most Important Factor
Most vegetables need 6-8 hours of direct sunlight daily to thrive. Tomatoes, peppers, beans, cucumbers, and squash are sun-lovers and won’t produce much without adequate light. Before you buy a single plant, spend a few days observing your balcony.
South-facing balconies get the most sun and are ideal for fruiting vegetables. West-facing balconies get strong afternoon sun—great for heat-loving plants like peppers and tomatoes. East-facing balconies get gentler morning sun, which works for many vegetables but may limit your tomato harvest. North-facing balconies are the toughest—they get minimal direct sun and are better suited for shade-tolerant crops like leafy greens, herbs, and microgreens.
If you’re working with partial shade (3-5 hours of sun), focus on lettuce, spinach, kale, arugula, and herbs like mint, parsley, and cilantro. These crops actually prefer cooler conditions and won’t bolt (go to seed) as quickly in partial shade.
Measuring Your Space
Grab a tape measure and figure out exactly how much space you have. Don’t just eyeball it—measure length, width, and any vertical space you can use. Consider railing width (can you attach railing planters?), wall space (can you install vertical racks or shelves?), and floor area (how many containers can you fit while still leaving walking space?).
A common mistake is cramming too many containers into a small balcony and leaving yourself no room to move. You need access to water your plants, harvest, and actually enjoy the space. Plan for walkways and functional use, not just maximum growing area.
Weight Limits Matter
This is crucial, especially for older buildings or high-rise apartments. Containers filled with wet soil are heavy—a 5-gallon container can weigh 40-60 pounds when fully watered. Multiply that by a dozen containers and you’re adding serious weight to your balcony.
Check with your building management or landlord about weight limits. If you’re unsure, err on the side of caution. Use lightweight containers like grow bags, which weigh far less than ceramic or terracotta pots and still provide excellent growing conditions. Distribute weight evenly across the balcony rather than clustering everything in one spot.
Wind Exposure
High-rise balconies and exposed locations face strong winds that can damage plants, dry out soil rapidly, and knock over containers. If your balcony is windy, choose sturdy, low-profile containers, stake tall plants securely, and position delicate crops in sheltered corners. Windbreaks like lattice screens or taller plants can protect more vulnerable vegetables.

Choosing Containers and Vertical Solutions
Container choice can make or break your balcony garden. The right setup maximizes every inch of space while keeping plants healthy and productive.
Best Container Types
For balcony gardening, I’m a huge fan of fabric grow bags. They’re lightweight, provide excellent drainage and air circulation, fold flat for storage in winter, and cost a fraction of heavy pots. They come in every size from 1-gallon for herbs to 10-gallon for tomatoes.
Plastic containers are affordable and retain moisture well, but they can get brittle in extreme sun and cold. Terracotta looks beautiful but is heavy and dries out quickly—not ideal for balconies where you might not be able to water twice daily. Self-watering planters are worth the investment if you travel frequently or have an unpredictable schedule—they keep plants hydrated for days without attention.
Vertical Gardening: Use Every Dimension
Balconies are all about vertical space. Floor space is limited, but walls and railings offer untapped potential. Hanging plant baskets are perfect for trailing tomatoes, strawberries, or herbs. They free up floor space and add visual interest.
Balcony railing planters hook directly onto railings and are ideal for lettuces, herbs, or small pepper plants. They don’t take any floor space and utilize an area that would otherwise be wasted. Just make sure they’re securely attached—you don’t want a strong gust sending your plants to the sidewalk below.
Vertical shelving units or tiered plant stands create multiple growing levels in the same footprint. I use a three-tier metal shelf on one end of my balcony that holds a dozen small pots of herbs and greens. It takes up two square feet of floor space but provides six square feet of growing area.
Trellis systems for climbing plants like cucumbers, pole beans, and peas make excellent use of vertical space. A simple DIY trellis made from bamboo stakes and twine works great, or you can buy collapsible metal trellises that store flat when not in use. Secure them with plant stakes for stability.
DIY vs. Store-Bought
You don’t need to spend a fortune. I’ve successfully grown vegetables in repurposed 5-gallon buckets (just drill drainage holes), old storage bins, even wooden crates lined with landscape fabric. The key is drainage—every container needs holes in the bottom.
That said, purpose-built containers often perform better and look nicer. If aesthetics matter to you or you’re trying to create an inviting outdoor space, invest in matching containers or decorative ceramic plant pots that complement your style.
The Right Soil Mix for Balcony Success
I learned this lesson the hard way: using regular garden soil in containers is a recipe for disaster. It compacts, drains poorly, and creates root problems.
Why Potting Mix Is Essential
Balcony containers need a lightweight, well-draining growing medium that retains some moisture but doesn’t get waterlogged. Quality potting mix is formulated specifically for this. It’s typically a blend of peat moss or coconut coir, perlite or vermiculite for drainage, and compost for nutrients.
DIY Balcony Potting Mix Recipe
Making your own saves money and lets you customize the mix for your climate:
- 3 parts coconut coir or peat moss (moisture retention)
- 2 parts perlite or vermiculite (drainage and aeration)
- 1 part compost (nutrients and beneficial microbes)
- Handful of organic fertilizer (slow-release nutrients)
Mix thoroughly in a large tub before filling containers. This recipe works great for most vegetables and can be adjusted—add more perlite if your balcony is very humid, or more coir if it’s hot and dry.
Drainage and Moisture Balance
Balcony containers dry out faster than in-ground gardens, especially in direct sun and wind. But overwatering is equally dangerous and causes root rot. The right soil mix helps by draining excess water while holding enough moisture for plant roots.
Always use containers with drainage holes and place saucers underneath to catch runoff (this protects your balcony surface from water damage too). Water until it drains from the bottom, then let the soil dry slightly before watering again.
Best Vegetables for Balcony Gardens (That Actually Produce)
Not every vegetable thrives in containers, but plenty do—and some were practically designed for balcony growing.
Cherry Tomatoes: The Balcony Garden MVP
Cherry tomatoes are the single best crop for balconies. They’re prolific, delicious, and compact varieties like ‘Tumbling Tom,’ ‘Patio,’ or ‘Tiny Tim’ thrive in 5-gallon containers. A single plant can produce pounds of fruit over a season.
Choose determinate or dwarf varieties for containers—they stay compact and don’t require heavy staking. Indeterminate varieties grow tall and sprawling, which can work if you have vertical space and sturdy supports. I’ve grown cherry tomatoes on my balcony every summer since I started, and they’ve never disappointed. Fresh tomatoes plucked right before a camping trip make the best trail snacks.
Leafy Greens: Fast, Easy, and Productive
Lettuce, spinach, arugula, and kale are perfect for beginners. They grow quickly (harvest in 30-45 days), tolerate partial shade, and you can harvest outer leaves repeatedly while the plant keeps producing.
Use wide, shallow containers—greens have shallow root systems and don’t need depth. A single 10-gallon container can grow enough lettuce for fresh salads multiple times per week. Plant new seeds every 2-3 weeks for continuous harvest all season.
Herbs: Essential for Trail Cooking
Herbs are the gateway to balcony gardening. Basil, cilantro, parsley, thyme, oregano, mint, and chives all thrive in small containers and add massive flavor to meals. Most herbs are low-maintenance and can handle some neglect.
Fresh herbs transform camp cooking. I keep a small herb garden year-round and grab handfuls before every outdoor trip. Fresh basil in eggs cooked on a camping stove is a game-changer. Fresh cilantro on fish tacos, fresh thyme on roasted vegetables—it’s the difference between eating to survive and actually enjoying your food.
Peppers and Beans: Productive and Space-Efficient
Both sweet and hot peppers do well in 3-5 gallon containers. They produce all summer and tolerate heat well. Jalapeños, serranos, and bell peppers are all excellent choices. A single pepper plant can yield dozens of peppers over a season.
Bush beans are incredibly productive and don’t need much space. Plant them in a container and provide a small stake for support—they’ll produce pods continuously for weeks. Pole beans grow vertically and are perfect for trellises, maximizing your vertical space.
Root Vegetables in Deep Containers
Carrots, radishes, and beets can all grow in containers if they’re deep enough. Carrots need at least 12 inches of depth for full-size varieties, or choose short varieties like ‘Paris Market’ or ‘Thumbelina’ that mature in shallower pots. Radishes grow fast (25-30 days) and are great for beginners—they’re ready to harvest before you even get impatient.
Potatoes are surprisingly productive in containers. Use a 5-10 gallon container or grow bag, plant seed potatoes, and hill soil around the plants as they grow. At harvest, you’ll dig up pounds of fresh potatoes from a single container.
Cucumbers and Summer Squash
Compact cucumber varieties like ‘Bush Pickle’ or ‘Spacemaster’ work wonderfully in large containers with vertical support. They need consistent watering and feeding but reward you with abundant harvests. Summer squash varieties like ‘Patio Star’ zucchini are bred specifically for container growing and stay compact while producing full-size squash.
Step-by-Step: Setting Up Your Balcony Garden
Ready to transform your balcony? Here’s the process I follow every spring.
Step 1: Clean and Prep Your Space
Sweep your balcony, check for any structural issues, and decide on layout. Consider sun patterns, access to water, and where you’ll still want to sit or move around. Take photos from different angles to help visualize your setup before you commit to container placement.
Step 2: Gather Supplies
- Containers (grow bags, pots, railing planters)
- Quality potting mix
- Seeds or seedlings
- Garden tool set (small trowel, pruners, gloves)
- Organic fertilizer
- Optional: trellises, hanging plant hooks, drip irrigation supplies
Step 3: Fill Containers Properly
Fill containers with your potting mix, leaving 1-2 inches of space at the top for watering. Don’t compress the soil—keep it light and fluffy for good root growth and drainage. For larger containers, you can add a layer of packing peanuts or empty plastic bottles at the bottom to reduce soil volume and weight, but ensure adequate depth for root growth.
Step 4: Plant Seeds or Transplants
For seeds, follow packet directions for depth and spacing. For transplants, dig a hole slightly larger than the root ball, place the plant, firm soil around it, and water immediately. If you’re starting from seed indoors first, use seed starter kits to get a jump on the season.
Start with easy crops like lettuce, herbs, cherry tomatoes, and radishes. As you gain confidence, expand to more challenging vegetables.
Step 5: Position Containers for Success
Place sun-loving crops (tomatoes, peppers, beans) in the sunniest spots. Position shade-tolerant crops (lettuce, spinach, herbs) in areas that get morning sun or filtered light. Group containers with similar water needs together to make watering more efficient.
Consider traffic flow—make sure you can easily access all plants for watering, harvesting, and maintenance. Leave space to move around comfortably.
Step 6: Install Vertical Supports
If you’re growing tomatoes, cucumbers, beans, or peas, install supports now before plants get too large. Stakes, cages, or trellises prevent damage and keep plants organized. Secure everything firmly—balcony wind can be brutal on tall plants.
Step 7: Establish a Watering Routine
Water thoroughly after planting, then monitor daily. Stick your finger into the soil—if the top inch is dry, it’s time to water. Balcony containers dry out fast, especially in hot, windy conditions. You may need to water daily or even twice daily in peak summer.
A watering spray mister is perfect for delicate seedlings and newly planted seeds, providing gentle moisture without disturbing the soil.
Watering, Feeding, and Maintenance
Balcony gardens need consistent attention, but the routine is straightforward once established.
Watering: The Daily Ritual
Balcony containers dry out faster than ground gardens because they’re exposed to sun, wind, and heat from all sides. Small containers dry out quickest and may need twice-daily watering in summer.
Water in early morning if possible—it gives plants time to absorb moisture before the day’s heat and reduces evaporation. If you can’t water in the morning, evening works too, though wet foliage overnight can promote fungal issues.
A soil pH/moisture meter takes the guesswork out of watering. Stick it in the soil and it tells you exactly when to water. For frequent travelers, drip irrigation on a timer or self-watering containers are lifesavers.
Fertilizing for Continuous Production
Container soil is finite, and nutrients get depleted quickly. Most potting mixes include starter fertilizer that lasts 2-4 weeks, then you’re on your own.
I use a balanced liquid fertilizer (10-10-10 or similar) every 2-3 weeks during active growth. For fruiting crops like tomatoes and peppers, switch to a higher phosphorus fertilizer (like 5-10-10) once flowers appear to promote fruit production.
Organic options like compost tea, fish emulsion, or seaweed extract work beautifully and improve soil health over time. If you’re committed to organic gardening, maintain a small compost bin to create your own nutrient-rich compost for future plantings.
Pruning and Pest Management
Check your plants regularly for pests like aphids, spider mites, or whiteflies. Catching problems early makes them easier to manage. Remove yellowing or dead leaves to improve airflow and prevent disease. For fruiting plants like tomatoes, prune suckers (small shoots between the main stem and branches) to focus energy on fruit production.
If you’re growing herbs, regular harvesting actually promotes bushier, more productive growth. Don’t be shy—snip what you need for your camping meals.
Seasonal Rotation: Year-Round Harvests
Don’t stop gardening when summer ends. Cool-season crops like lettuce, spinach, kale, radishes, and peas thrive in spring and fall when temperatures drop. In many climates, you can grow these crops through winter with minimal protection.
After harvesting summer crops, refresh your soil with compost, and replant with cool-season vegetables. This succession planting maximizes productivity and keeps your balcony green year-round.
In colder climates, consider cold frames, row covers, or even a mini greenhouse to extend the season. Even a simple plastic covering can add weeks to your growing window. For serious year-round growing, grow tents with LED grow lights allow you to maintain production regardless of outdoor conditions.
Maximizing Your Harvest Year-Round
The best balcony gardeners don’t just plant once and hope for the best—they plan for continuous production.
Succession Planting
Instead of planting all your lettuce seeds at once, plant a small batch every two weeks. This staggers harvest so you’re not overwhelmed with mature lettuce all at once, followed by weeks of nothing. The same strategy works for radishes, beans, carrots, and herbs.
This approach ensures you have fresh produce available continuously rather than feast-or-famine cycles. It also lets you learn from each planting—if your first batch struggles, you can adjust technique for the next round.
Interplanting Fast and Slow Crops
Plant fast-maturing crops (radishes, lettuce) alongside slow-maturing crops (tomatoes, peppers). By the time the slow crops need the space, the fast crops are already harvested. This maximizes container use and boosts overall yield.
For example, plant lettuce around the edges of a tomato container in early spring. The lettuce will be ready to harvest by the time the tomato plant fills out and needs the full container.
Companion Planting
Certain plants grow better together. Basil planted with tomatoes is said to improve flavor and repel pests. Marigolds throughout your garden deter aphids and other insects. Lettuce grows well in the shade of taller plants and helps keep soil cool and moist.
Research companion planting combinations that work for your favorite crops. It’s part art, part science, and totally worth experimenting with.
Season Extension Techniques
Use row covers, cold frames, or even a simple plastic sheet to protect plants from early frosts. Many cool-season crops can handle light frost and continue producing well into fall and winter.
In hot climates, shade cloth can protect tender crops from scorching afternoon sun and extend spring harvests into early summer. Position shade-loving crops strategically so taller plants provide natural shading.
Common Balcony Garden Mistakes (And How I Fixed Them)
I’ve made every mistake in the book. Here’s what I learned so you don’t have to repeat my failures.
Overcrowding Containers
I once crammed four tomato plants into a single 10-gallon container because I was impatient and wanted more tomatoes. They competed for nutrients, light, and water—all four suffered, and I ended up with less total harvest than if I’d planted one properly. One healthy plant in a properly sized container always outperforms multiple crowded plants.
Follow spacing recommendations religiously. They’re not suggestions—they’re requirements for healthy growth.
Ignoring Wind Damage
My first summer, I lost several plants to wind. Tall, top-heavy tomato plants tipped over, breaking stems and damaging fruit. Lightweight containers blew off the railing. It was a disaster.
Now I stake everything securely with sturdy supports, use heavier containers or weigh down lightweight ones with rocks, and position delicate plants in sheltered areas. If your balcony is exposed, accept that some plants won’t work and focus on low-profile, wind-tolerant crops.
Wrong Plant Choices
I wasted time and money trying to grow sprawling vining squash and large pumpkins on my balcony. They need far more space than containers provide and took over the entire balcony without producing much.
Stick to compact, bush, or dwarf varieties bred for container growing. Read plant descriptions carefully before buying seeds or transplants. Look for terms like “container-friendly,” “patio variety,” “compact,” or “dwarf.”
Inconsistent Watering
I’d water religiously for a week, then forget for three days, then overcompensate by drowning my plants. This stress cycle weakens plants, reduces harvests, and invites disease.
Container plants need consistency. Establish a routine, set phone reminders, or invest in self-watering systems if you’re forgetful. Your plants will thank you with healthier growth and better harvests.
Not Enough Nutrients
I thought potting mix alone would sustain plants all season. Wrong. After six weeks, my plants were pale, stunted, and barely producing. Containers need regular feeding—there’s nowhere for roots to find additional nutrients.
Now I fertilize every 2-3 weeks without fail, and my plants are healthier, more productive, and more disease-resistant. It’s a simple habit that makes an enormous difference.
Neglecting Soil Refresh
I tried reusing the same potting mix year after year without refreshing it. By the third season, it was depleted, compacted, and plants struggled. Old soil harbors pests, diseases, and has no nutritional value left.
Now I either replace soil entirely each season or refresh it by removing at least half and mixing in fresh compost and potting mix. It’s worth the investment.
Advanced Techniques for Serious Balcony Gardeners
Once you’ve mastered the basics, there are advanced techniques that can dramatically increase your production and extend your growing season.
Hydroponic Container Gardening
Compact hydroponic kits allow you to grow plants without soil, using nutrient-rich water instead. They’re perfect for indoor setups or balconies where weight is a concern. Hydroponics can produce faster growth and higher yields than traditional soil growing, though they require more attention to nutrient balance and pH levels.
Start with lettuce or herbs in a simple hydroponic system before graduating to tomatoes or peppers. The learning curve is steeper, but the results can be incredible.
Indoor Supplemental Growing
Don’t limit yourself to outdoor space. Use indoor plant stands with LED grow lights to start seedlings, grow herbs year-round, or maintain production during winter. This extends your growing season indefinitely and provides fresh herbs even when your balcony is covered in snow.
Aquaponics on Your Balcony
For the truly adventurous, small aquaponics systems combine fish-keeping with vegetable growing. Fish waste provides nutrients for plants, and plants filter water for fish. It’s a closed-loop system that produces both vegetables and protein. While more complex than traditional gardening, it’s a fascinating project for those interested in sustainable food production.
FAQs
Q: Can I really grow enough vegetables on a balcony to make a difference?
Absolutely. You won’t replace all your grocery store produce, but a well-managed balcony garden can provide fresh herbs year-round, salad greens multiple times per week, and pounds of tomatoes, peppers, and beans throughout the growing season. I harvest enough from my small balcony to cut my produce spending by 30-40% during peak season, and the quality is far superior to store-bought vegetables.
Q: What vegetables grow best in partial shade on a balcony?
Leafy greens are your best bet for partial shade (3-5 hours of direct sun). Lettuce, spinach, arugula, kale, and Swiss chard all tolerate less sun and actually prefer cooler conditions. Herbs like parsley, cilantro, mint, and chives also do well in partial shade. Avoid fruiting vegetables like tomatoes and peppers in low light—they need full sun to produce well.
Q: How much weight can a typical apartment balcony hold?
This varies dramatically by building age, construction, and location. Modern apartment balconies typically support 50-100 pounds per square foot, but older buildings may have lower limits. Contact your building management for specifics. To stay safe, use lightweight containers like fabric grow bags, distribute weight evenly, and avoid clustering all containers in one spot. Consider that wet soil is significantly heavier than dry soil.
Q: Do I need to bring my balcony garden inside during winter?
Depends on your climate and what you’re growing. Annual vegetables like tomatoes and peppers will die in frost, so you’ll need to either bring them inside (if they’re in portable containers) or let them go and replant in spring. Cool-season crops like kale, spinach, and certain lettuces can survive light frosts and even snow in many zones. Perennial herbs like rosemary, thyme, and oregano may survive winter outdoors in mild climates but need protection or indoor relocation in harsh winters.
Q: How do I deal with pests on a balcony garden?
Balcony gardens actually have fewer pest problems than ground gardens since many pests can’t easily reach upper floors. Common issues include aphids, spider mites, and whiteflies. Check plants regularly and address problems early. Hand-pick large insects, spray aphids off with water, or use organic solutions like neem oil or insecticidal soap. Good air circulation, proper watering, and healthy plants are the best pest prevention.
Your balcony is more than a place to store old furniture or dry laundry. It’s untapped potential waiting to become a productive food source that feeds your kitchen and your outdoor adventures.
Starting a balcony vegetable garden isn’t complicated, expensive, or time-consuming. It’s about working with what you have, choosing the right plants, and establishing simple routines. The reward is fresh, flavorful food you grew yourself, a daily connection to nature even in the heart of the city, and the satisfaction of self-reliance that every outdoor enthusiast understands.
Whether you’re growing herbs for your next camping breakfast, tomatoes for fresh trail snacks, or greens for everyday salads, your balcony garden will change how you think about food, space, and your own capabilities.
Start small. Pick three easy crops. Get your hands in the soil. Make mistakes, learn, and expand from there. Before you know it, you’ll be the person showing up to weekend trips with bags of fresh produce from your own balcony, and everyone will want to know your secret.
The secret is simple: just start. Your adventure in balcony vegetable gardening begins today.